Hey all,
I have 4 Aqara E1 thermostats at home for years now, and I discovered that after some time, two of them failed. The issue is visible on this video, where the case of thermostat constantly presses the screen so you can’t basically do anything with it. All you can do (and what I was doing for a while) was to gently loosing the casing and leave it with some free space.
Since my devices are out of warranty, I decided that I’ll try to open them and see what’s inside. Thankfully those devices were easy to disassembly.
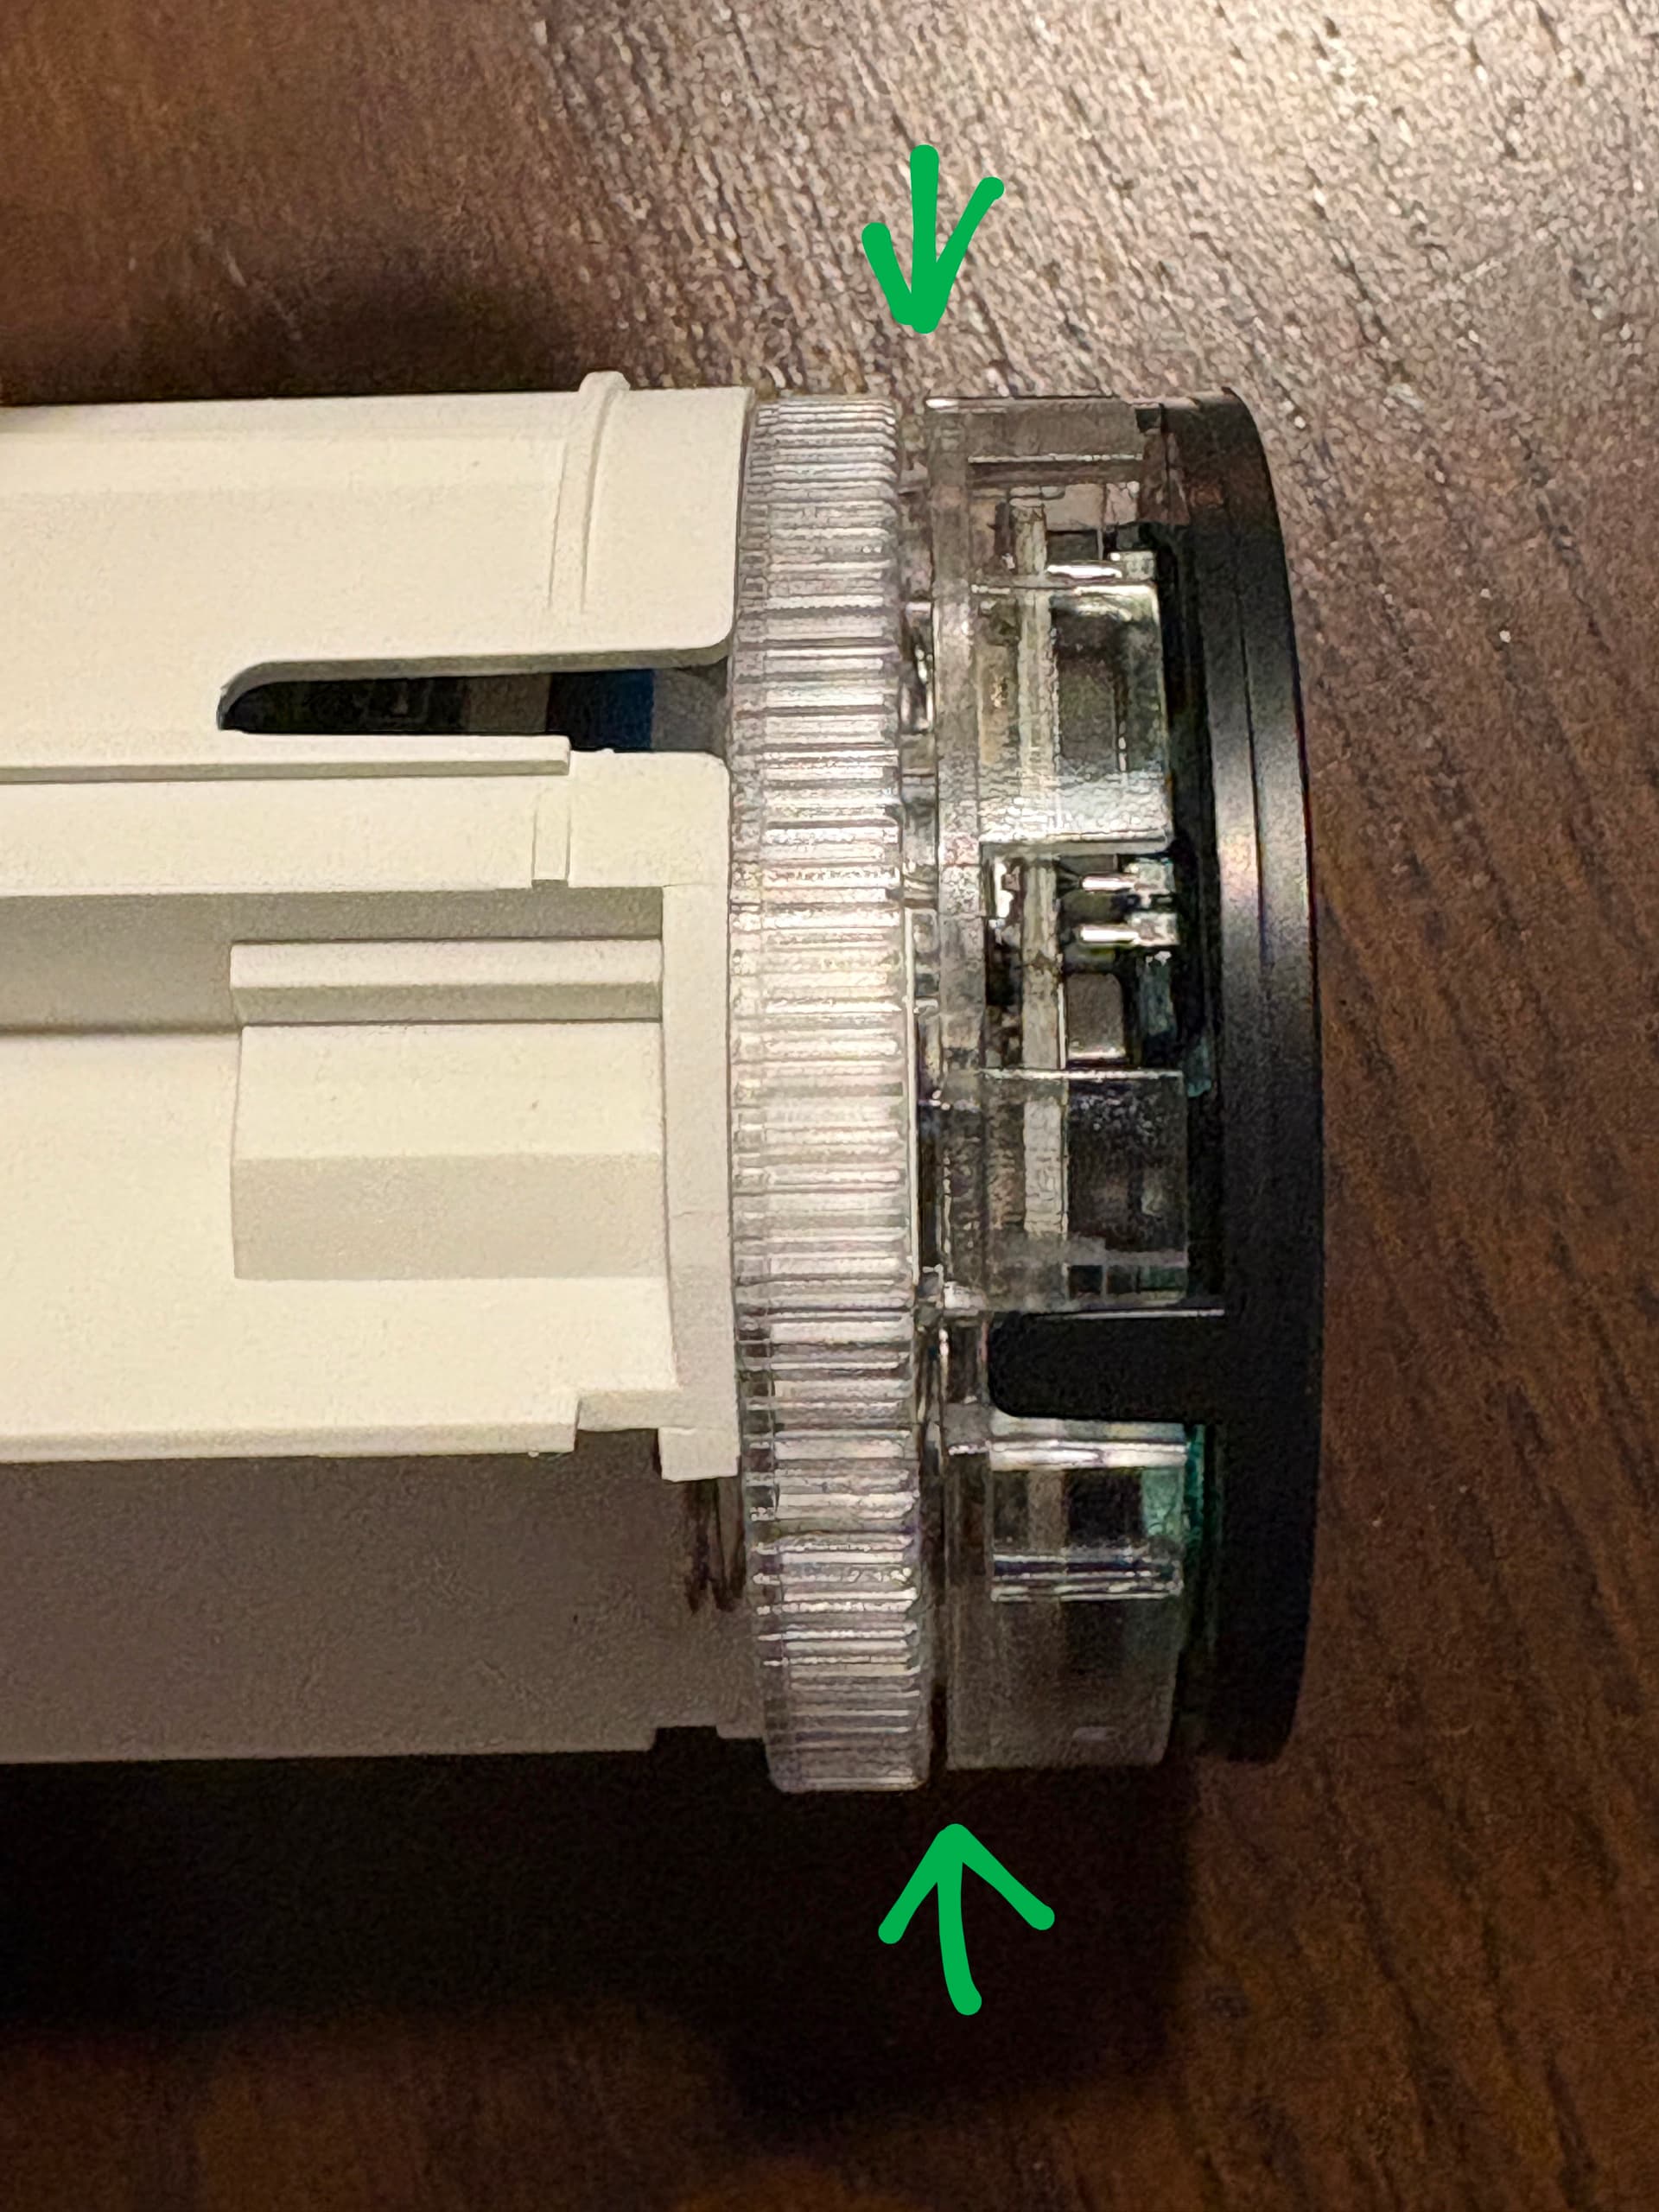
How do you recognize something is wrong? Look at the picture below
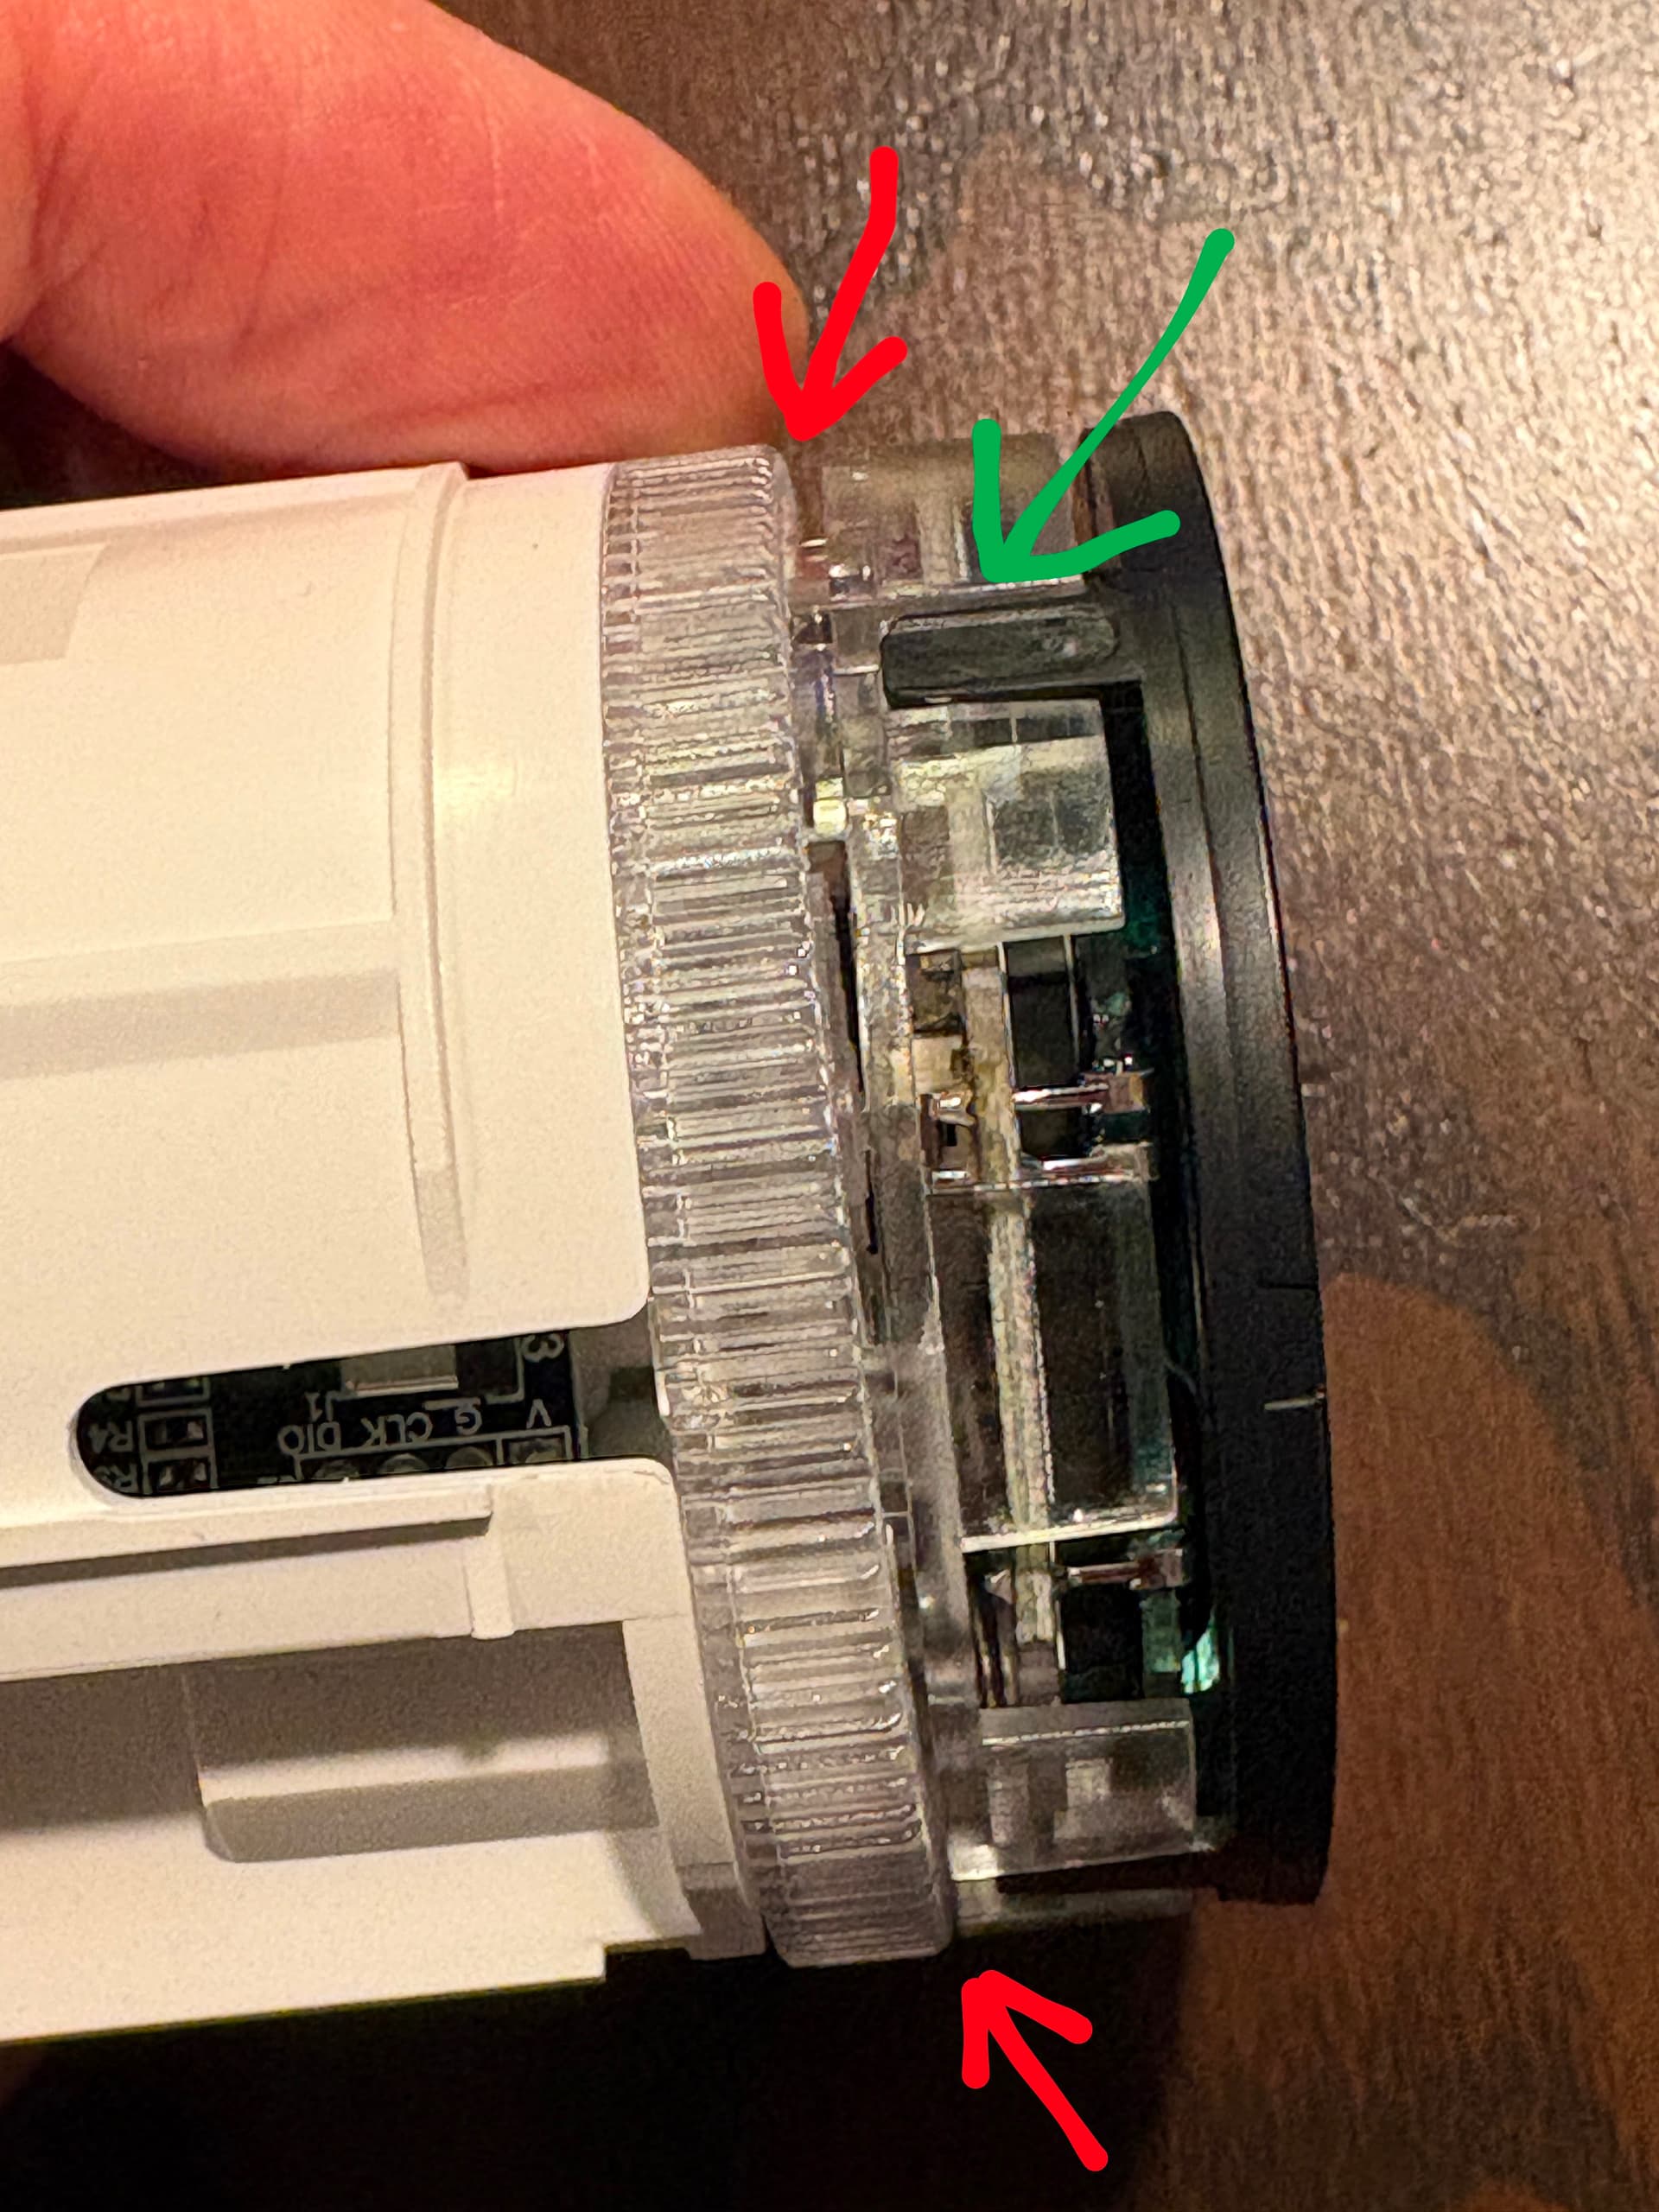
as you can see, the space marked by red arrows are not equal. The screen of the thermostat is uneven. So, how do you open it?
Disclaimer - if your device is still under warranty - I recommend to send it back for a repair since following this guide will definitely void your warranty and well… yes, you could damage the thermostat. So do it at your own risk.
First, remove the thermostat from the heater. I did it by removing the battery for a few seconds, and once put them in again - thermostat goes into installation mode (F1 on the screen) and you can then unscrew the termostat without too much force (watch out to not remove with a valve)
Then gently lever those plastic hooks marked by green arrow - all of them, one by one. Gently, to not brake it. This black plastic part then could be removed and you will see the electronics
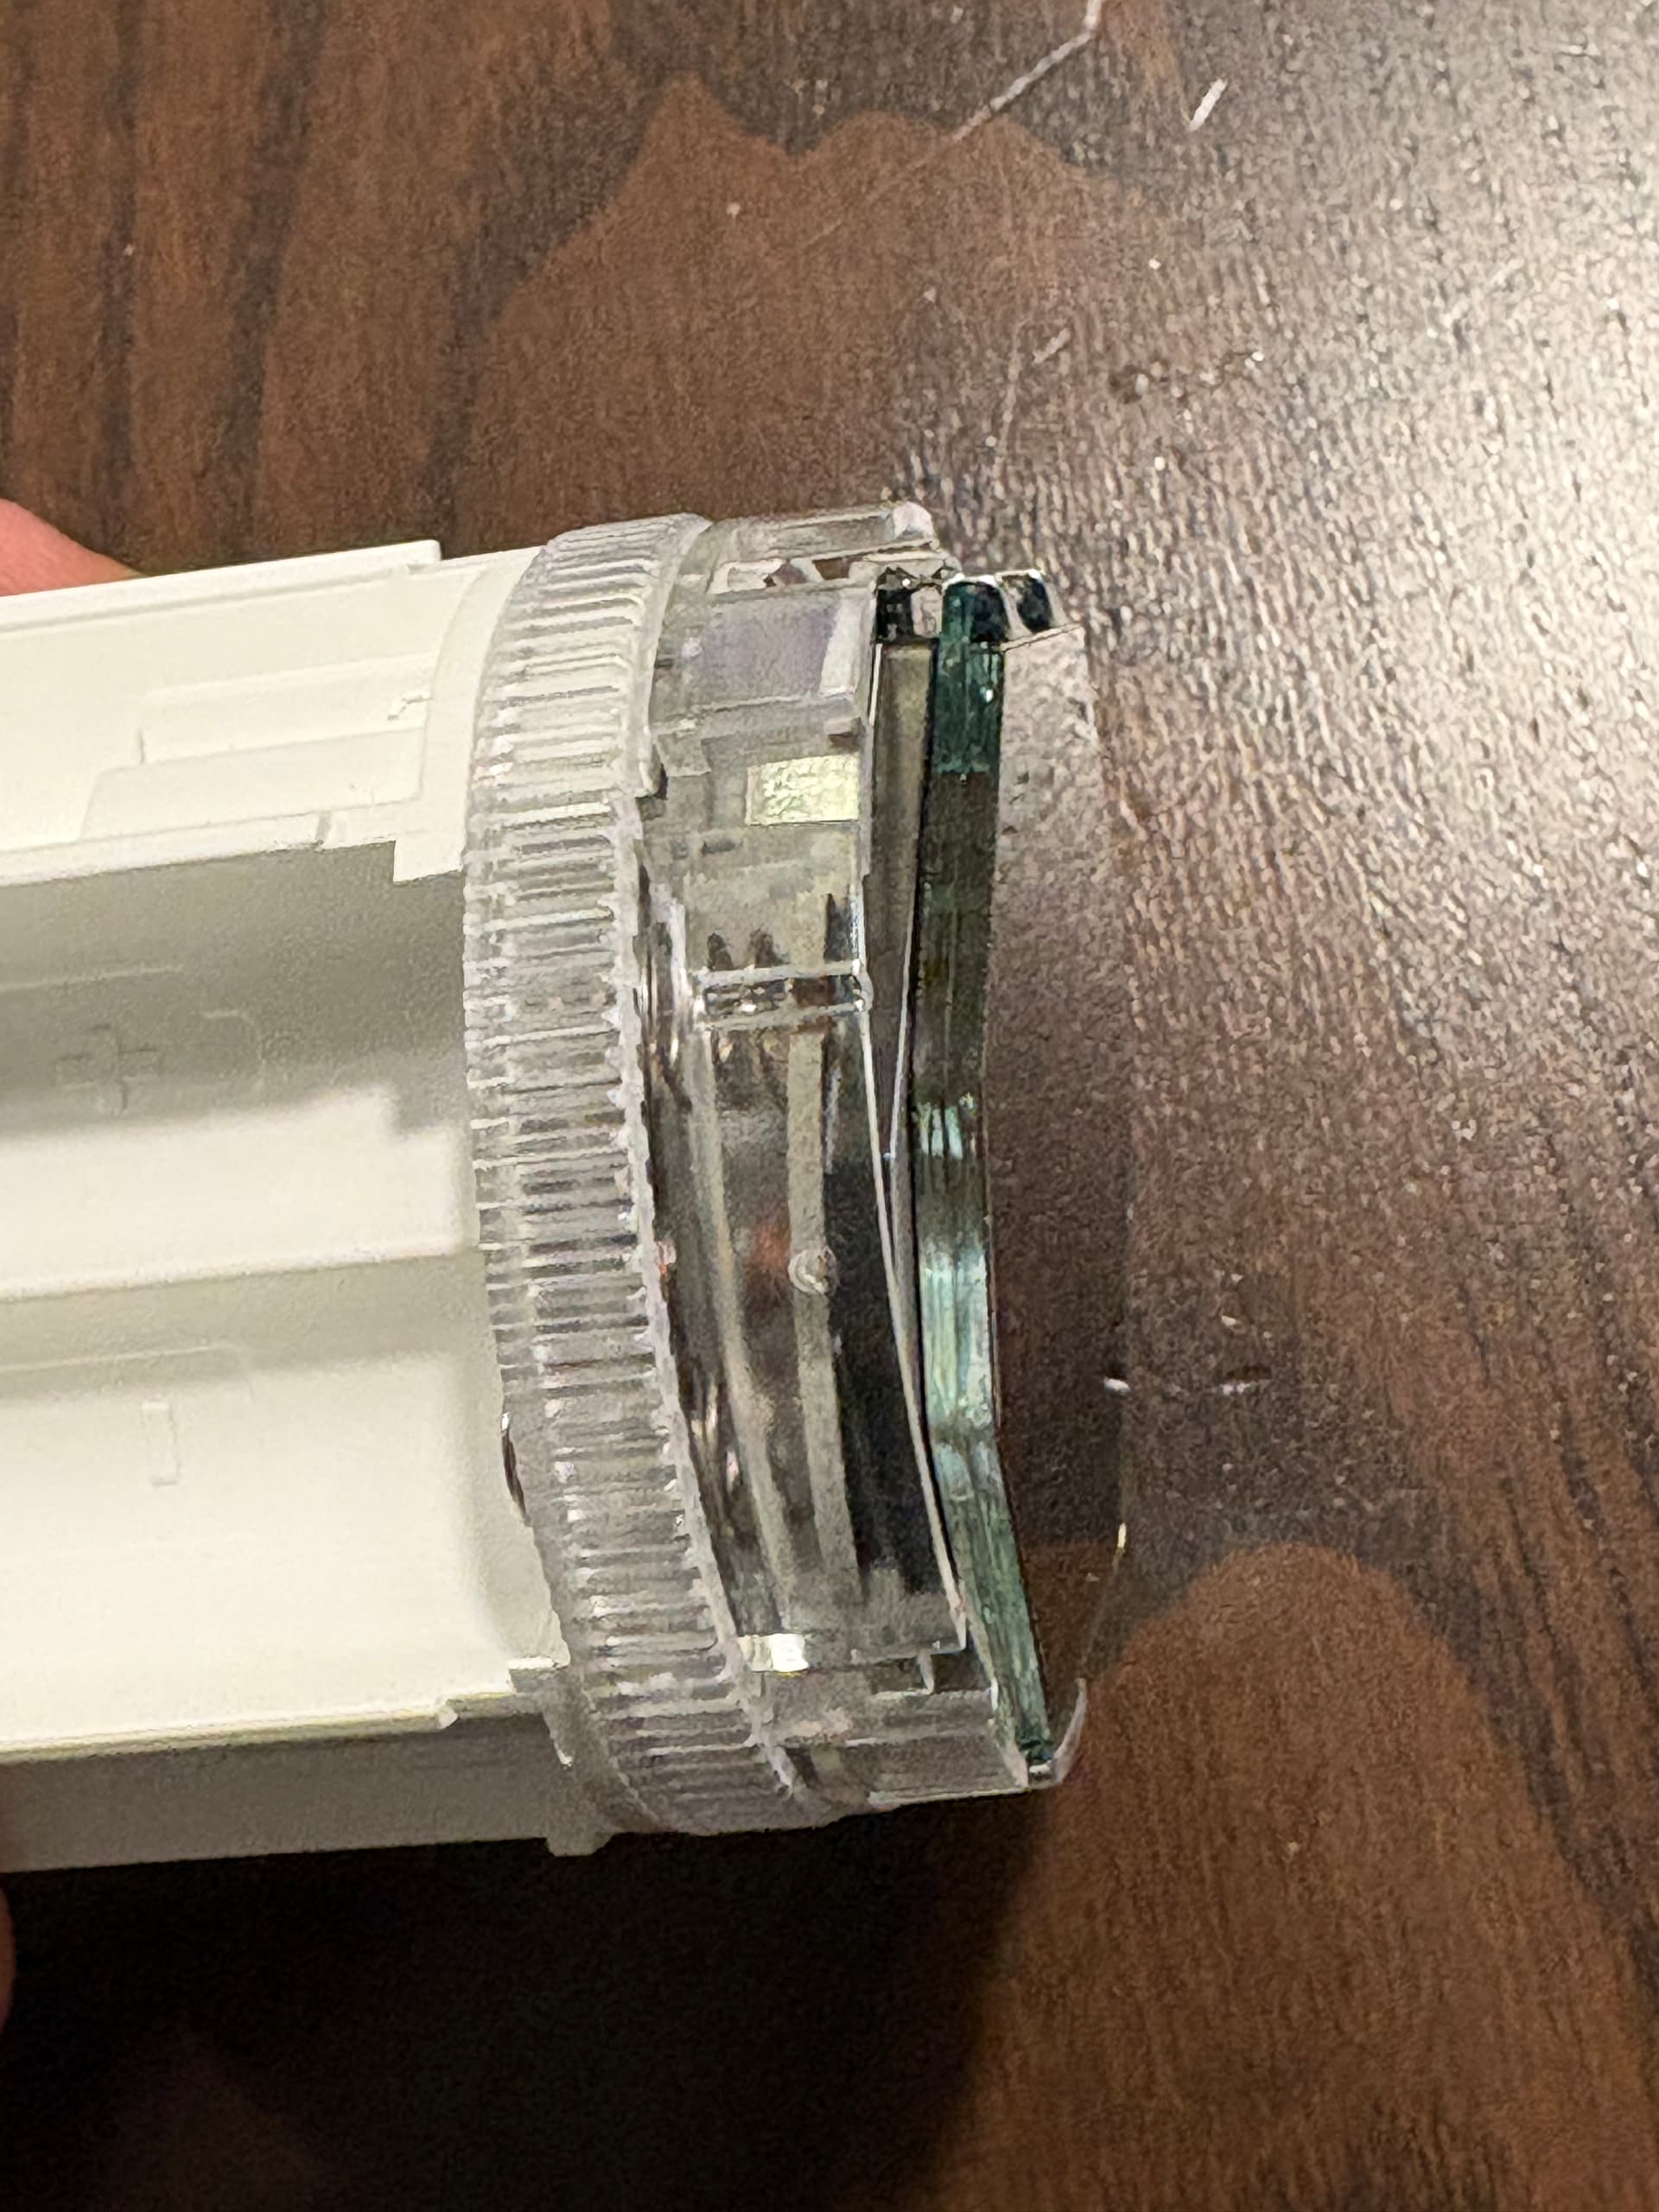
take the screen away and you will see this
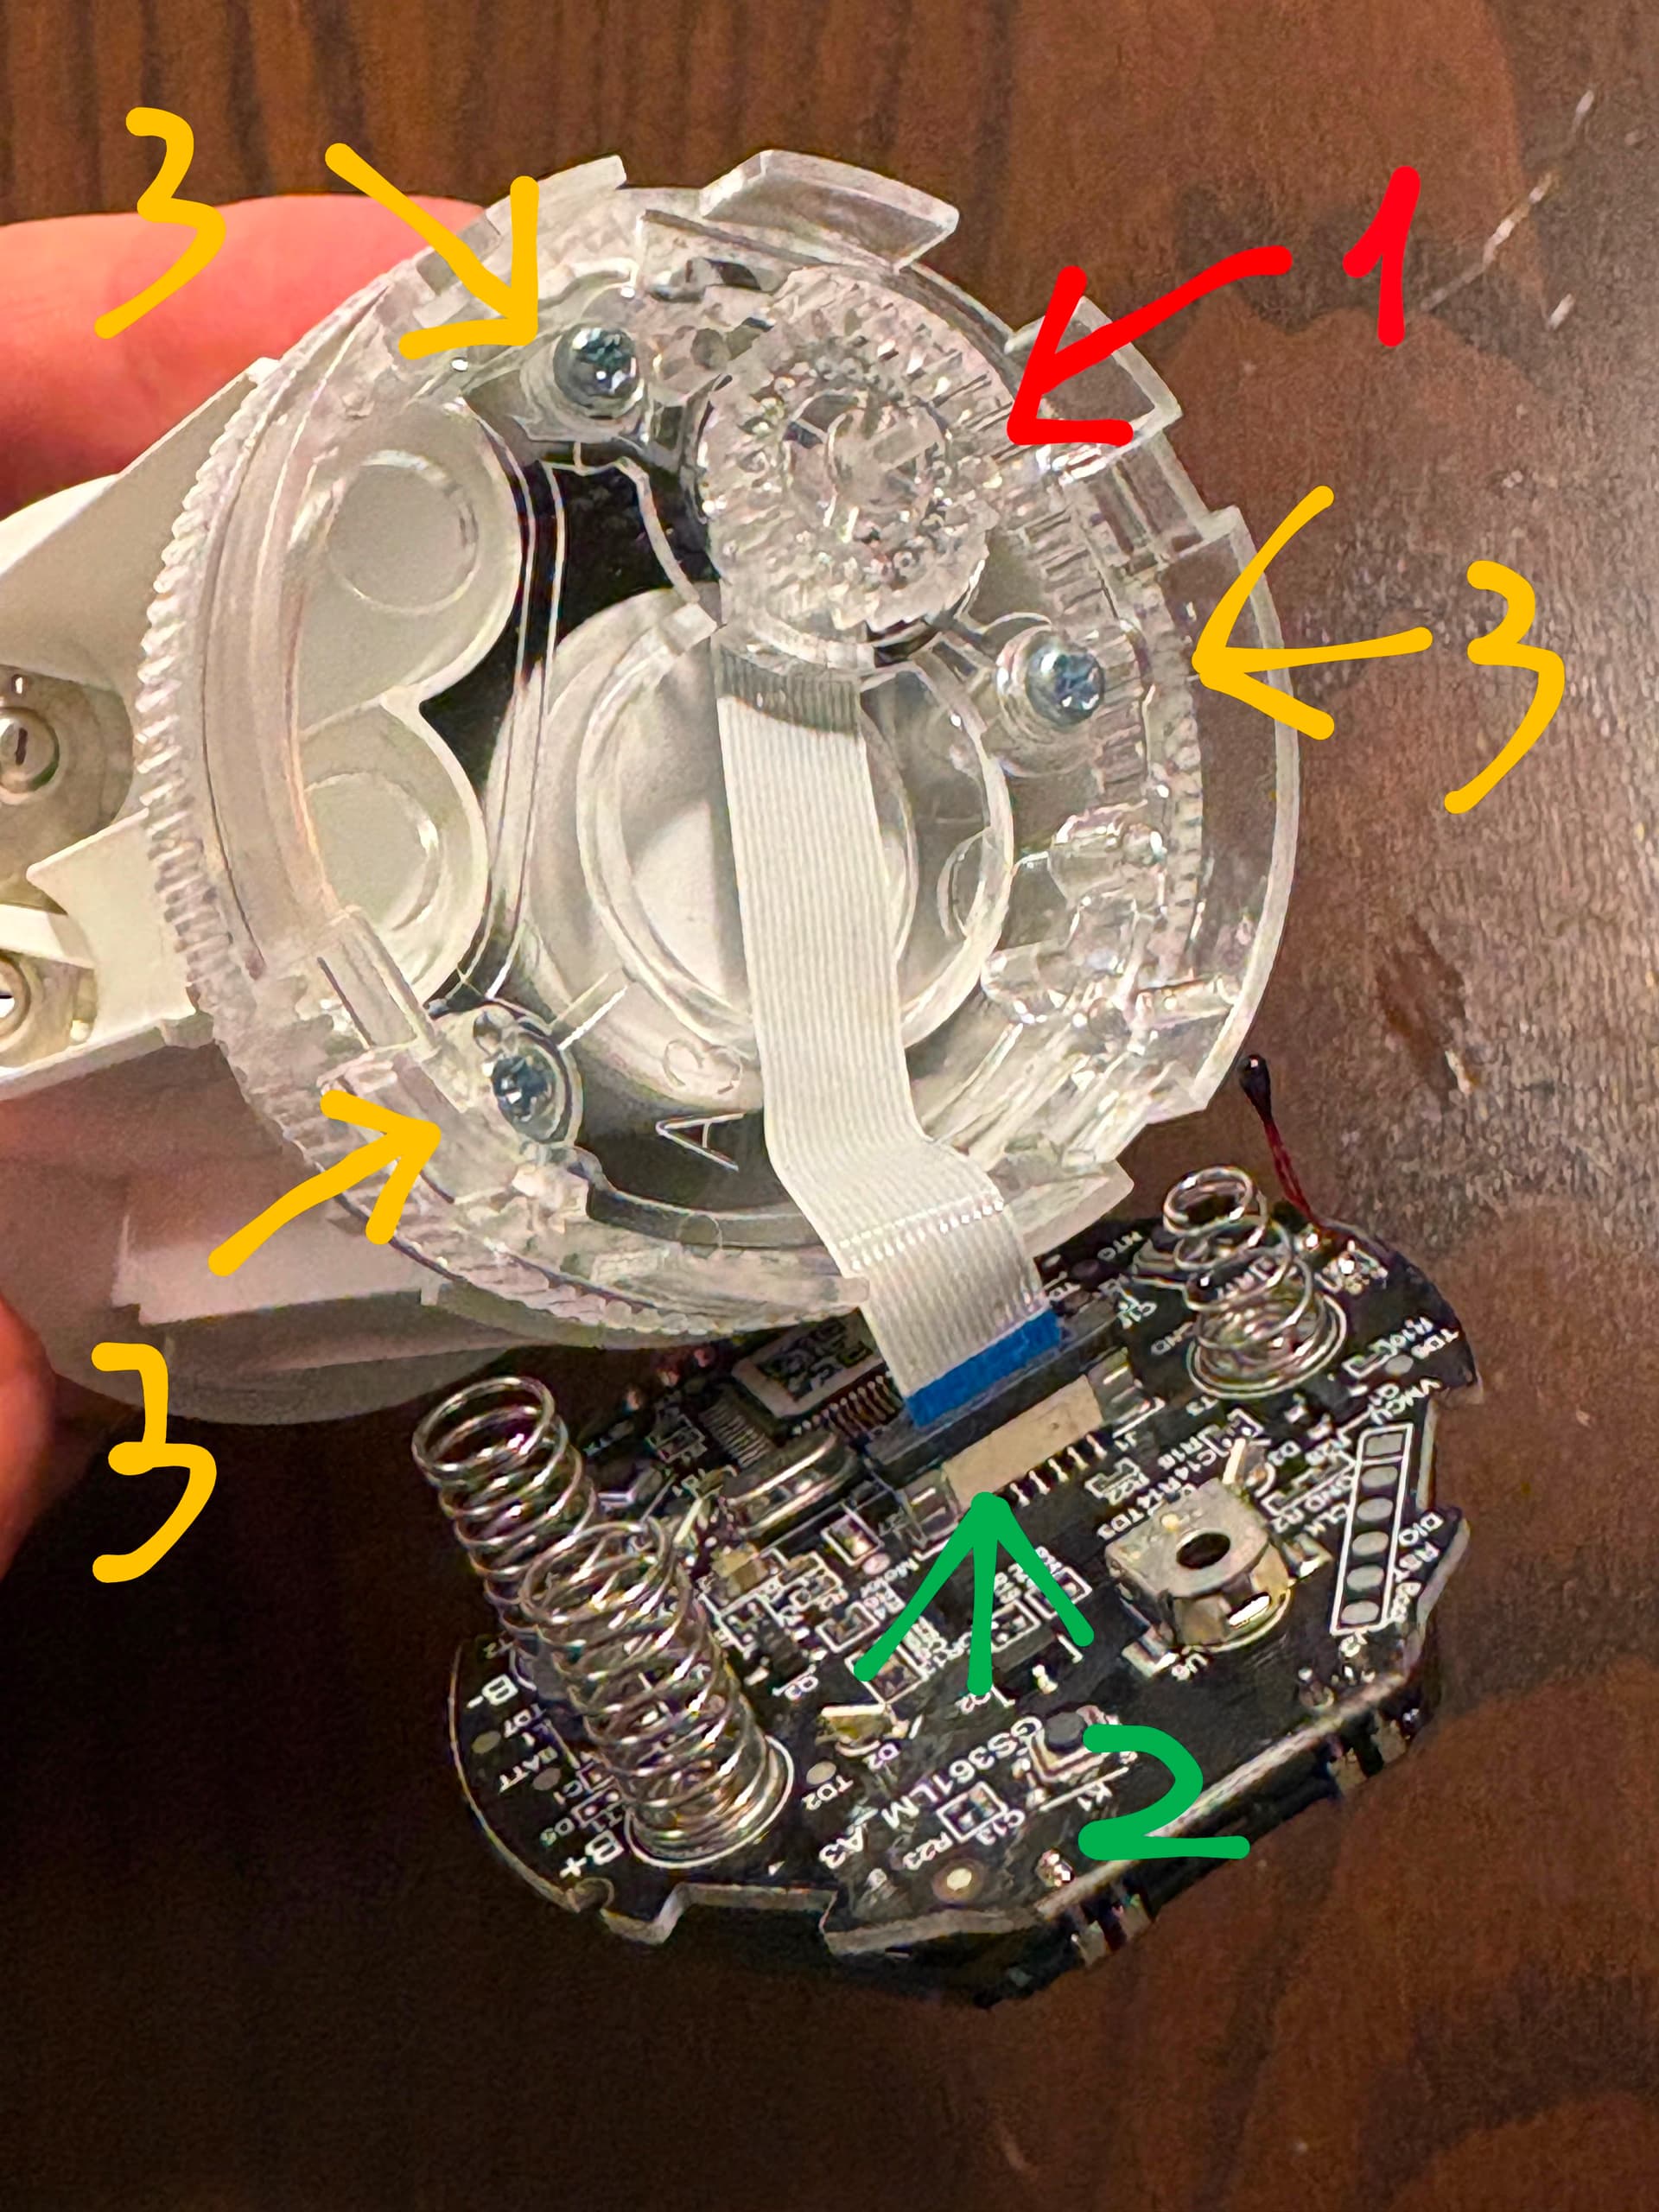
Now, what you need to do is to
- Remove the wheel (red arrow)
- Remove the tape (see below, green arrow)
- Unscrew 3 screews
How do you remove the tape?
You gently pull this black thing that blocks the tape and then you will be able to remove it without any force

When you do that, simply take off this white plastic circle (red arrow below)
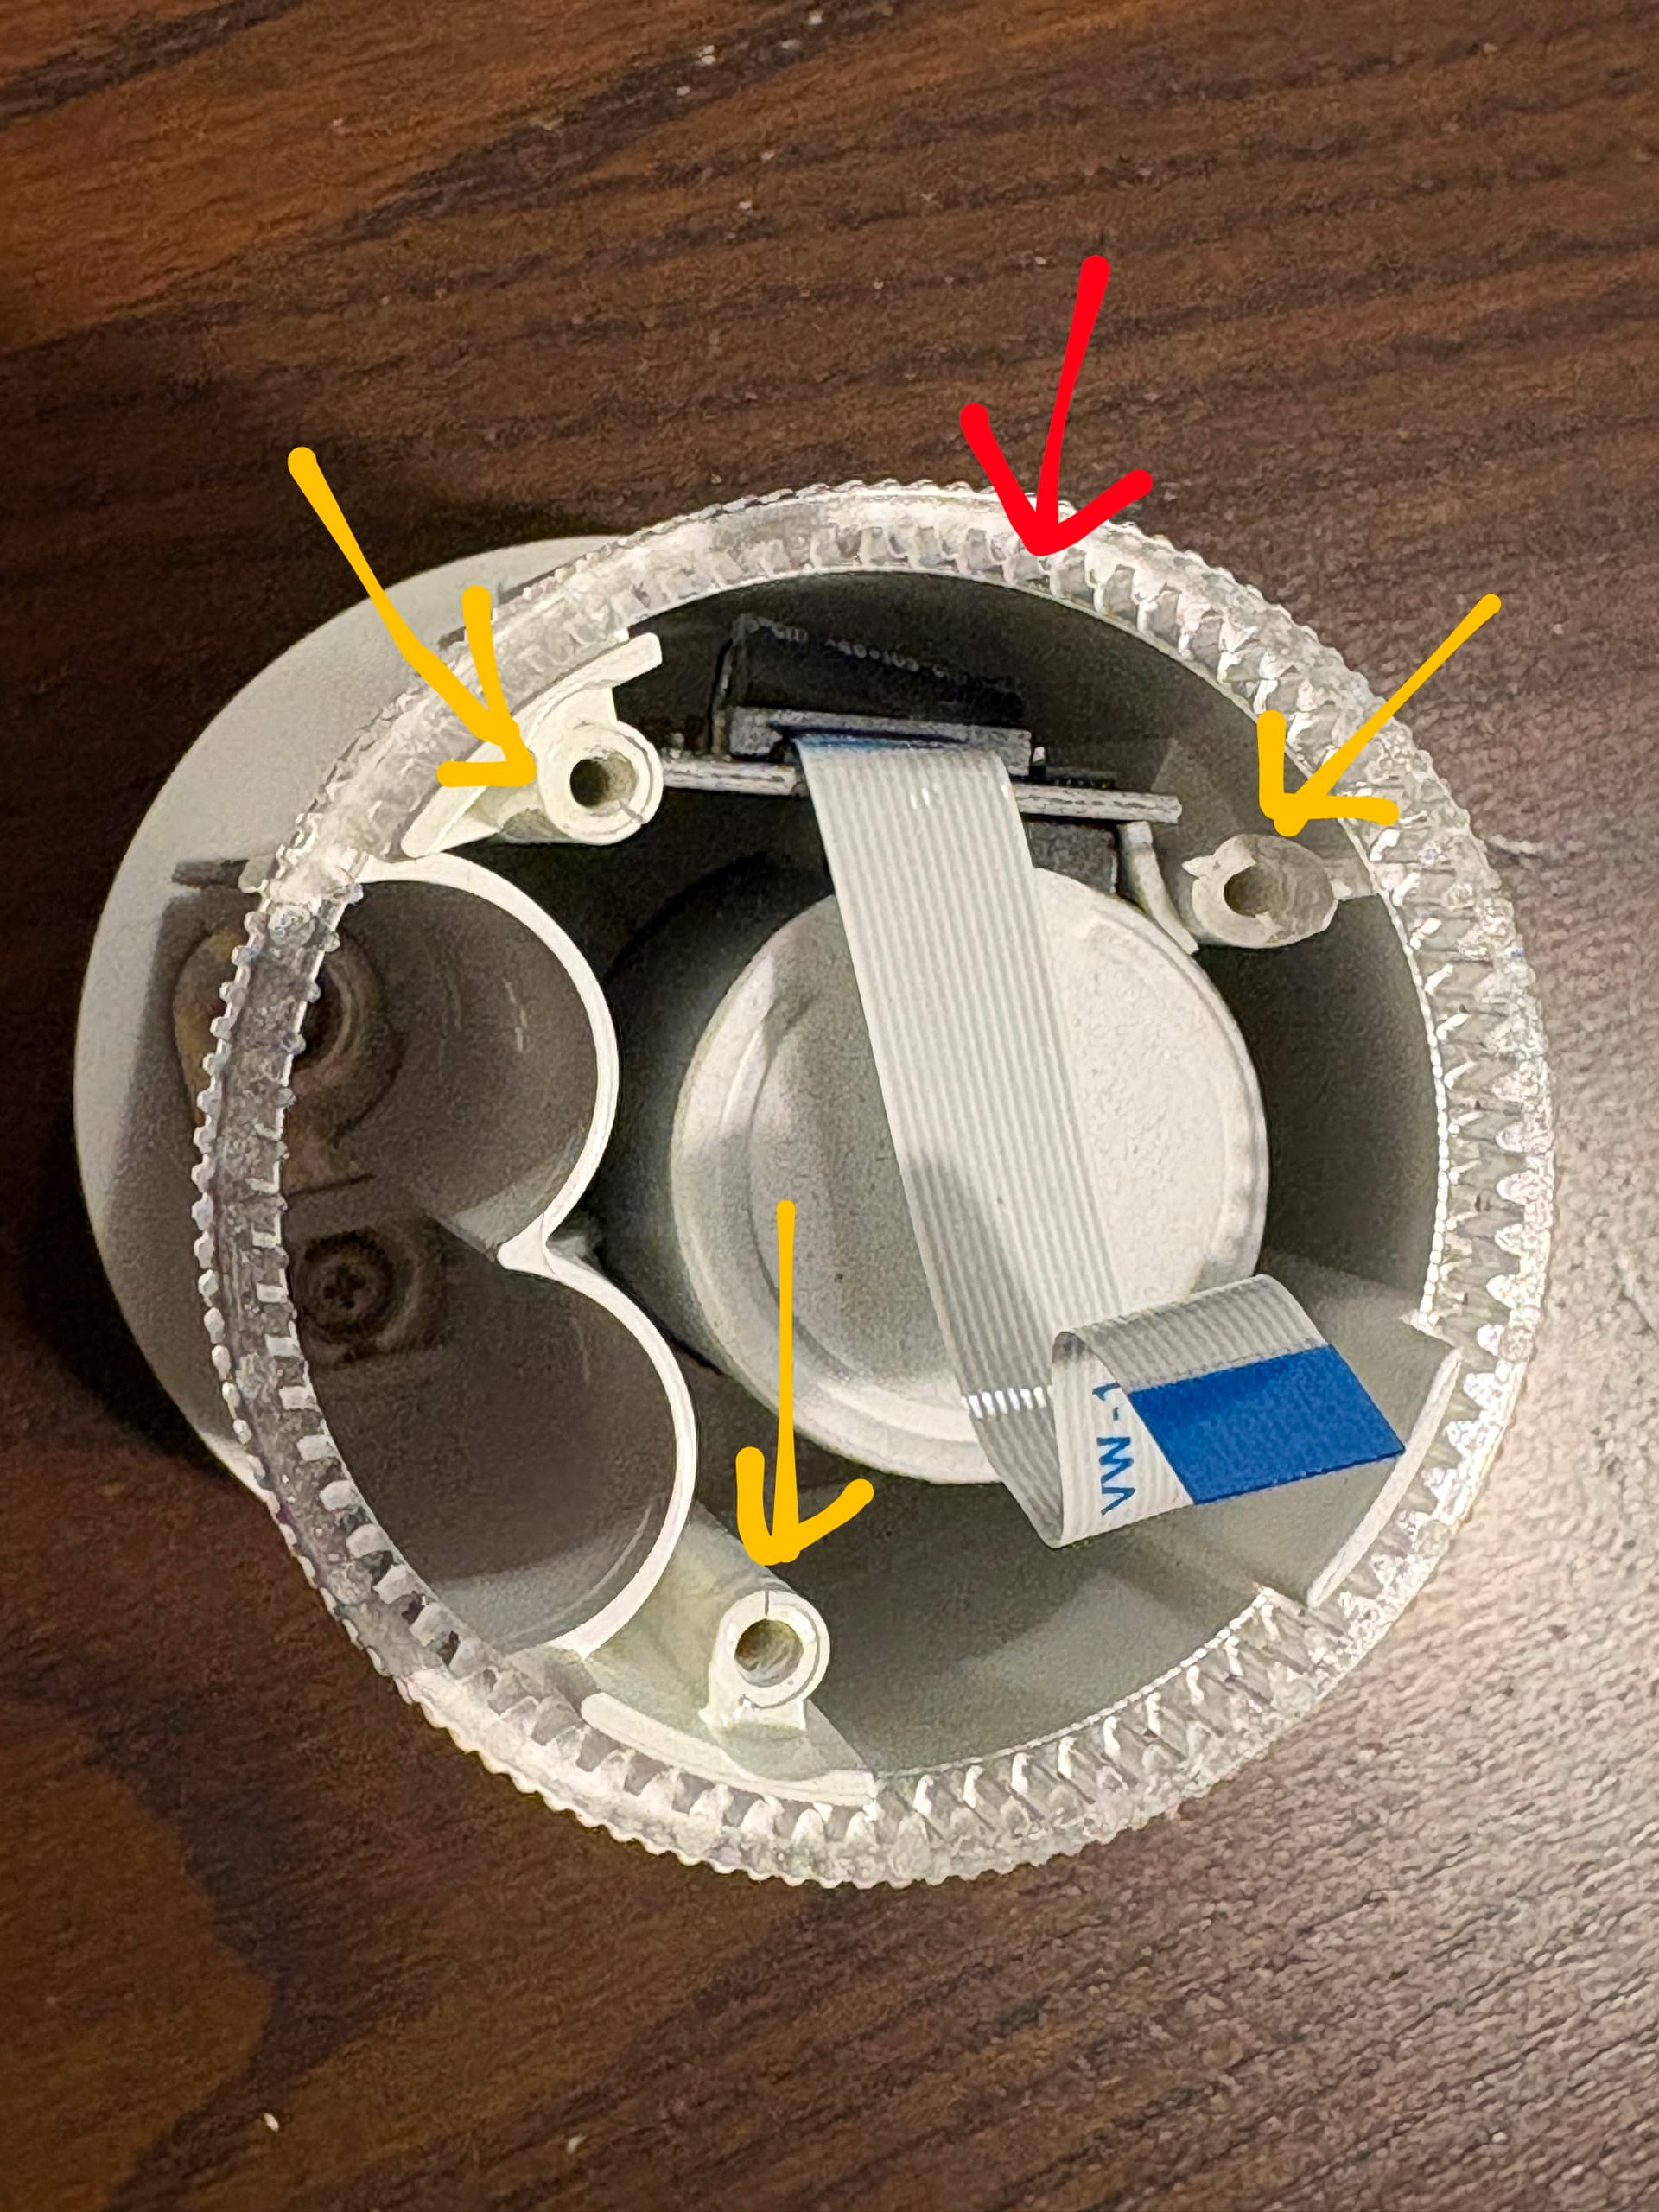
and you should see the damage inside. In both my devices, it was similar - 2 of the screw holders were cracked and one of them totally broken. The missing part was inside the device.
I simply glued the missing part, put a bit of a glue on cracked as well - I used CA300 glue with activator. And that’s really it…
To make sure it won’t happened again, I also glued this platic cover that was screwed on (don’t forget to install this plastic wheel that you use to adjust temperature and recognize that it does matter which side it goes in - also, don’t glue it!) and screwed it on again with screws - so glue + screw. I hope it won’t break again but surely I won’t be able to open it anymore ![]()
Then I did reversed all the actions that I did to disassembly the device.
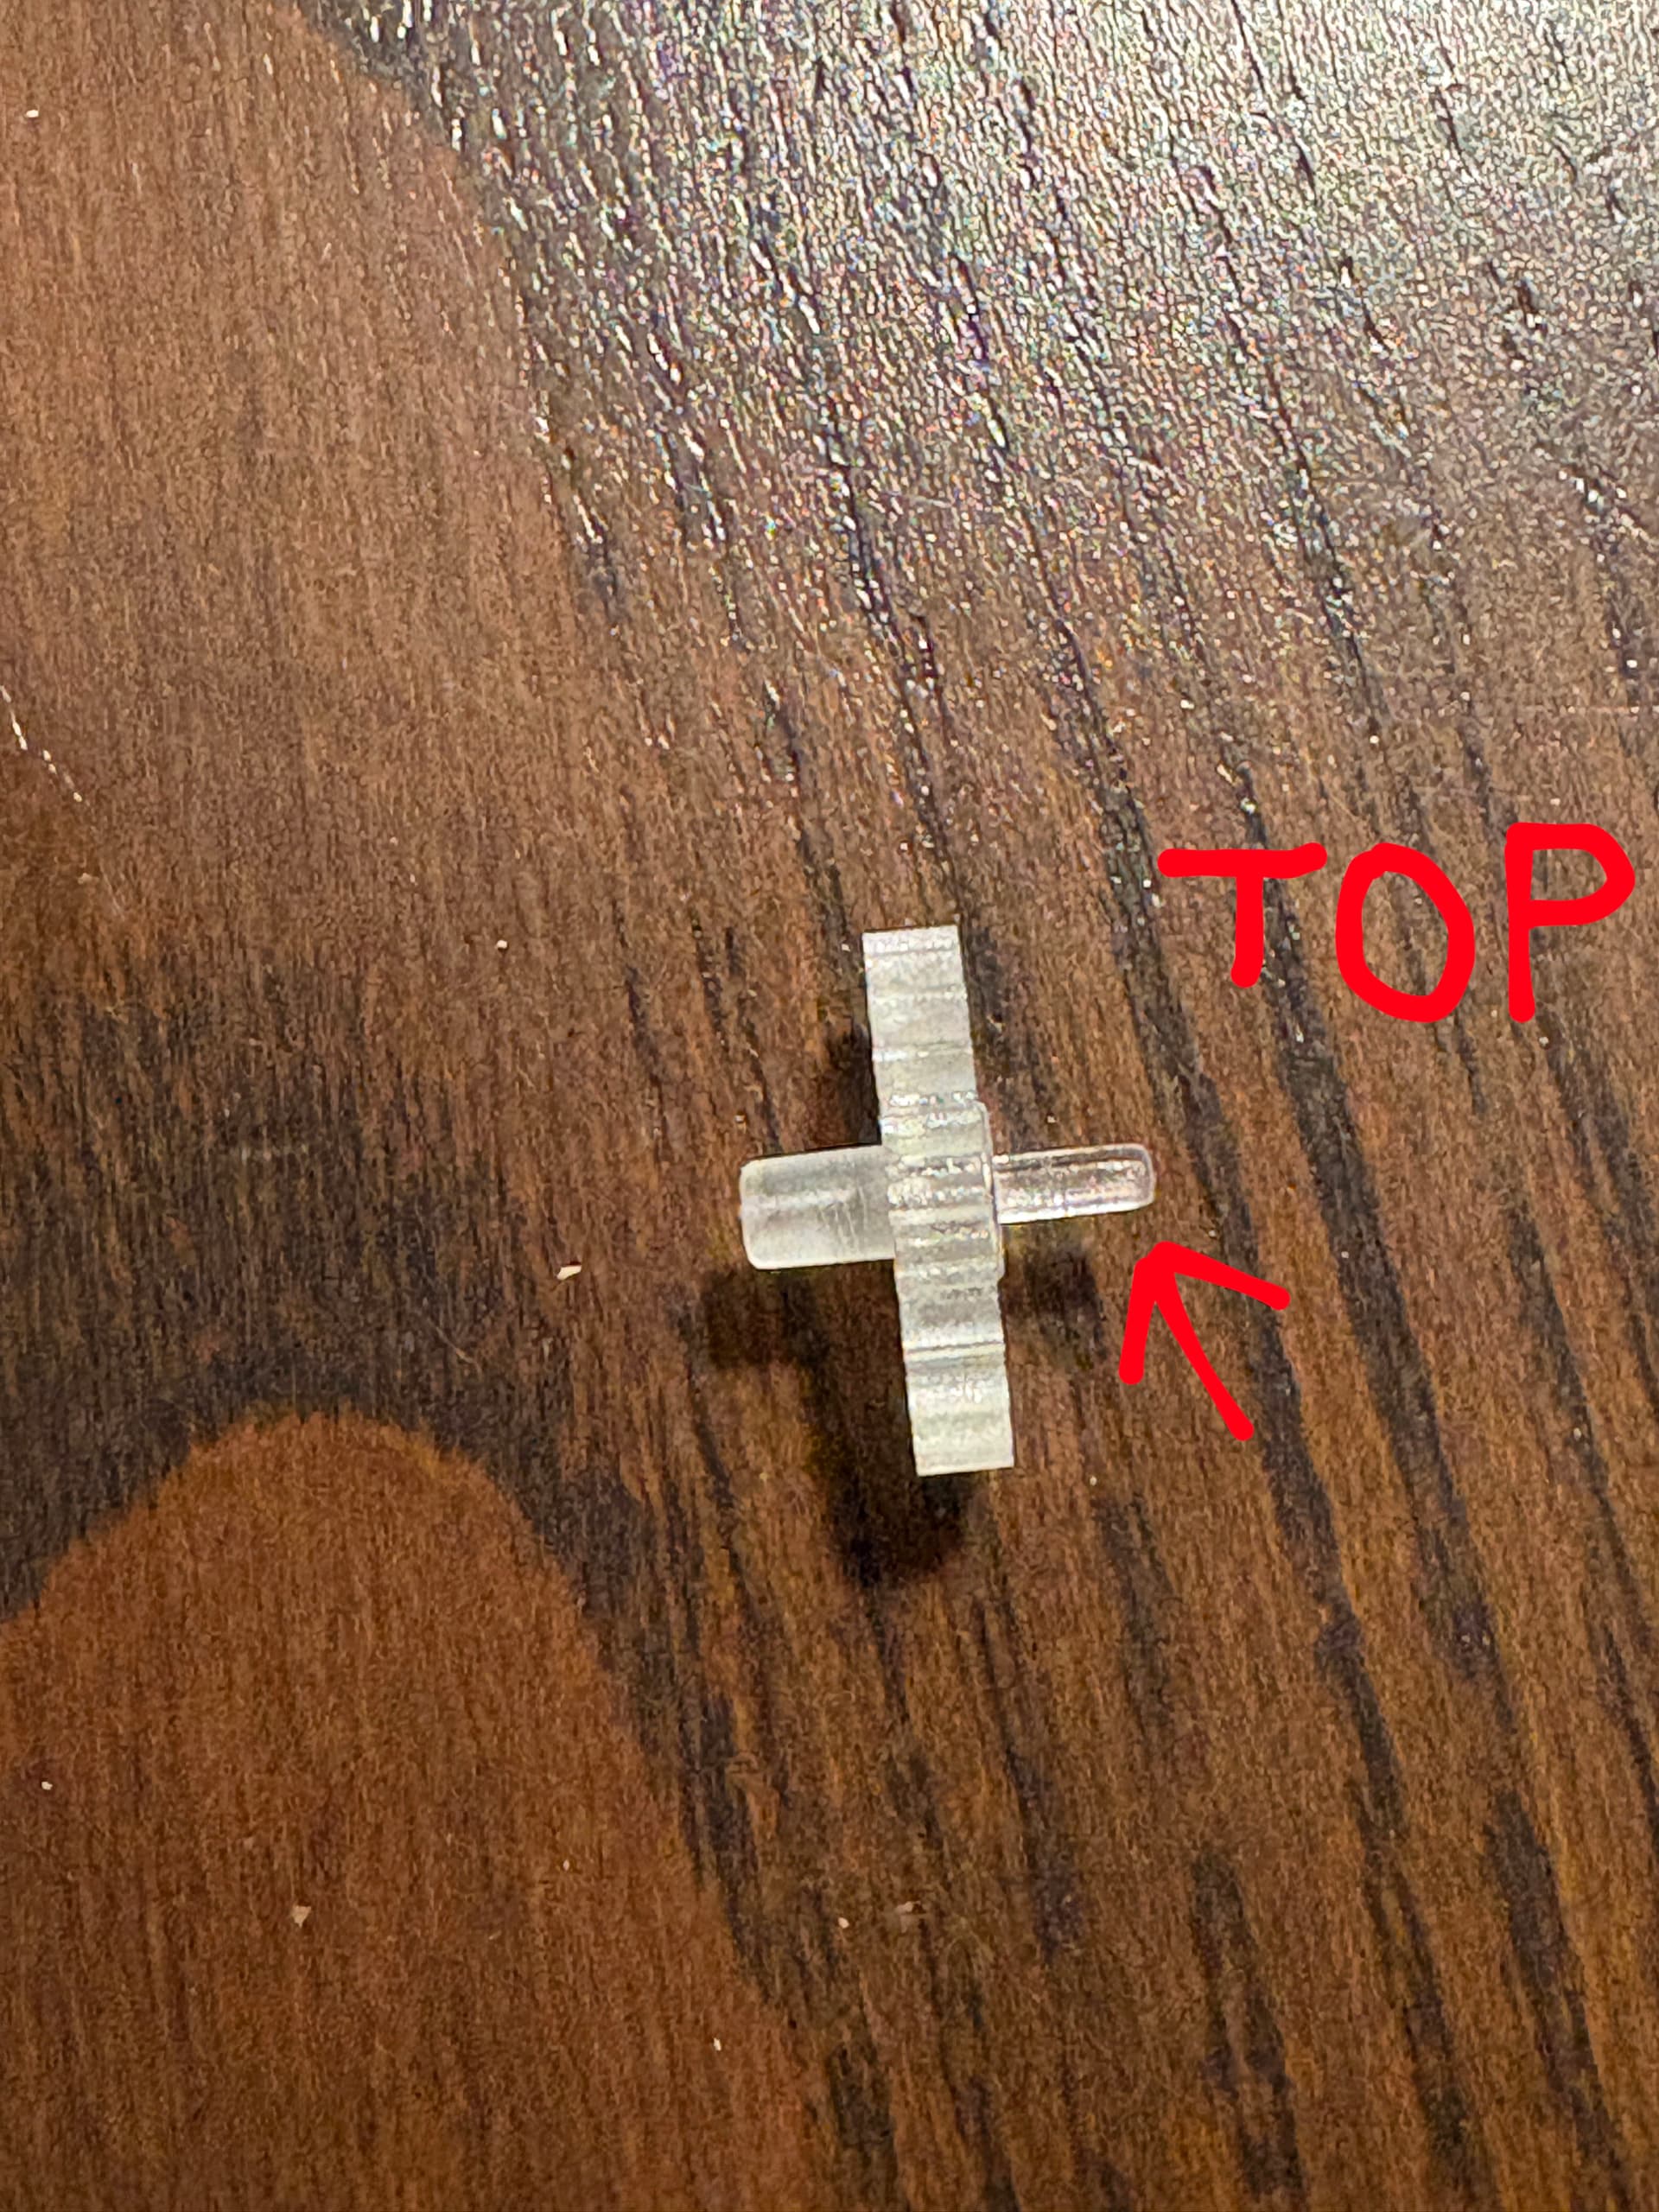
When adding last small gearwheel, bear in mind that it has to sides, top and bottom, don’t mix them - see below
Connect the signal tape again, secure by pressing in this black bar, and continue all steps backwards.
After full assembly, finally the distance on top and the bottom was the same - device fixed!
I fixed this way both faulty devices and it took me maybe 10 minutes per device.
I hope you will find this guide useful. Thx