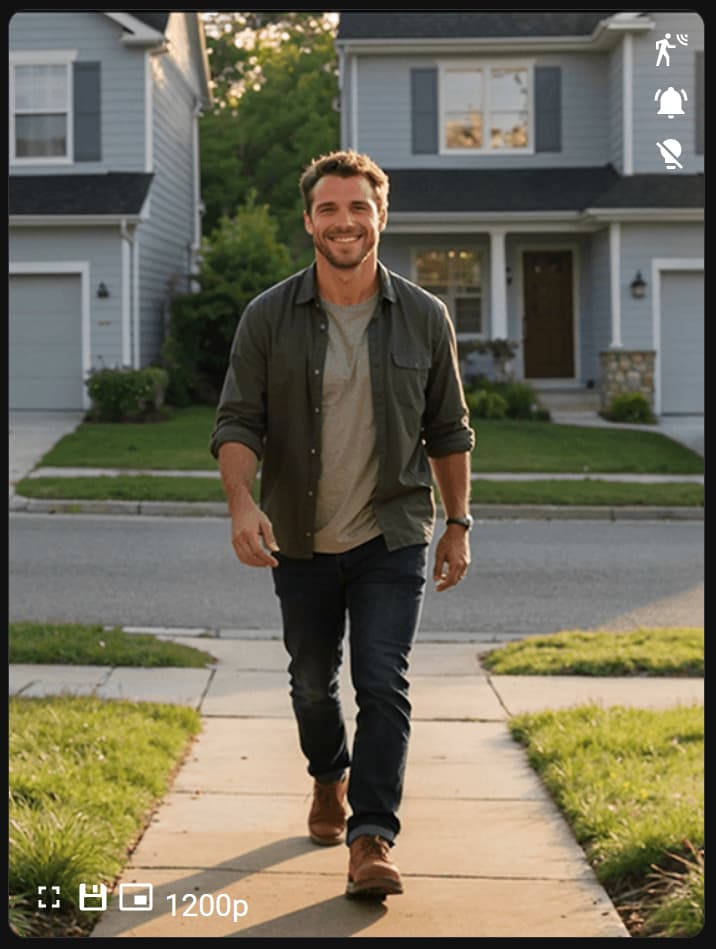
Here’s a guide to make an Aqara G400 Doorbell Home Assistant dashboard video feed card that’s more feature rich than the standard HomeKit version. Includes resolution selection, correct aspect ratio, snapshots, full screen & picture in picture buttons, digital PTZ, motion sensor indicator, doorbell/chime mute, and a toggle for an outdoor/hallway light.
Requirements
- G400 Doorbell added to Home Assistant via HomeKit
- HACS (Home Assistant Community Store)
- WebRTC Camera integration
Guide
- First you need to enable RTSP LAN Preview in the G400 device settings in the Aqara Home App.
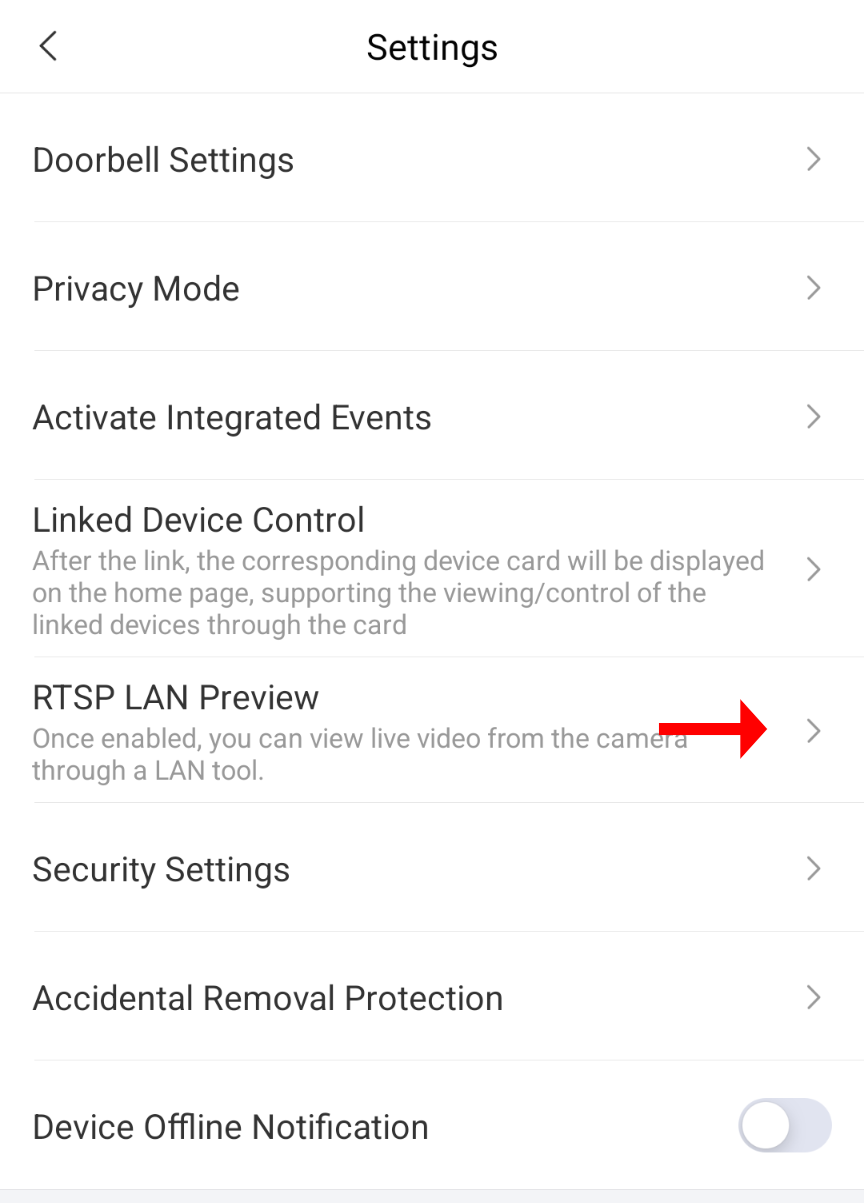
Note down your G400s IP address and username/password (giving your G400 a static IP address in your network router is strongly advised).

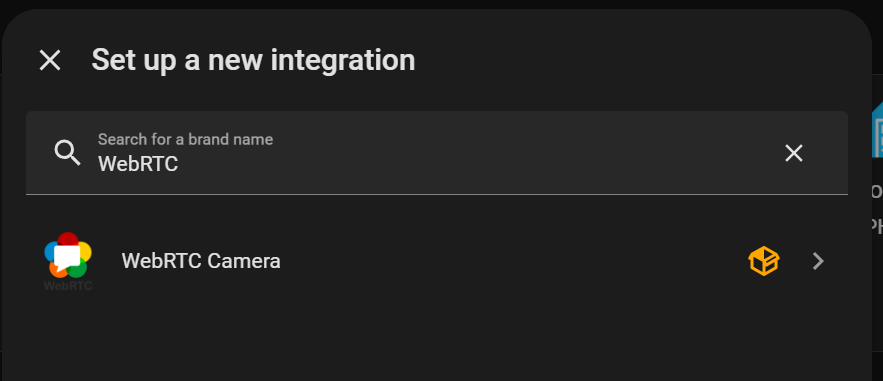
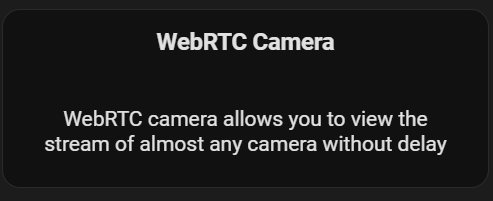
- Now in Home Assistant, install WebRTC Camera via HACS (Home Assistant Community Store). Go to HACS and search for “WebRTC Camera”, download and then install via Settings-Devices & Services-Add Integration-Search for WebRTC Camera.
-
Next go your Home Assistant dashboard, click the Edit Dashboard icon in the top right, and click Add Card in the dashboard.
Scroll down to Custom Cards and select the WebRTC Camera card.
- Paste the below yaml into the editor.
type: custom:webrtc-camera
streams:
  - url: rtsp://user:pass@xx.xx.xx.xx:8554/ch1
    name: 1200p
    media: video,audio
  - url: rtsp://user:pass@xx.xx.xx.xx:8554/ch2
    name: 960p
    media: video,audio
  - url: rtsp://user:pass@xx.xx.xx.xx:8554/ch3
    name: 480p
    media: video,audio
poster: >-
  /media/local/myimage.jpg
style: |-
  video {aspect-ratio: 3/4; object-fit: fill;}
   .mode {display: none}
   .shortcuts {left: unset; top: 15px; right: 10px; gap: 10px; display: flex; flex-direction: column}
   .controls {left: 15px; right: 15px; gap: 5px; display: flex; flex-direction: row}
digital_ptz:
  mouse_drag_pan: true
  mouse_wheel_zoom: true
  mouse_double_click_zoom: true
  touch_drag_pan: true
  touch_pinch_zoom: true
  touch_tap_drag_zoom: true
  persist: true
muted: true
ui: true
shortcuts:
  - name: Motion Sensor
    icon: >-
      ${ states['binary_sensor.doorbell_camera_g400_1f75_motion_sensor'].state
      === 'on' ? 'mdi:motion-sensor':'mdi:motion-sensor-off' }
    data:
      entity: binary_sensor.doorbell_camera_g400_1f75_motion_sensor
  - name: Doorbell Mute
    icon: >-
      ${ states['switch.doorbell_camera_g400_1f75_mute_3'].state === 'on' ?
      'mdi:bell-off':'mdi:bell-ring' }
    service: switch.toggle
    service_data:
      entity_id: switch.doorbell_camera_g400_1f75_mute_3
  - name: Door Light
    icon: >-
      ${ states['light.door_lamp'].state === 'on' ?
      'mdi:lightbulb-on':'mdi:lightbulb-off' }
    service: light.toggle
    service_data:
      entity_id: light.door_lamp
Edit the following lines with you own specific values:
- 3 -
user:pass@xx.xx.xx.xx- replace with the username/password/ip address noted down from the Aqara Home app before - 6 -
user:pass@xx.xx.xx.xx- as above - 9 -
user:pass@xx.xx.xx.xx- as above - 13 -
/media/local/myimage.jpg- replace with the path to an image to display whilst the camera feed loads (delete the lines if not wanted) - 32 & 35 -
binary_sensor.doorbell_camera_g400_1f75_motion_sensor- this is the name of the motion sensor for your doorbell, it will be slightly different but as you type it out Home Assistant should show an autocomplete suggestion with the correct name. - 38 & 42 -
switch.doorbell_camera_g400_1f75_mute_3- this is the doorbell/chime mute switch, HomeKit makes 3 mute toggles for the G400. I haven’t figured out what 1 & 2 do, but number 3 is for the bell/chime mute. - 45 & 50 -
light.door_lamp- a light entity for the toggle button if you want to turn on an outdoor/hallway light whilst looking at the stream, delete the lines if not wanted.
You should now have a more feature rich G400 video feed in your Home Assistant dashboard.