Are you an Android user frustrated by the Aqara app’s doorbell notifications? While they work, the notifications are often delayed and don’t include a snapshot image—leaving you unsure whether to answer or ignore the ring.
With Home Assistant, you can overcome these limitations and receive instant, rich notifications that include an image from your doorbell camera. Even better, the notification can be made clickable, taking you directly into the Aqara app for further interaction.
Step 1: Connect Your Aqara Doorbell to Home Assistant
To start, make sure your Aqara doorbell is integrated with Home Assistant using the HomeKit integration.
This is important because the HomeKit integration is currently the only method that exposes the doorbell press event, which is what we’ll use to trigger the automation.
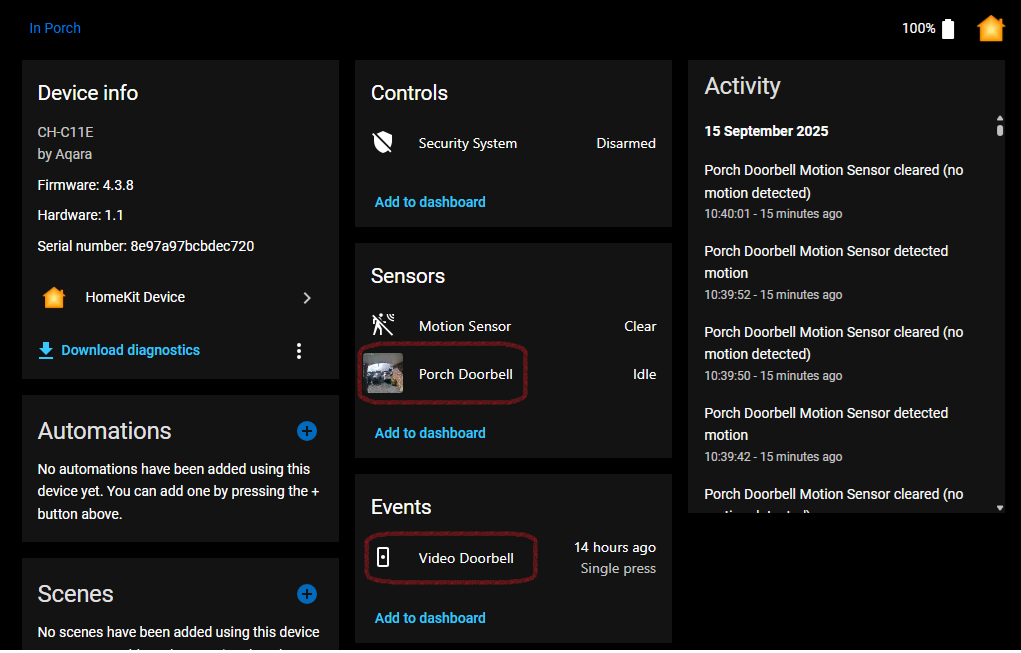
For example, here’s my Aqara G410 camera connected to Home Assistant via HomeKit. In the screenshot (circled in red), you can see the entities that we’ll reference in our automation.
Step 2: Capture the Doorbell Event and Send Notifications
Once the doorbell is integrated, we can create an automation that:
- Detects the doorbell press event.
- Takes a snapshot from the camera entity.
- Sends a rich notification (with image and text) to your Android device.
Optional: Send Notifications to Multiple Devices
If you want the notification delivered to multiple phones, you’ll need to set up a notification group.
This is done by editing your Home Assistant configuration file and adding YAML similar to the example below:
notify:
  - platform: group
    name: androidusers
    services:
      - service: mobile_app_phone1
      - service: mobile_app_phone2
name: The alias you’ll use in the automation.services: The devices that will receive the notification.
In this example, both Phone1 and Phone2 will be notified. If you only want to send notifications to a single device, you can skip this step.
Step 3: Build the Automation
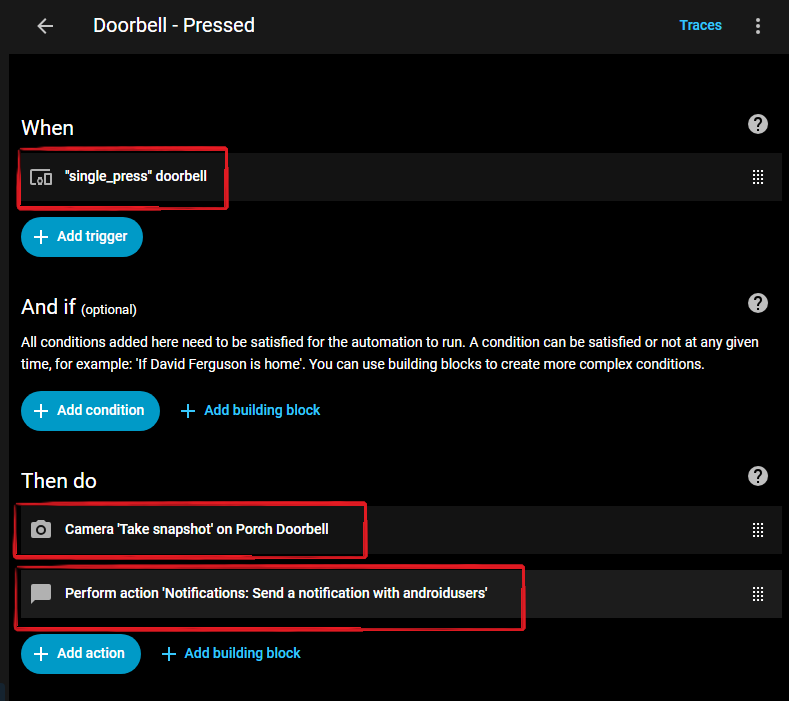
Now let’s break down the automation into three parts:
1. Trigger – Detect Doorbell Press
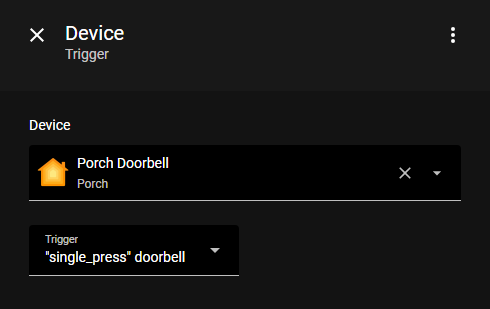
The automation begins by listening for the doorbell press event exposed by the HomeKit integration.
2. Action – Take a Snapshot
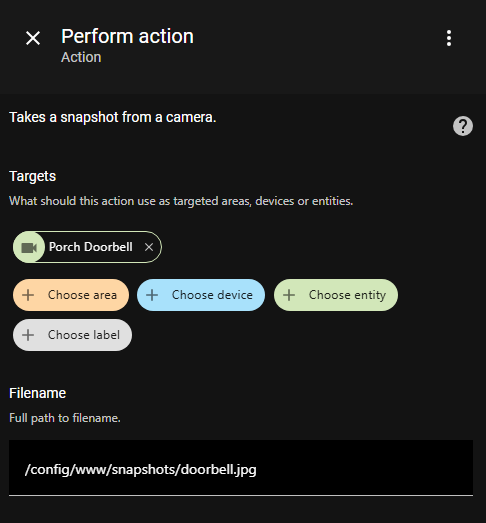
Next, the automation captures a snapshot from the camera entity and saves it to a consistent file path:
service: camera.snapshot
target:
  entity_id: camera.aqara_g410
data:
  filename: /config/www/doorbell_snapshot.jpg
Make sure to update the filename path to a valid location in your Home Assistant setup.
3. Action – Send the Notification
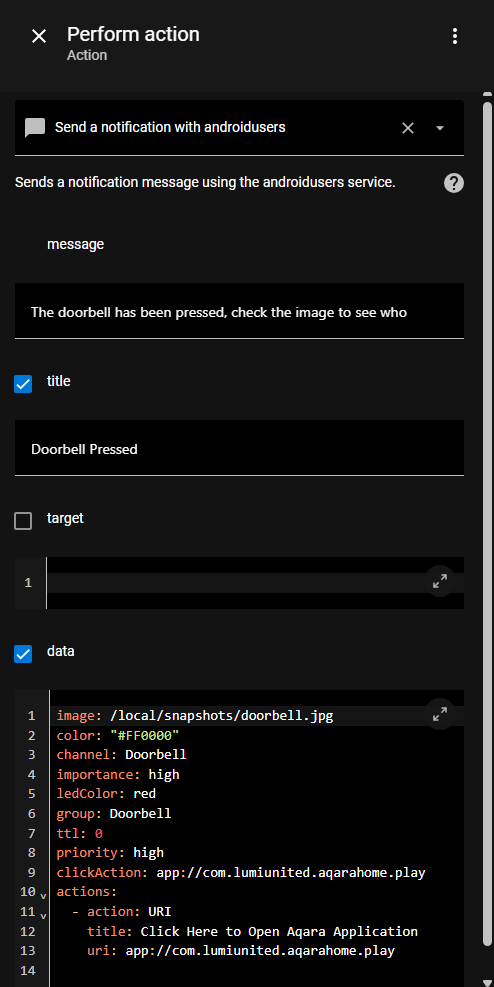
Finally, the automation sends a notification to your device (or notification group):
service: notify.androidusers
data:
  title: "Doorbell Alert"
  message: "Someone is at the door!"
  data:
    image: /local/doorbell_snapshot.jpg
    ttl: 0
    priority: high
    channel: Doorbell
    group: Doorbell
    clickAction: "intent://#Intent;scheme=app;package=com.lumiunited.aqara;end"
This is how the notification looks on my Android Phone 

Key fields explained:
title&message: The notification text. HTML formatting is supported.image: The snapshot file path (use/local/for images saved inwww/).ttl: 0&priority: high: Ensures the notification is delivered immediately.channel&group: Creates a unique notification channel in Android’s notification settings.clickAction: Launches the Aqara app directly from the notification.
Final Thoughts
With this setup, your Aqara doorbell becomes far more useful:
- Instant delivery thanks to priority handling.
- Snapshot included so you know who’s at the door before deciding to respond.
- Seamless app integration with a single tap on the notification.
This approach solves the biggest limitations of the Aqara app’s built-in notifications and makes your smart doorbell far more responsive and practical.

