__Aqara camera setup tutorial/explanation (for beginners). Part FIVE: "Pan/tilt settings" (PTZ) — configuring the rotation for Aqara cameras that support this function
Hello! Let’s continue the tutorial/explanation covering all types of Aqara cameras—designed for users who have just bought an Aqara camera and often find the settings confusing. As always, I’ve included plenty of images to illustrate the lesson.
In this tutorial, I will explain how to save video files recorded by the camera to local internal storage.
I’ll admit, I personally ran into this issue myself. I only fully figured it out after having to investigate a break-in at my home.
Let’s get started.
You need to look for the recordings on the camera’s main page.
Fig. 1
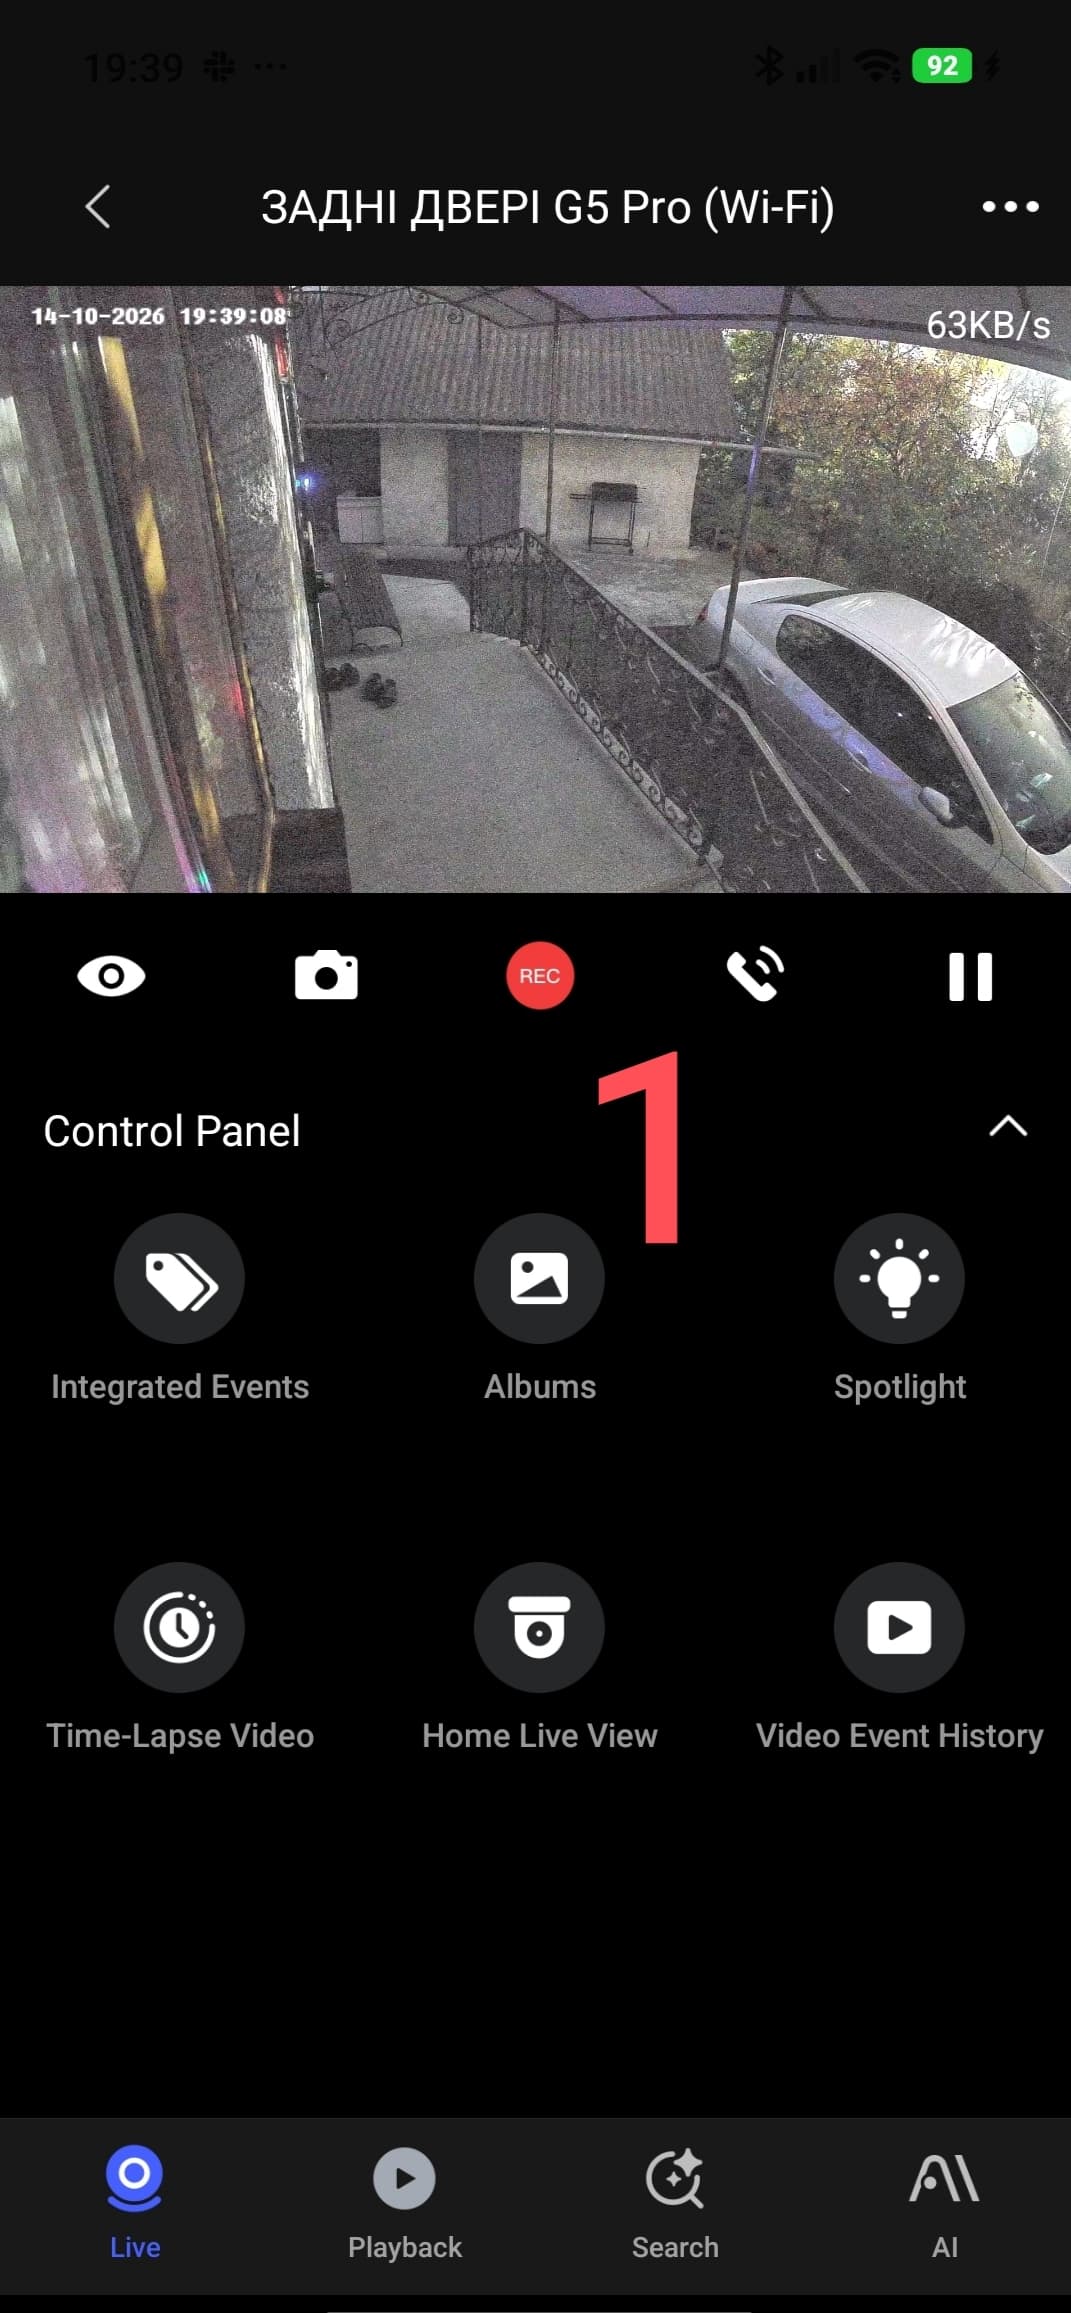
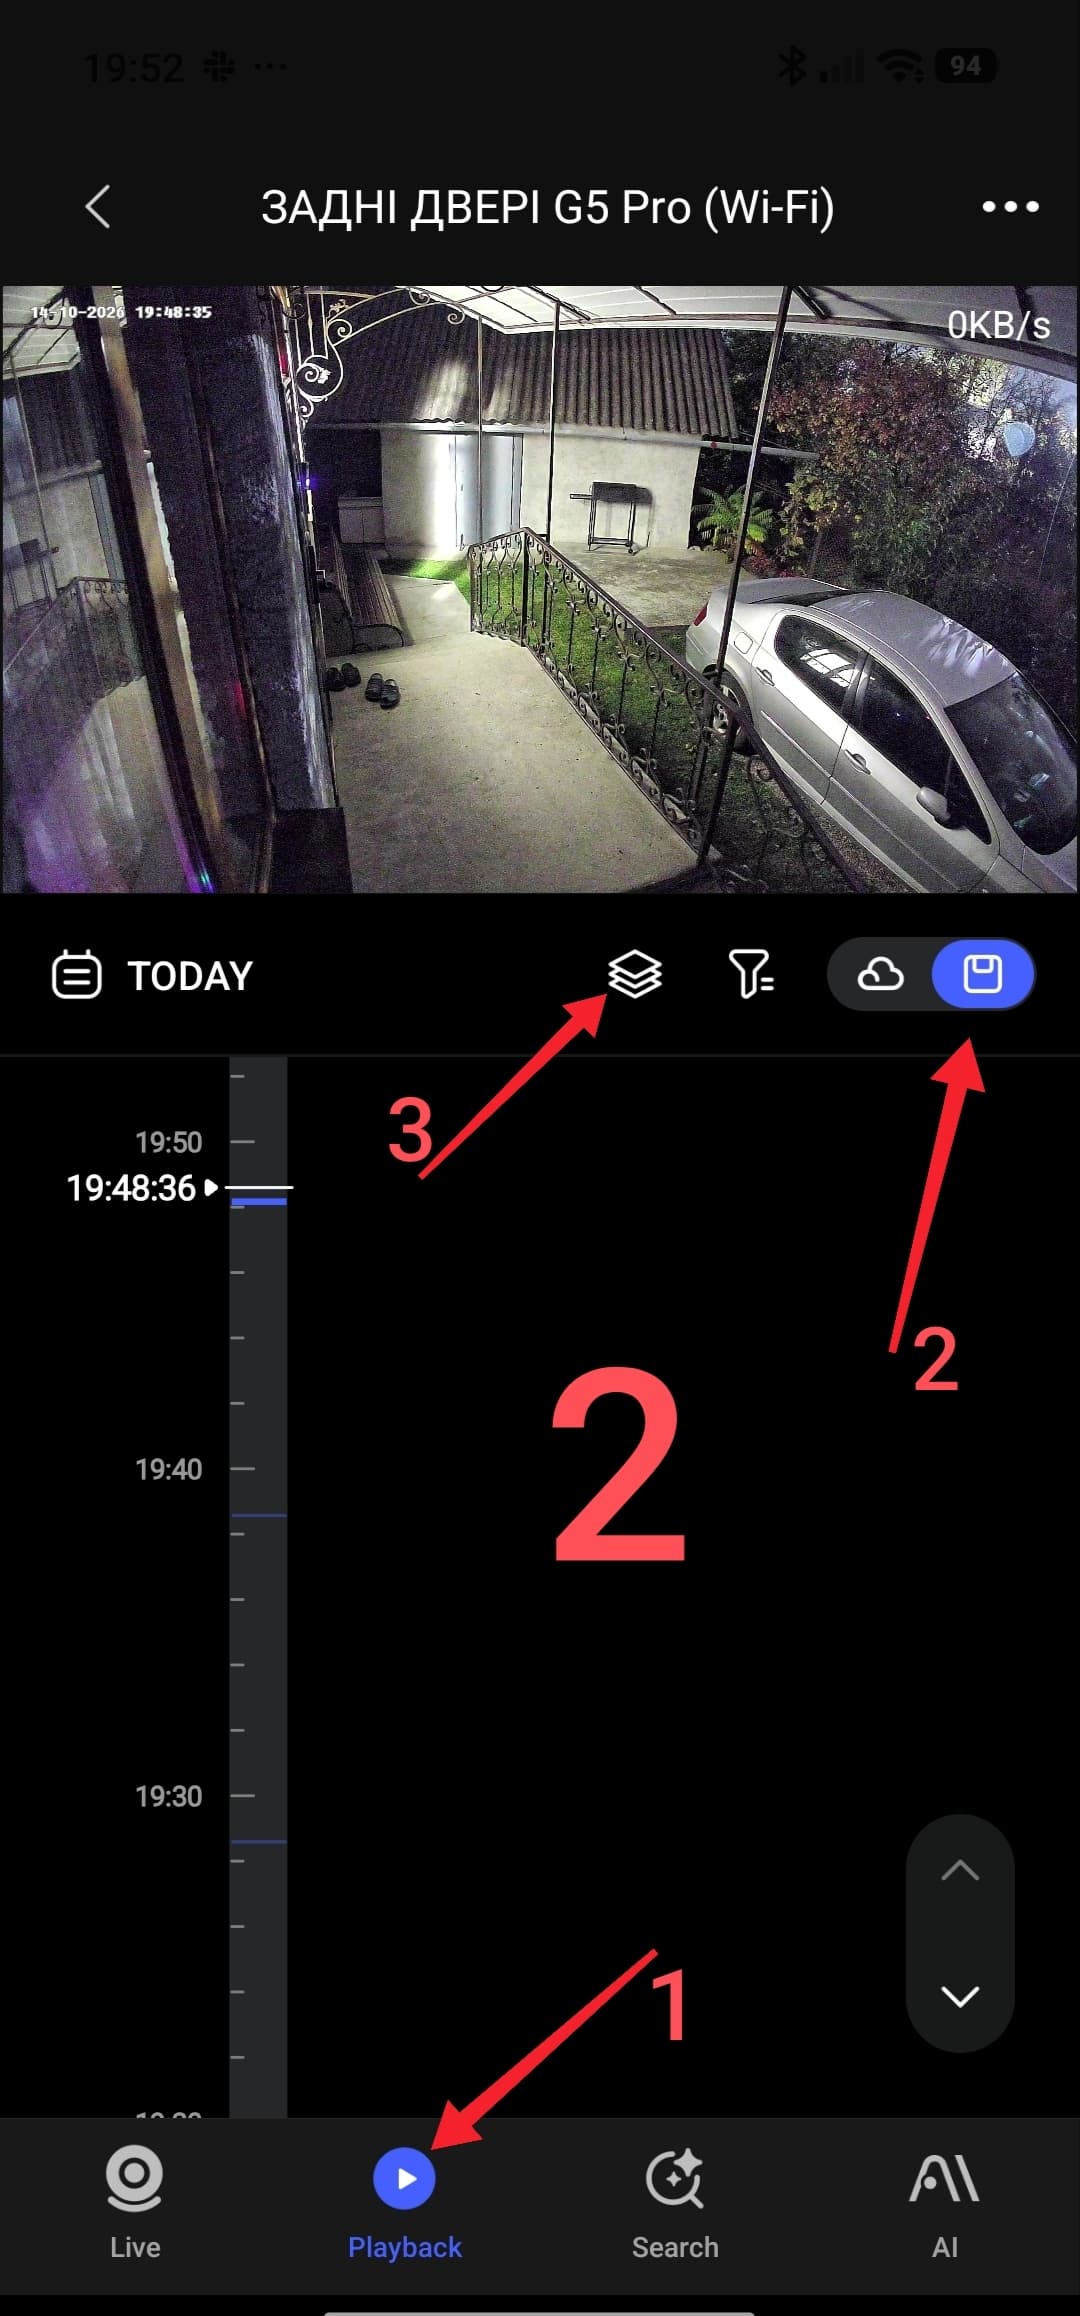
Select the playback section (1), then choose local storage (2) and the image icon (3).
Fig. 2
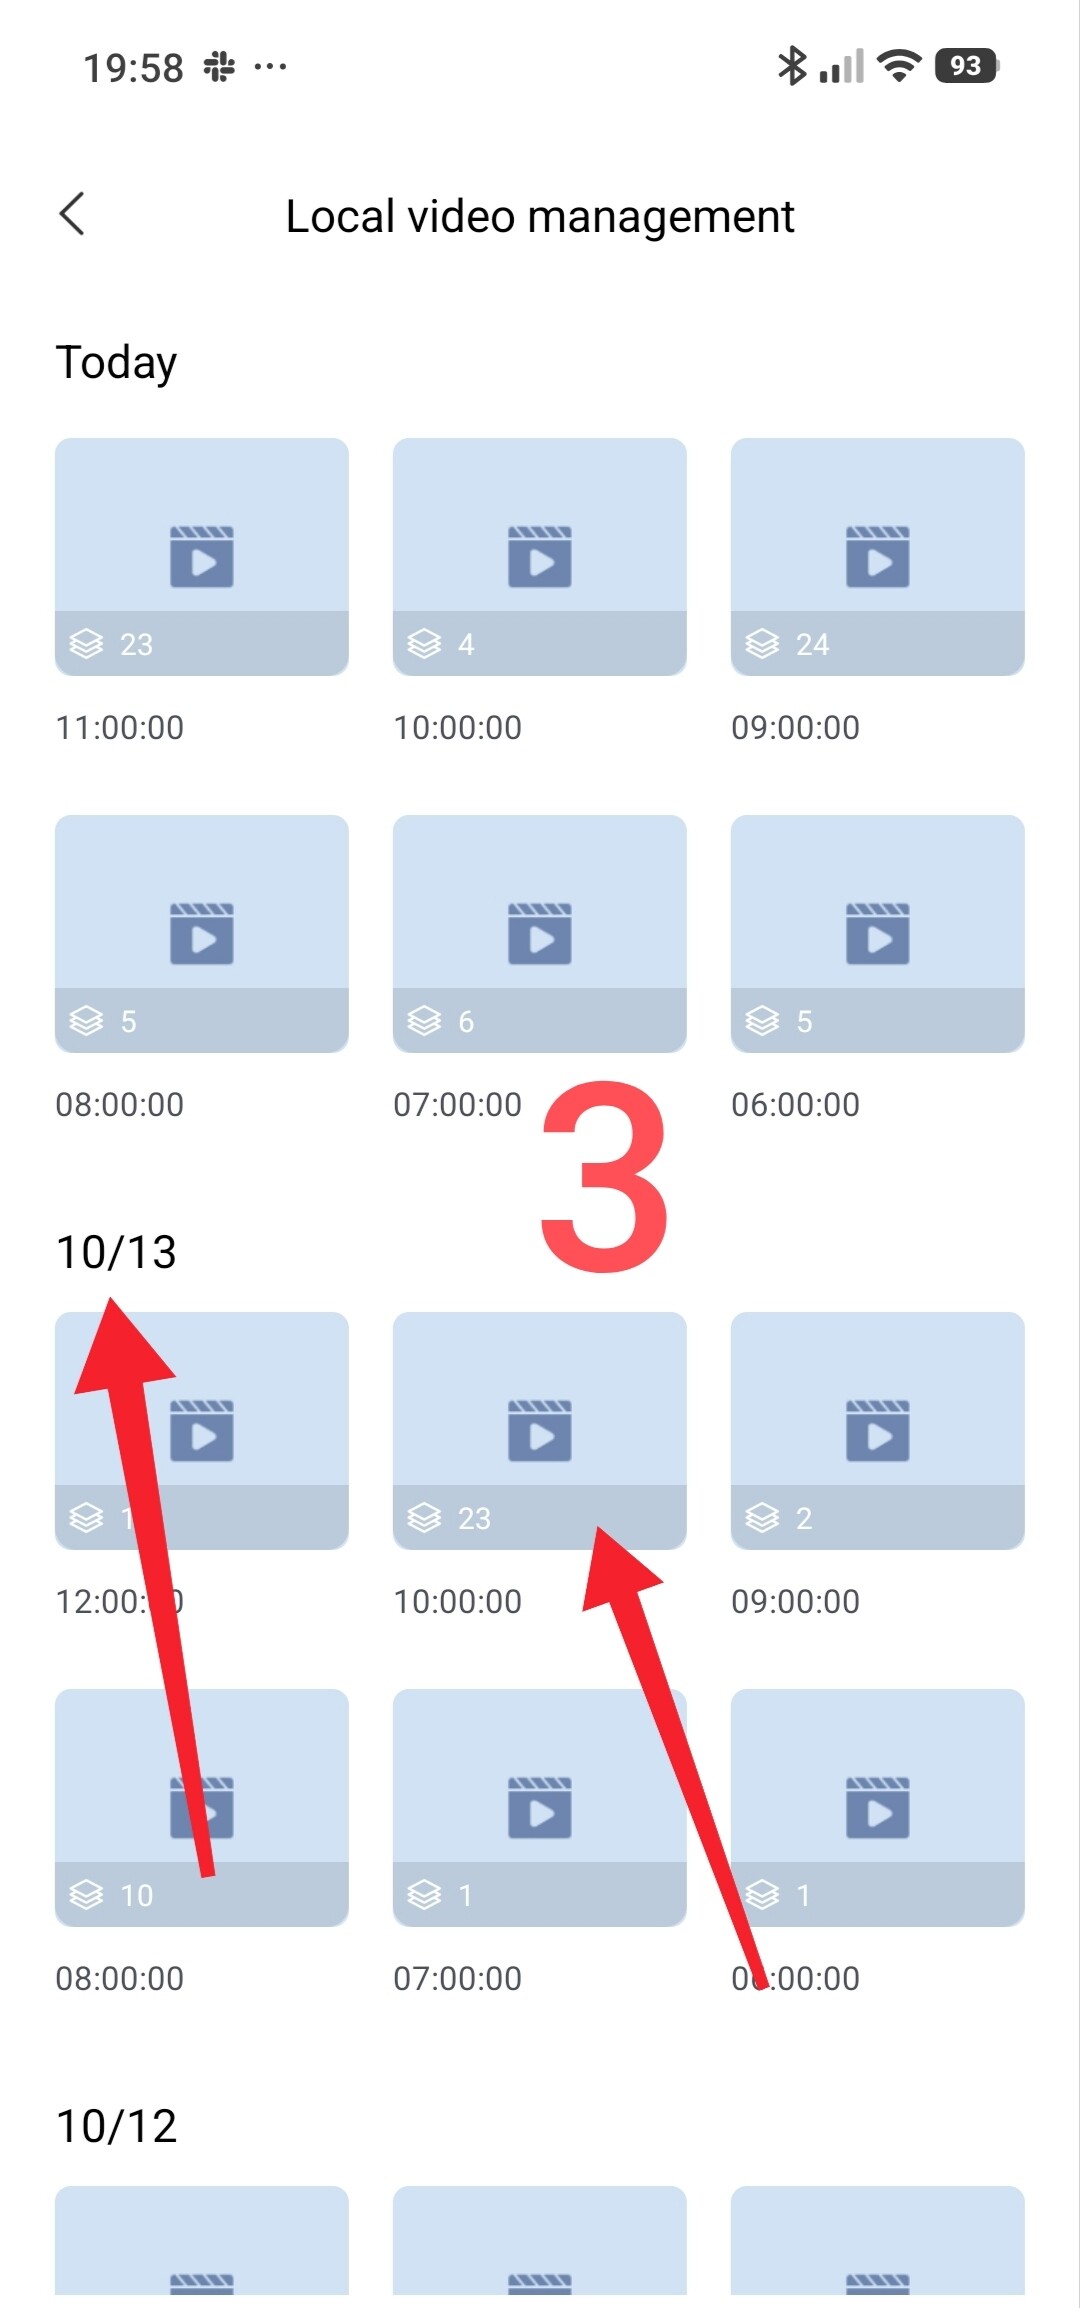
In the window that appears, select the desired date and time. Note that the time is grouped into one-hour blocks (a folder containing a one-hour video archive). For this example, I selected October 13, 2026, at 10:00 AM.
Fig. 3
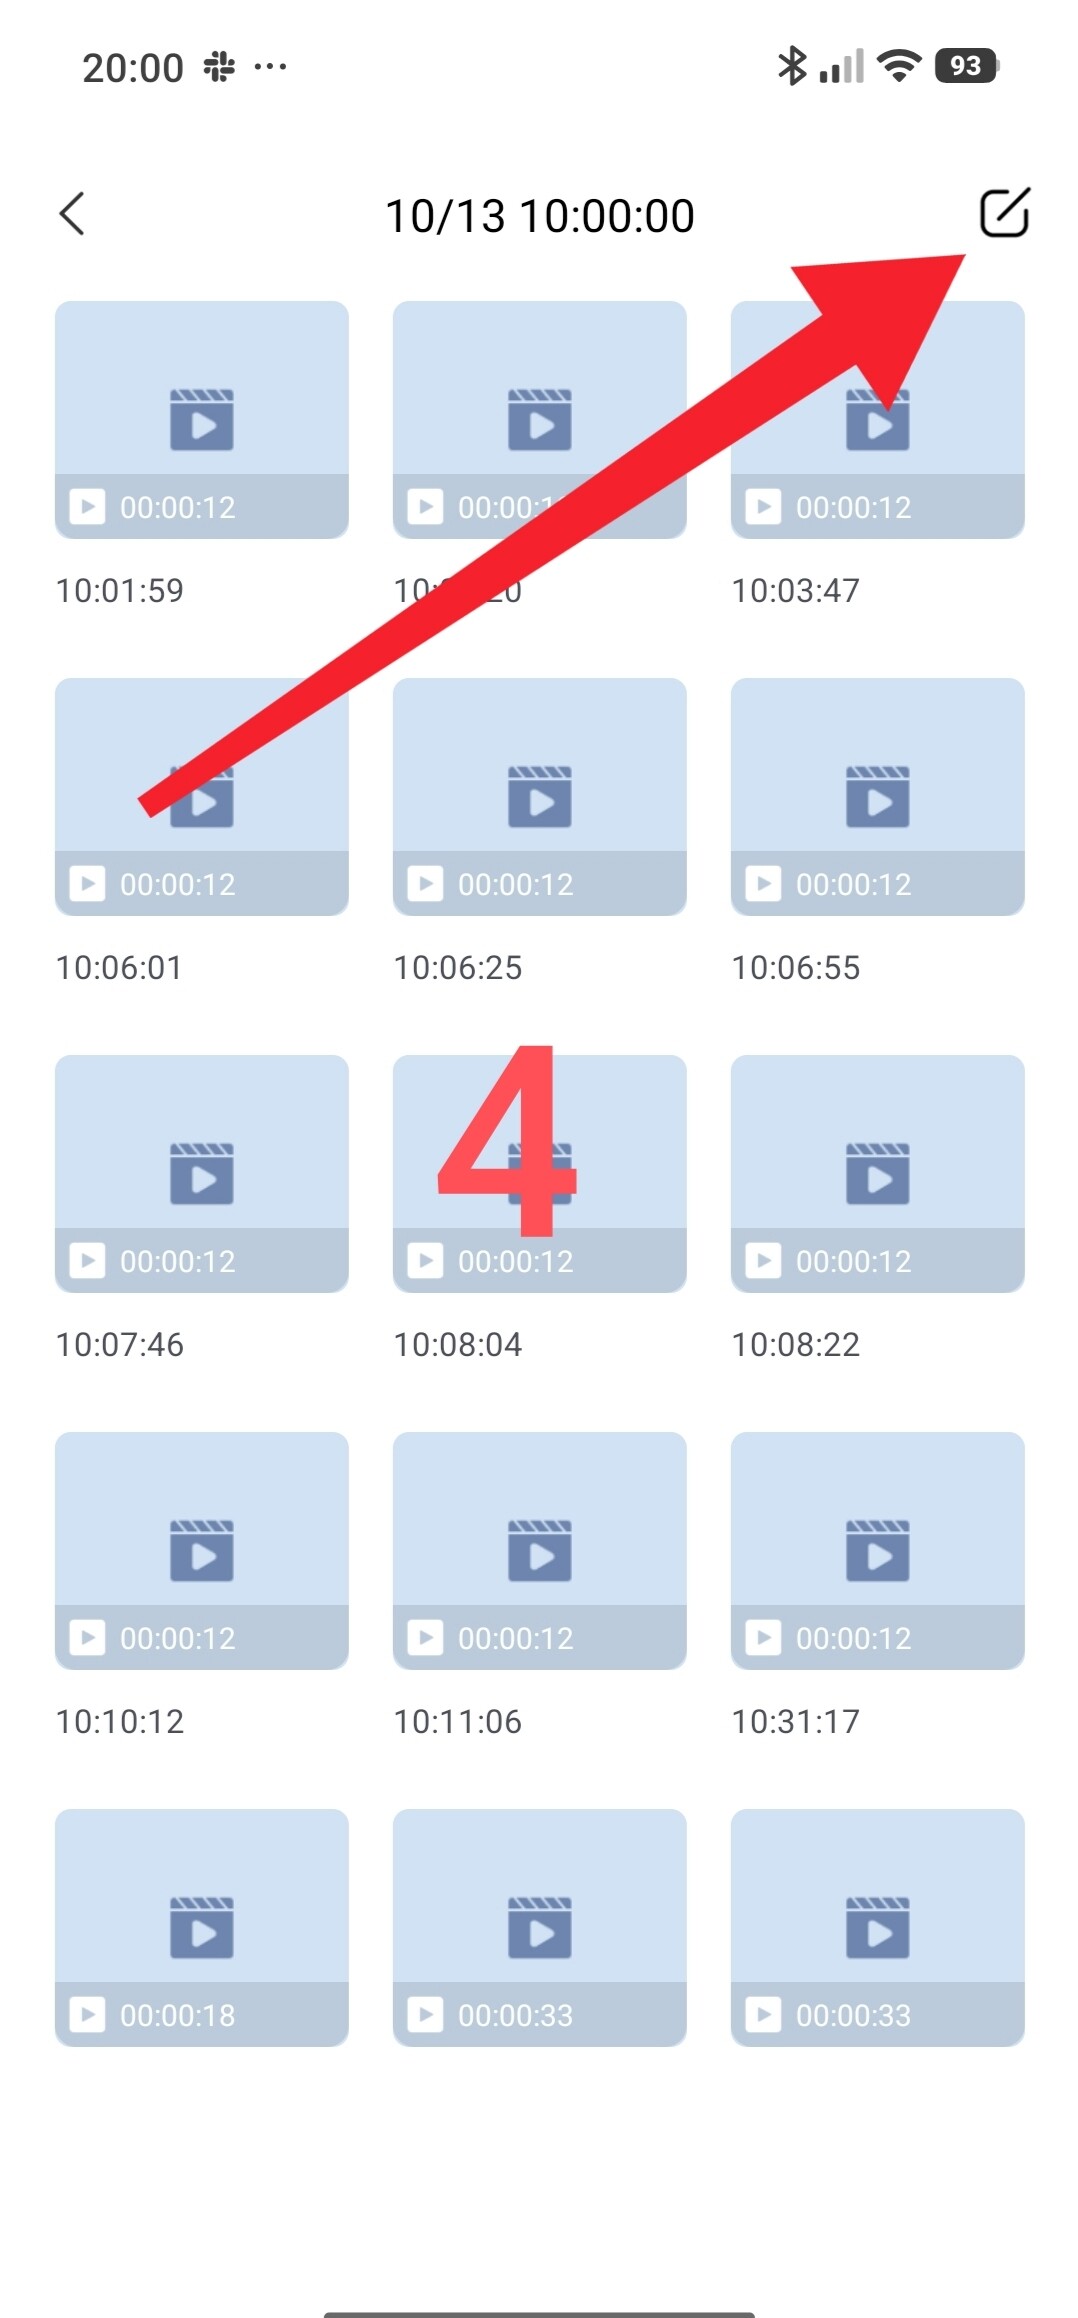
In the next window, you need to tap the edit icon to bring up the selection function. Fig. 4
Select the files you want to save and tap the “Download file” icon. You can also select all files with a single tap.
Fig. 5
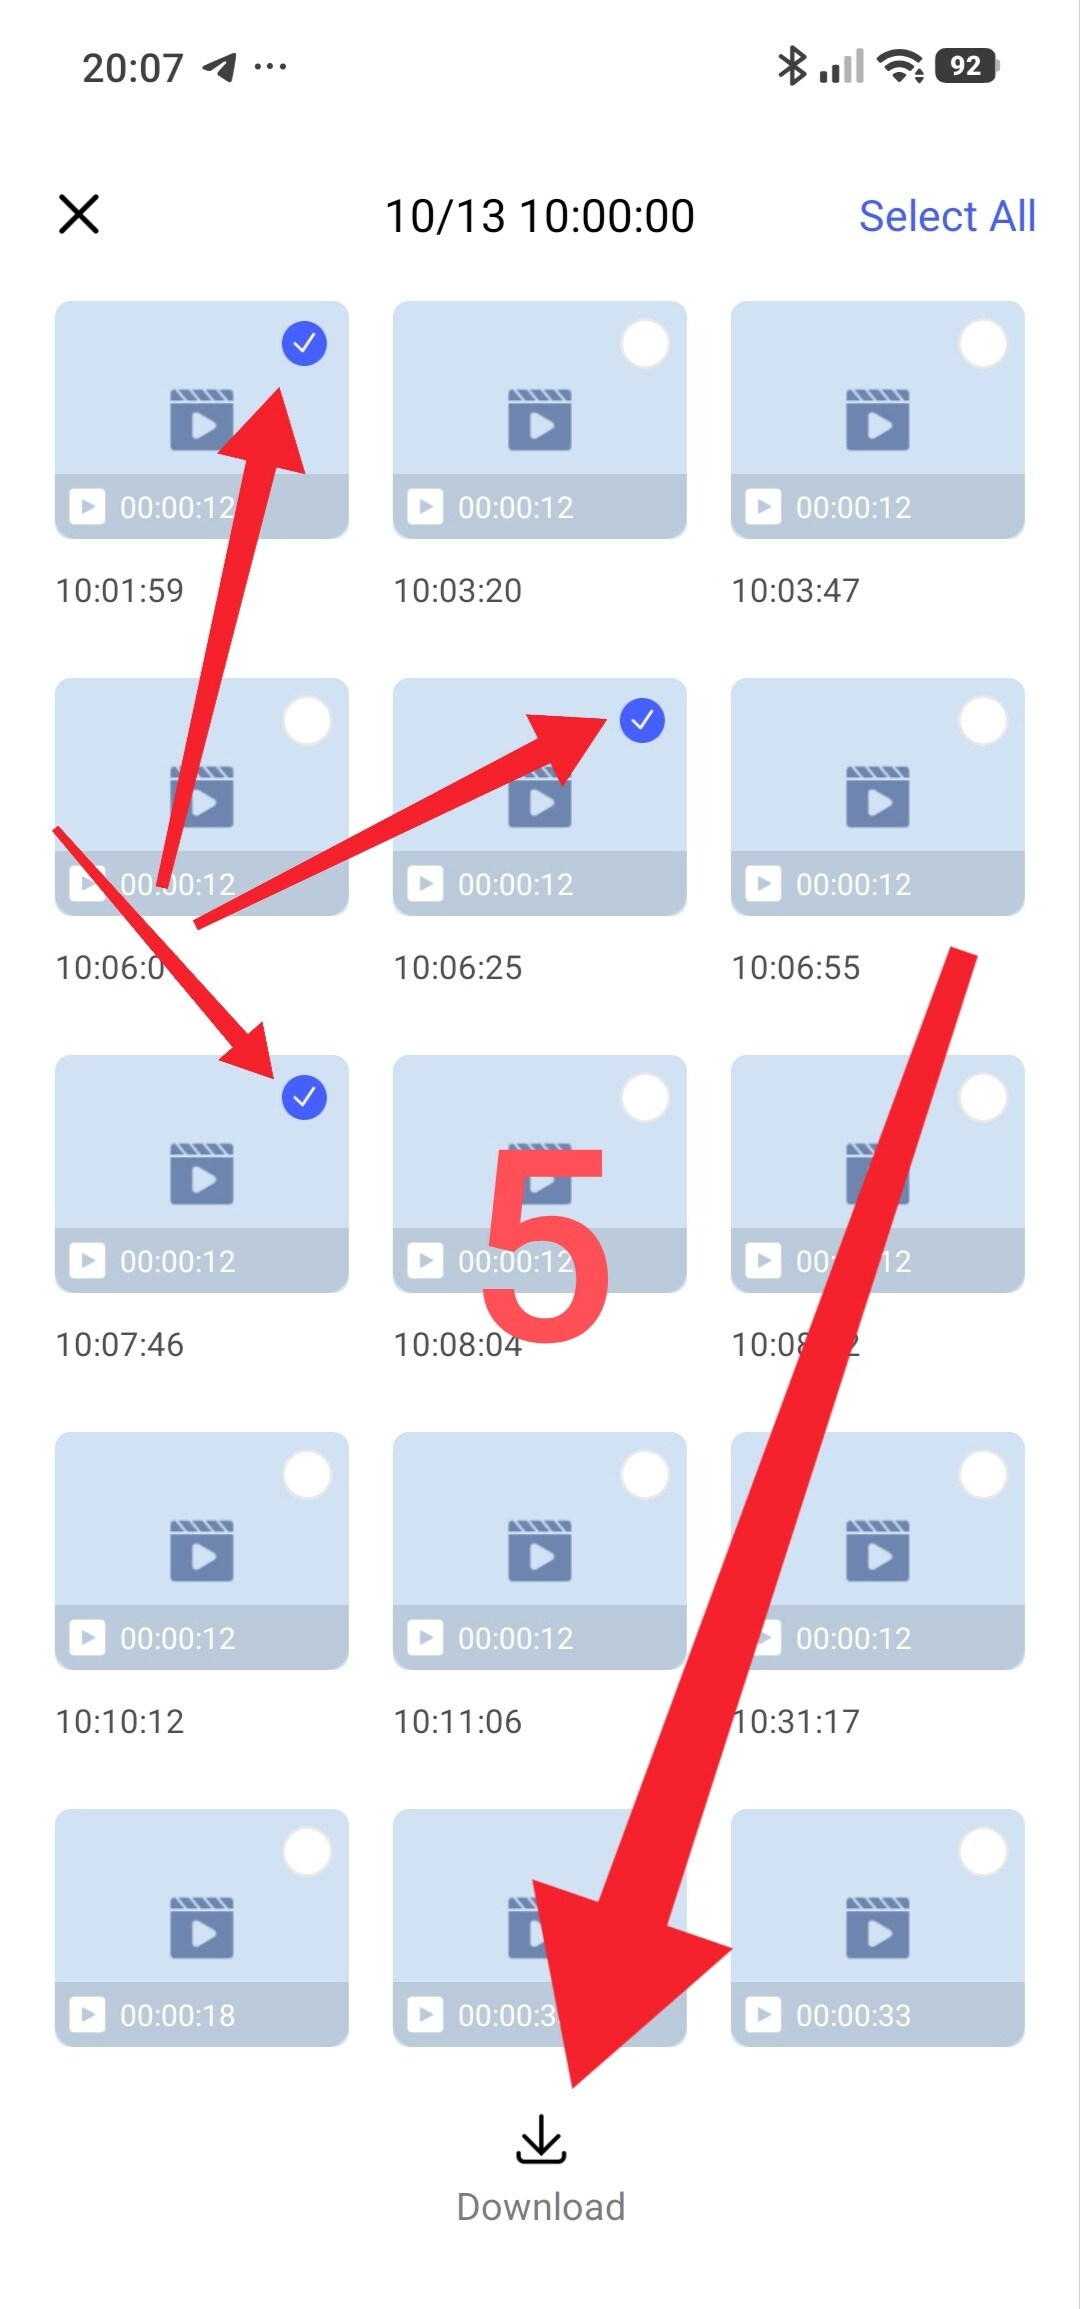
That’s it—the video file is saved to your phone (or other device).
I will wrap up this lesson/explanation here. It turned out to be quite brief, but I hope very effective.
In the next lesson, we will look at how to add a face for tracking by Aqara cameras.
Thank you for reading.
__Aqara camera setup tutorial/explanation (for dummies). Part 1, "Detection Settings"