Lesson 1 Automation 2.0. Lesson 1. Introduction
Good afternoon, today’s lesson is devoted to creating automations related to lighting control. Perhaps I will not surprise a certain group of readers with this lesson, but it will be useful for beginners.
Let’s consider the use of the following devices:
- motion sensor;
- door opening sensor;
- contactless control button;
- AqaraT1 lamp.
Let’s create basic automations.
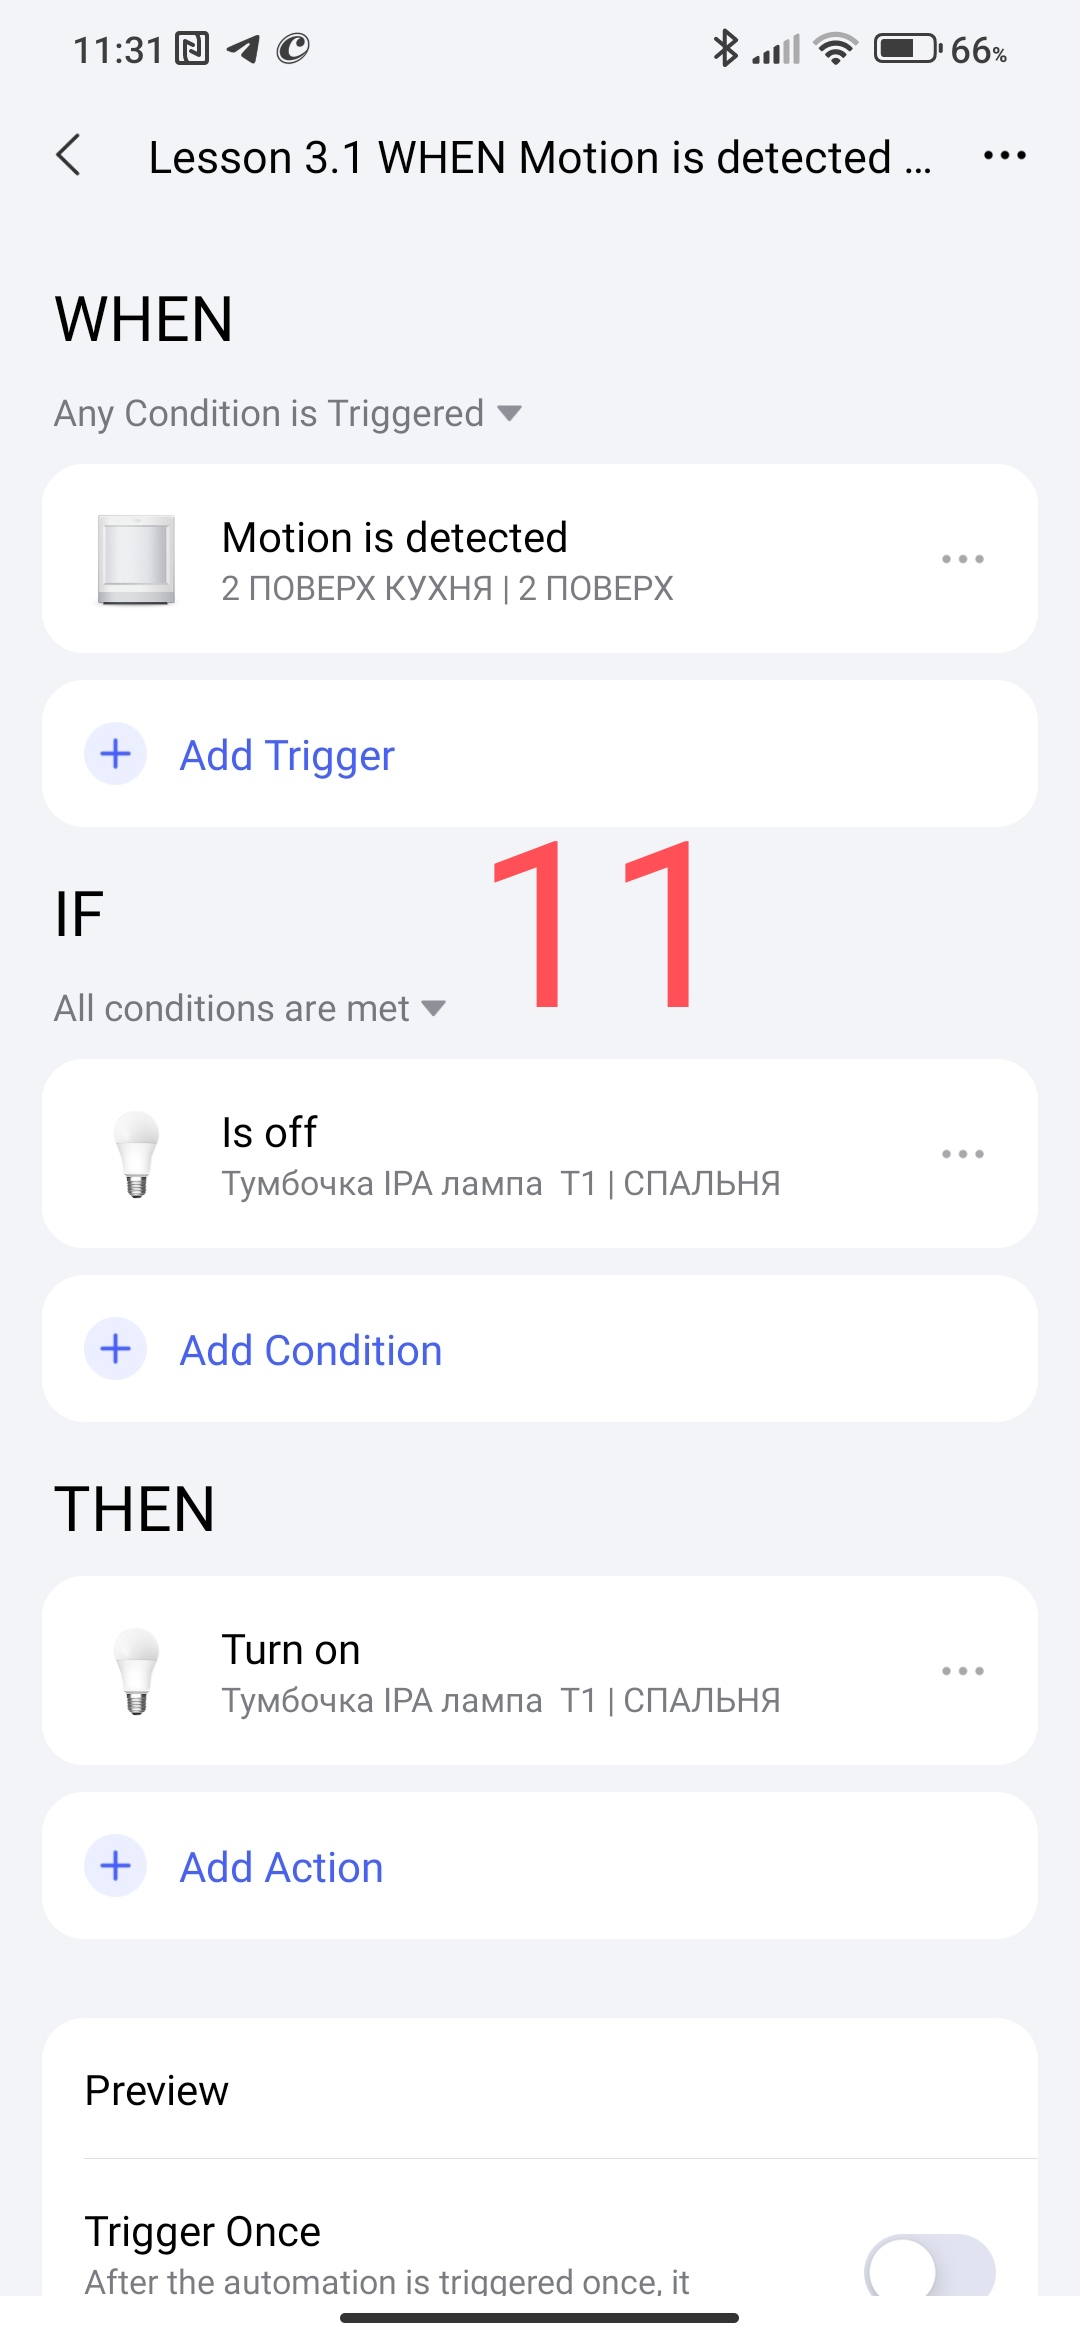
1.1 If there is movement, then turn on the light.
(I will once, in detail, show the creation process for “dummies” step by step, then I will give screenshots of ready-made automations with a description.)
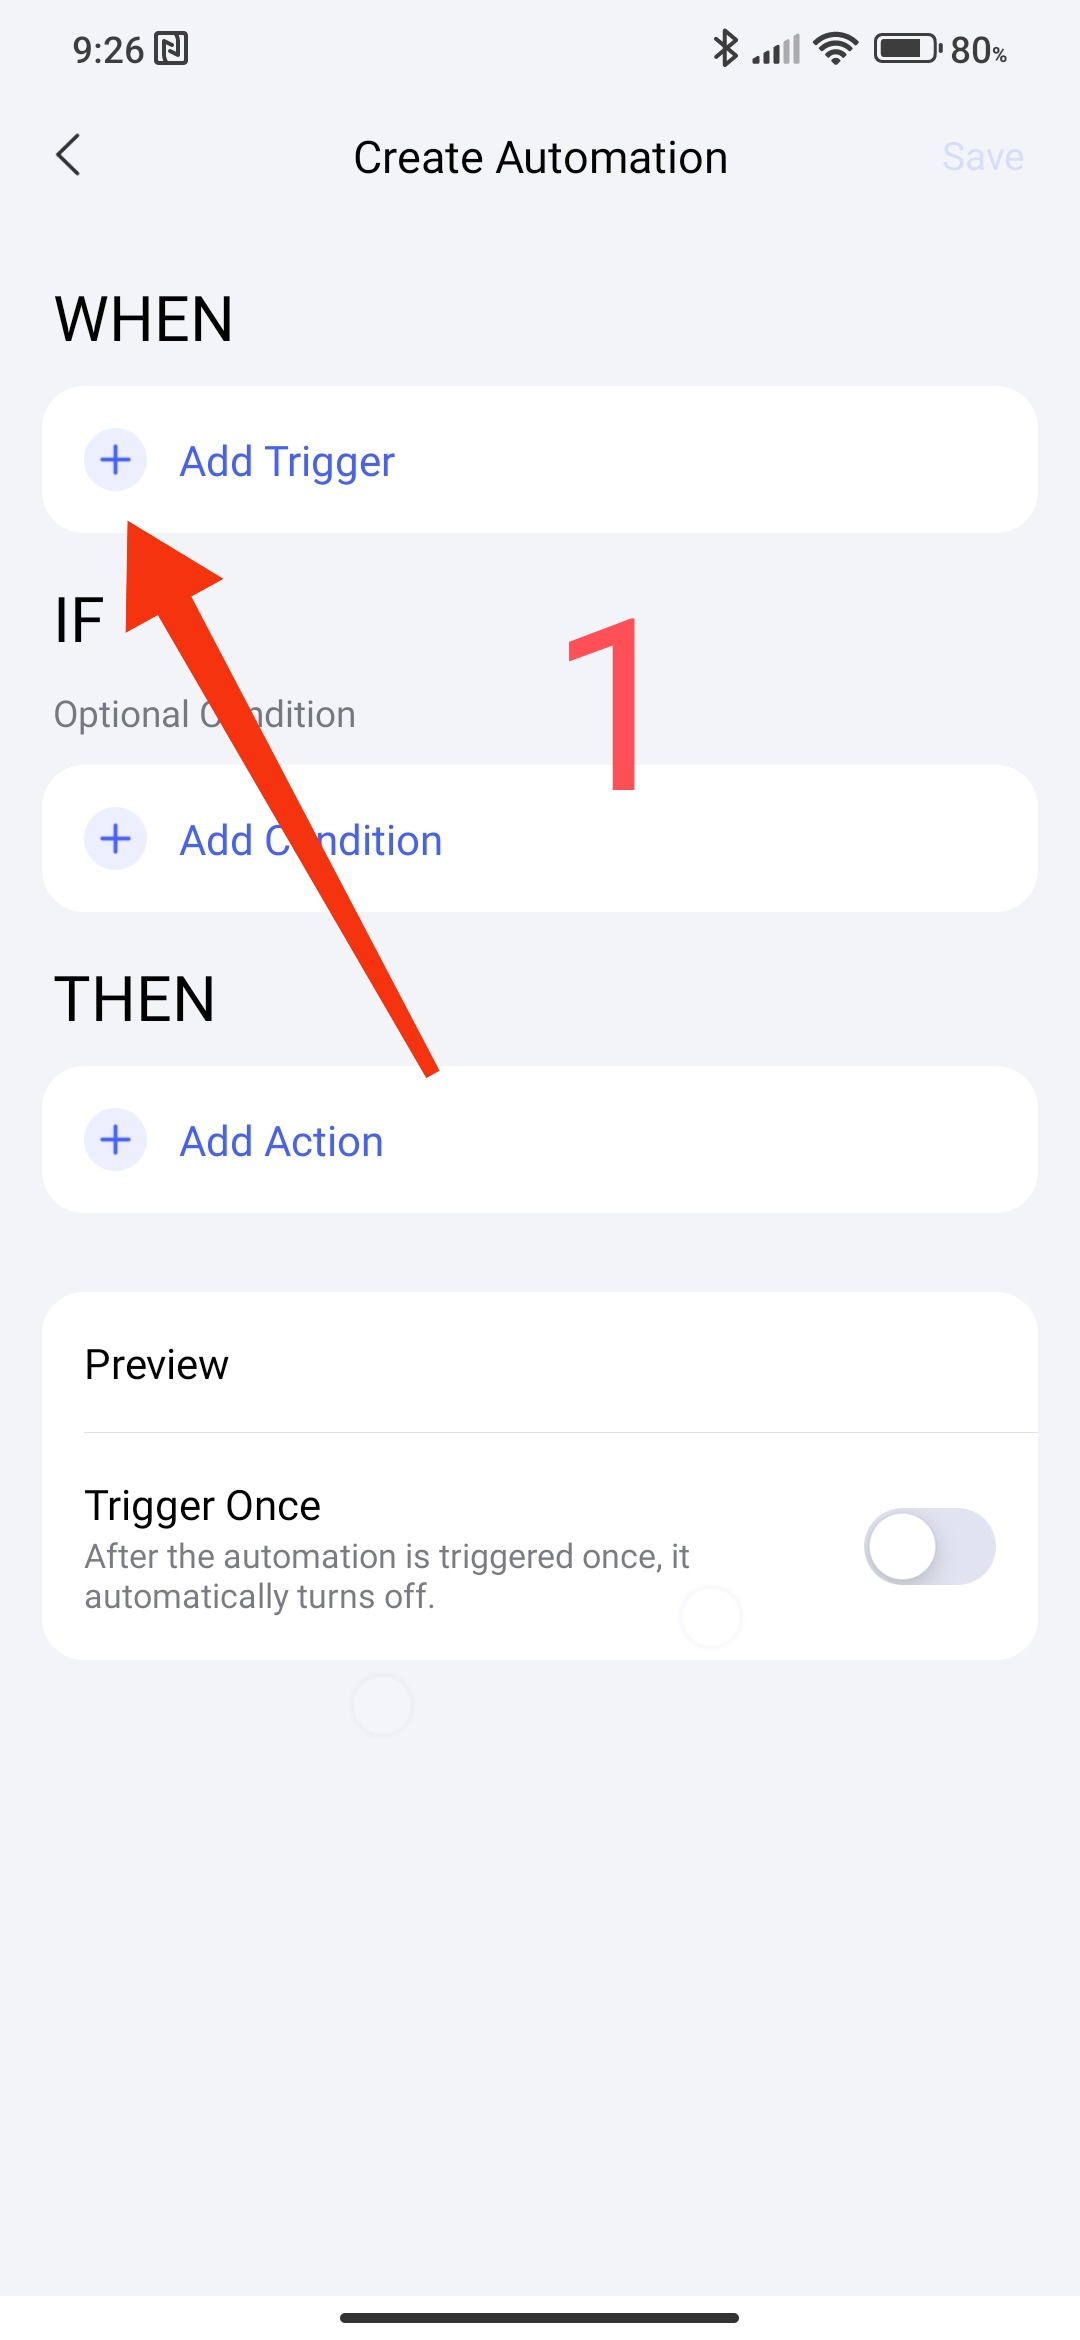
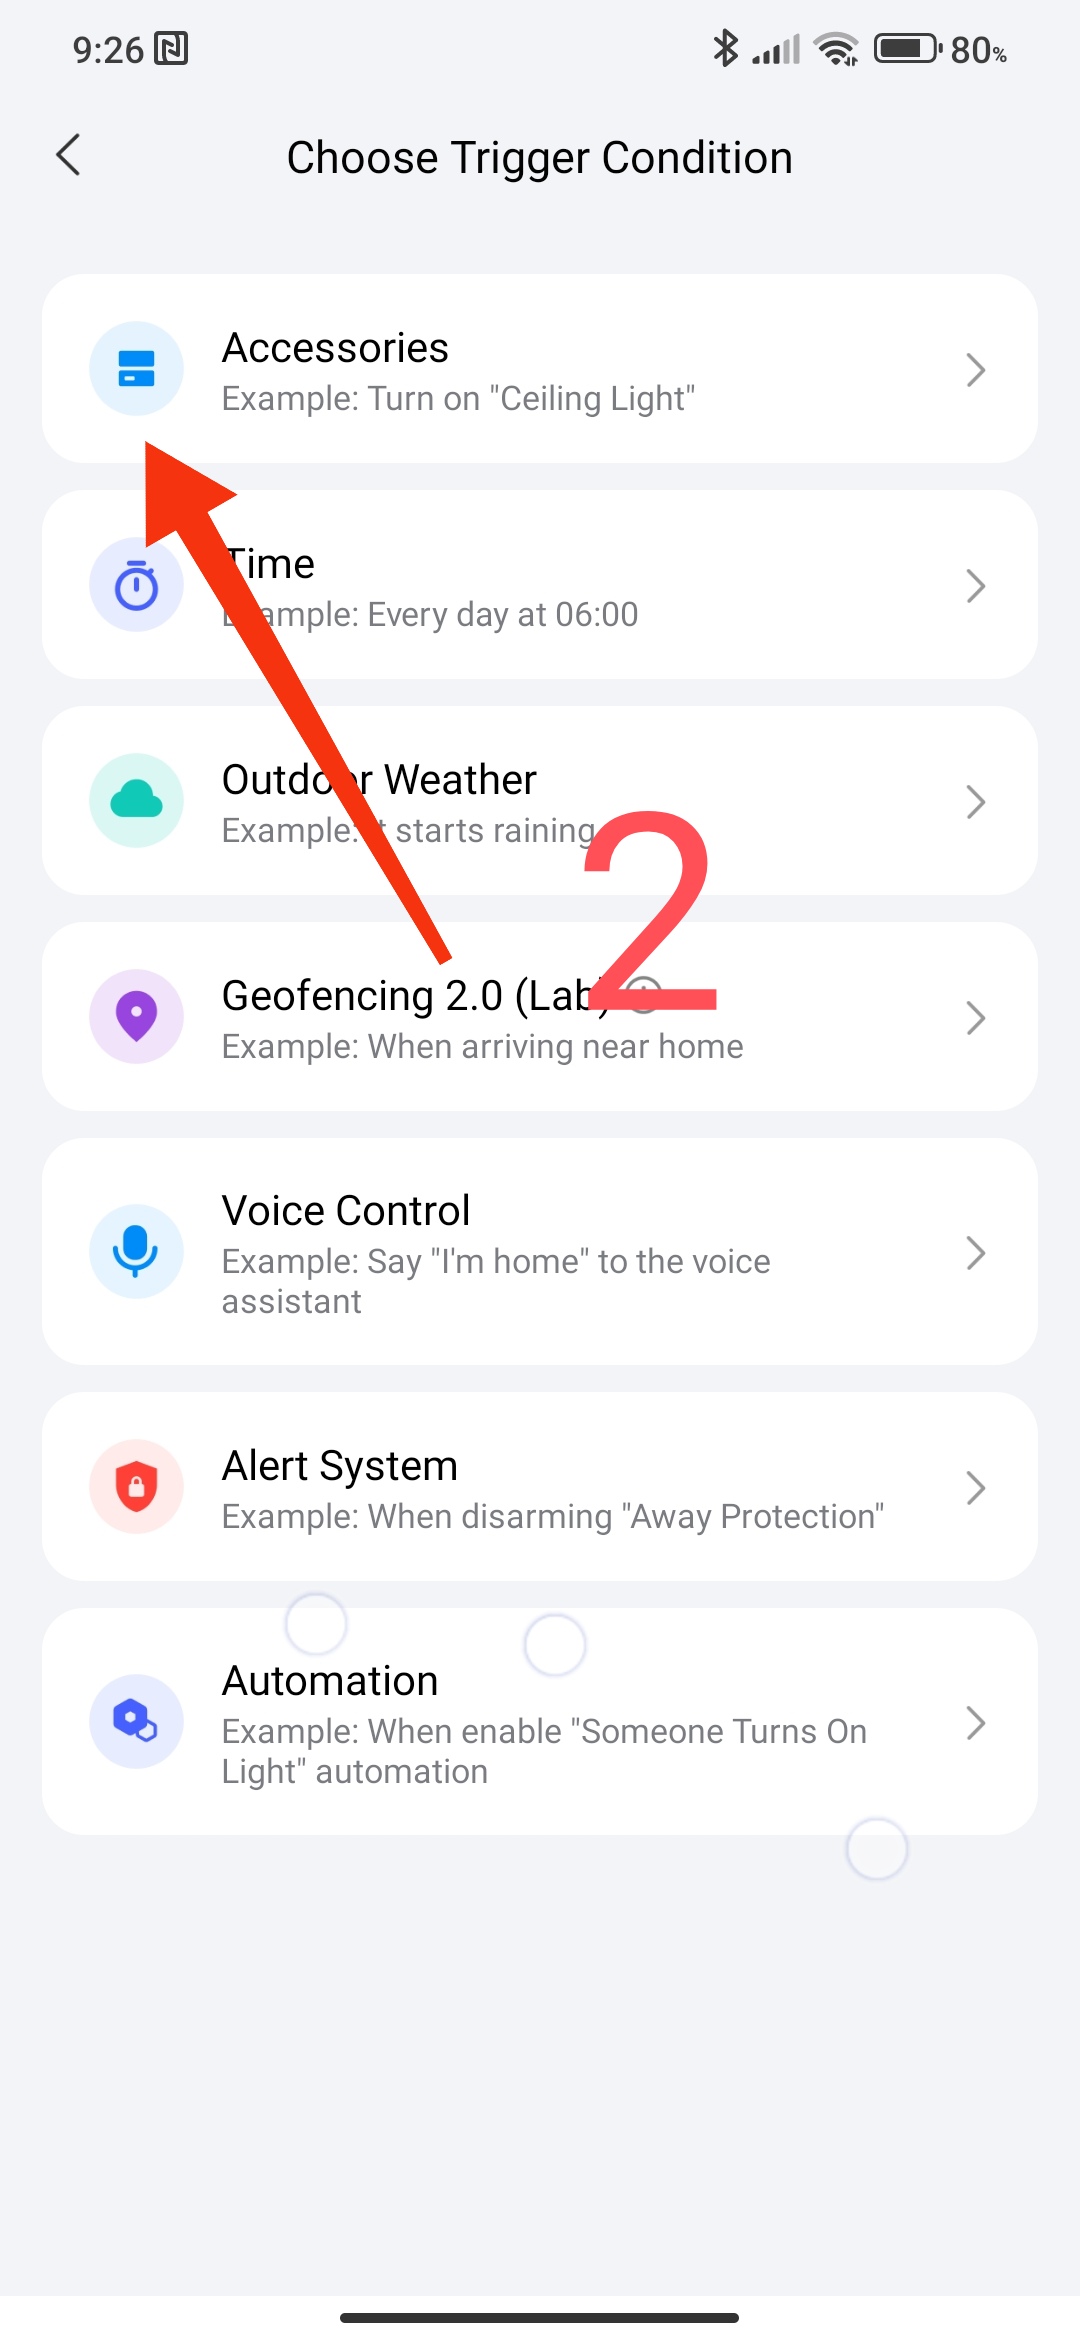
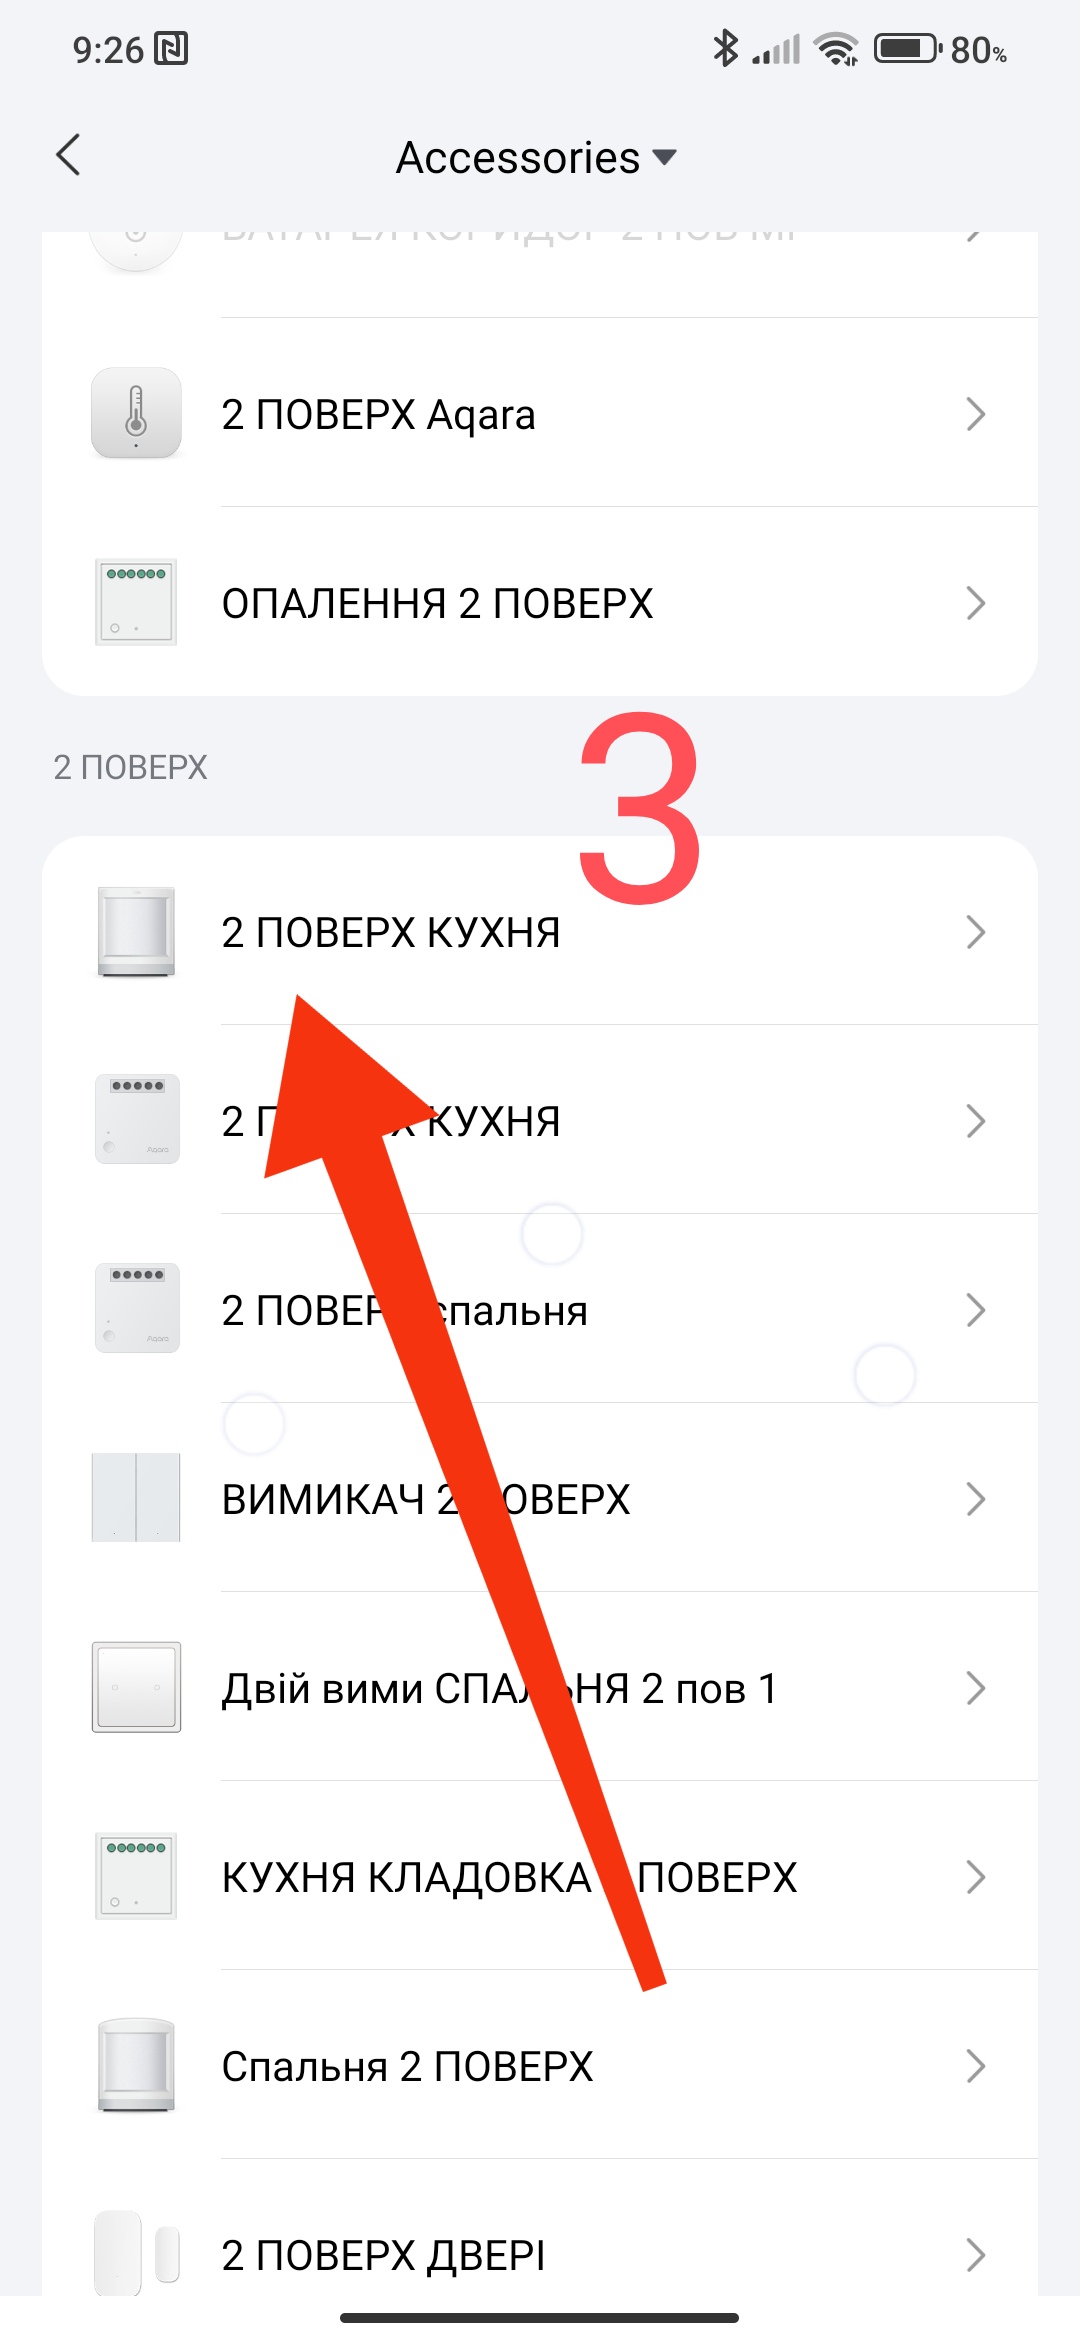
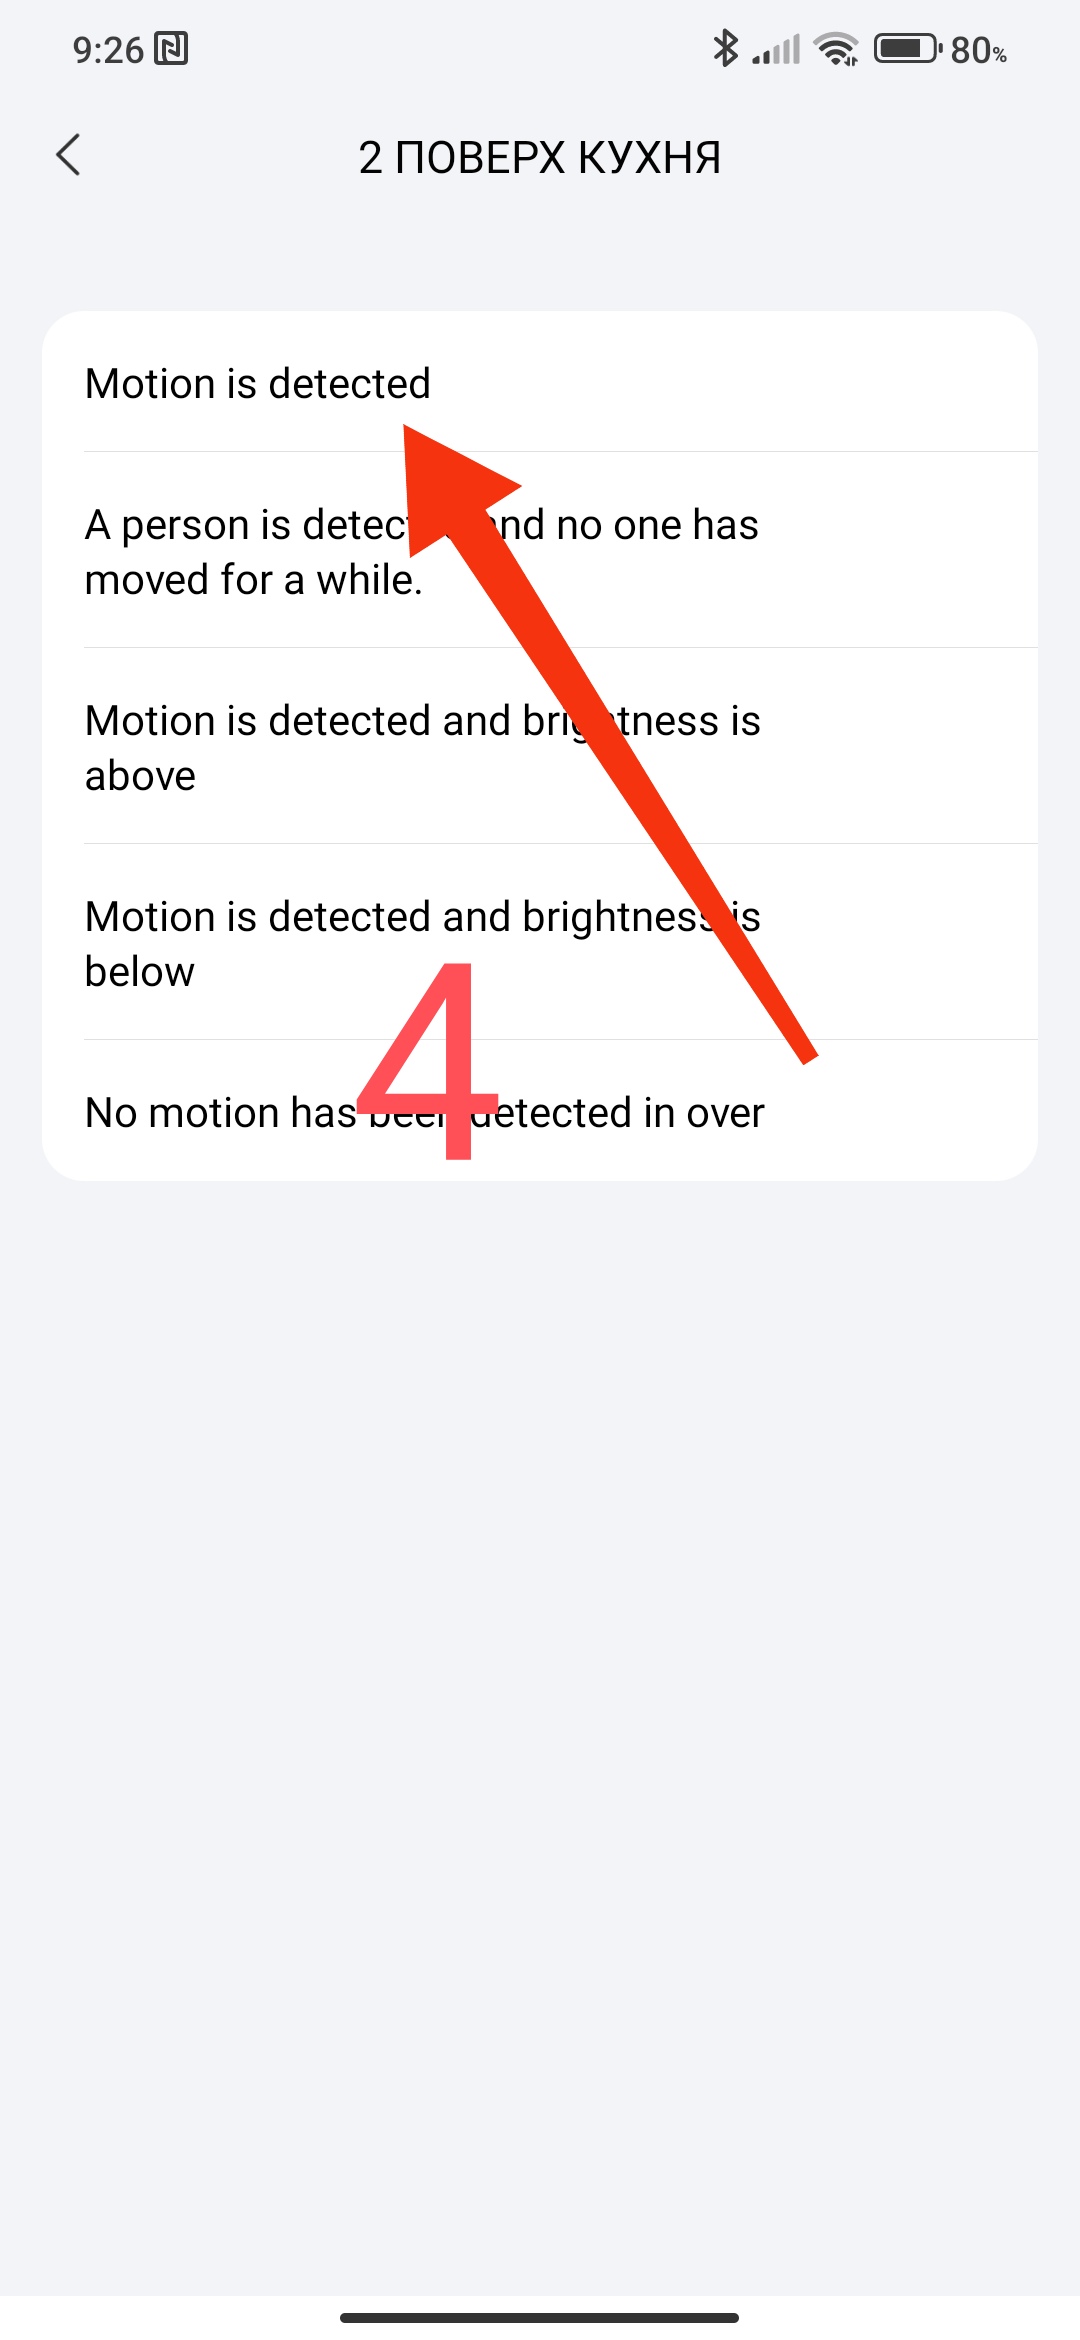
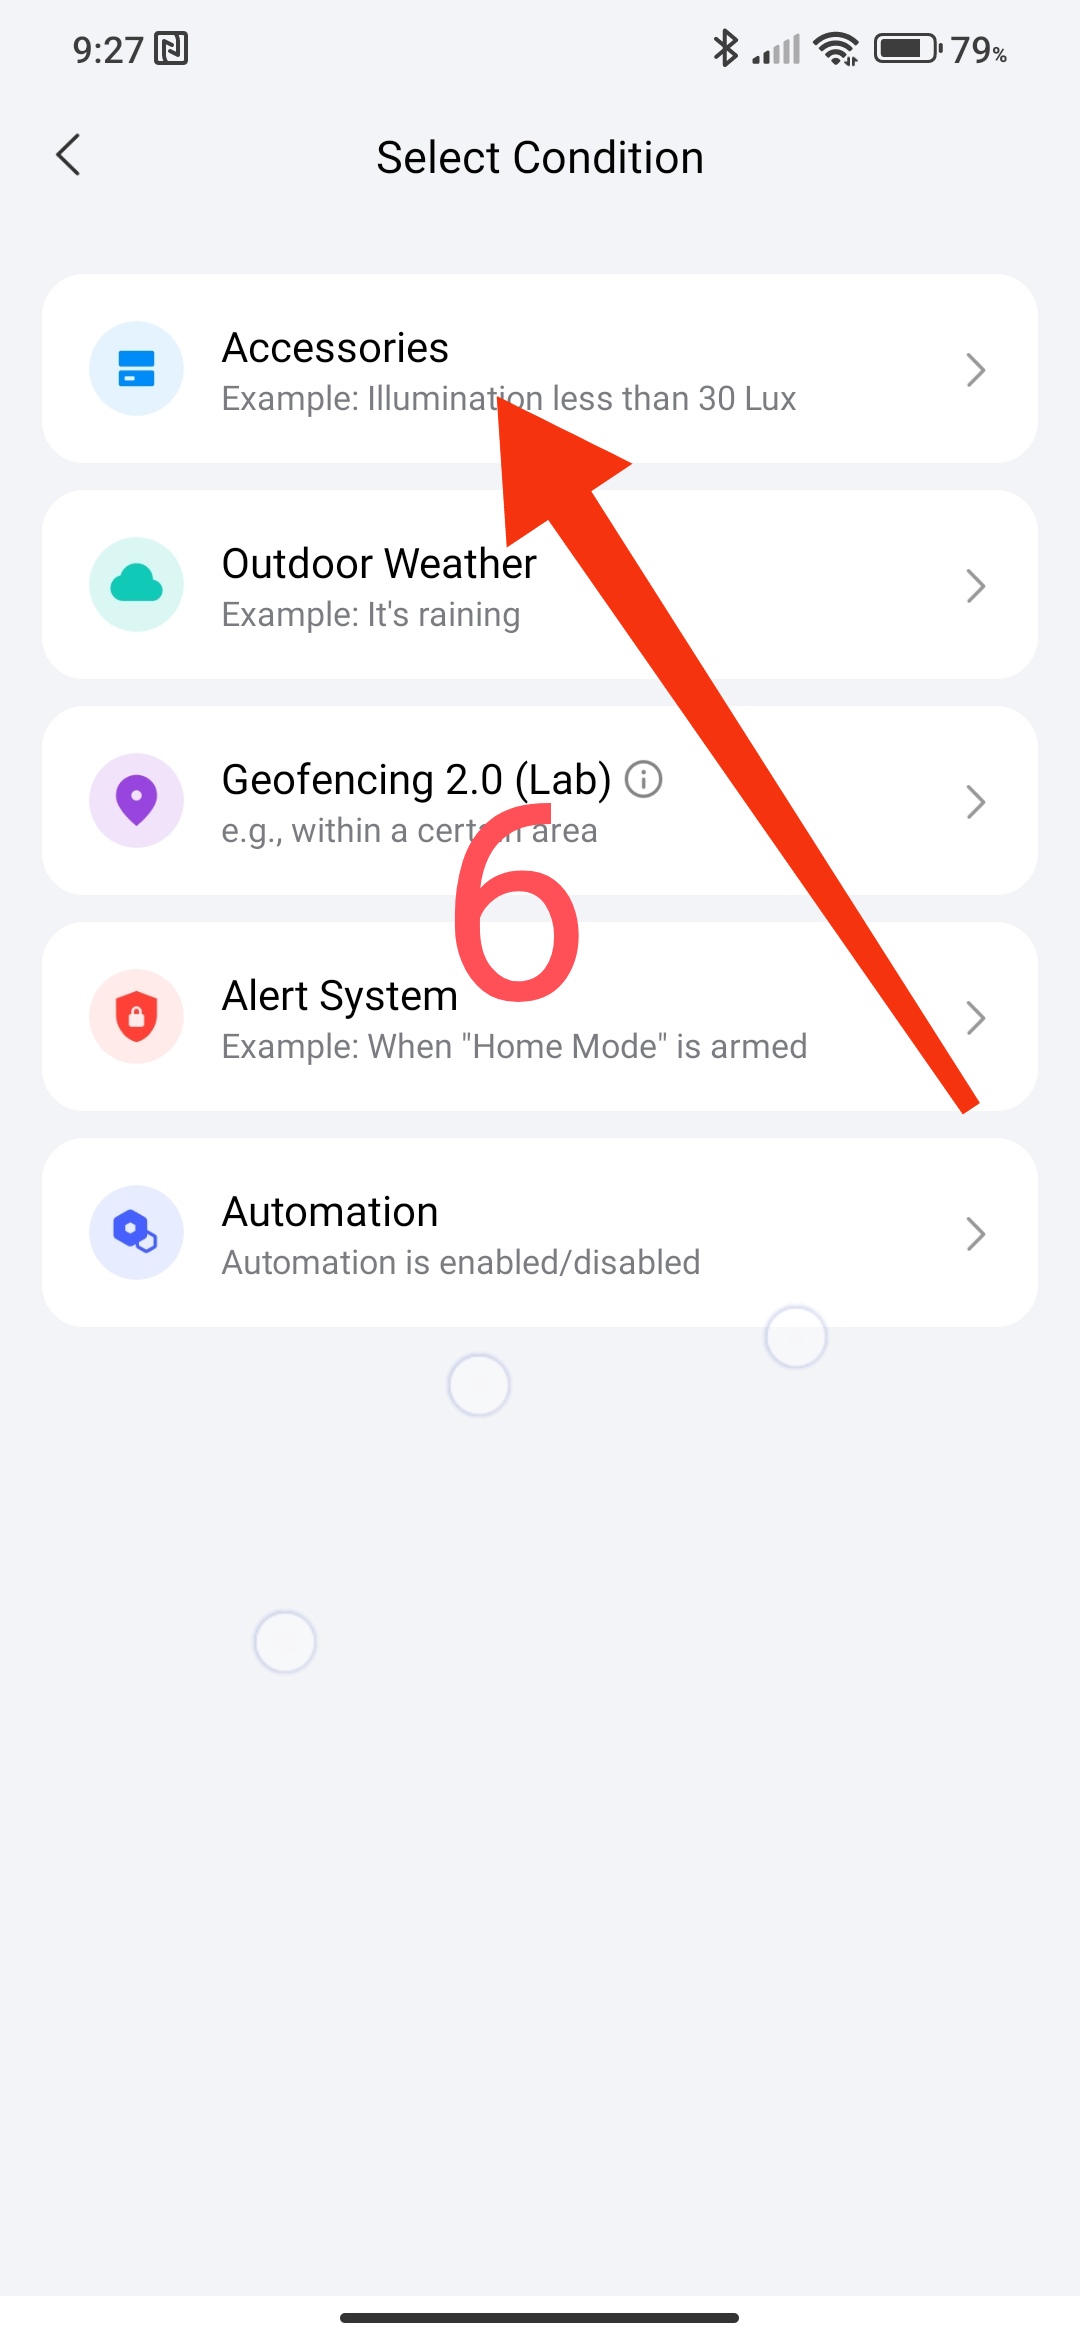
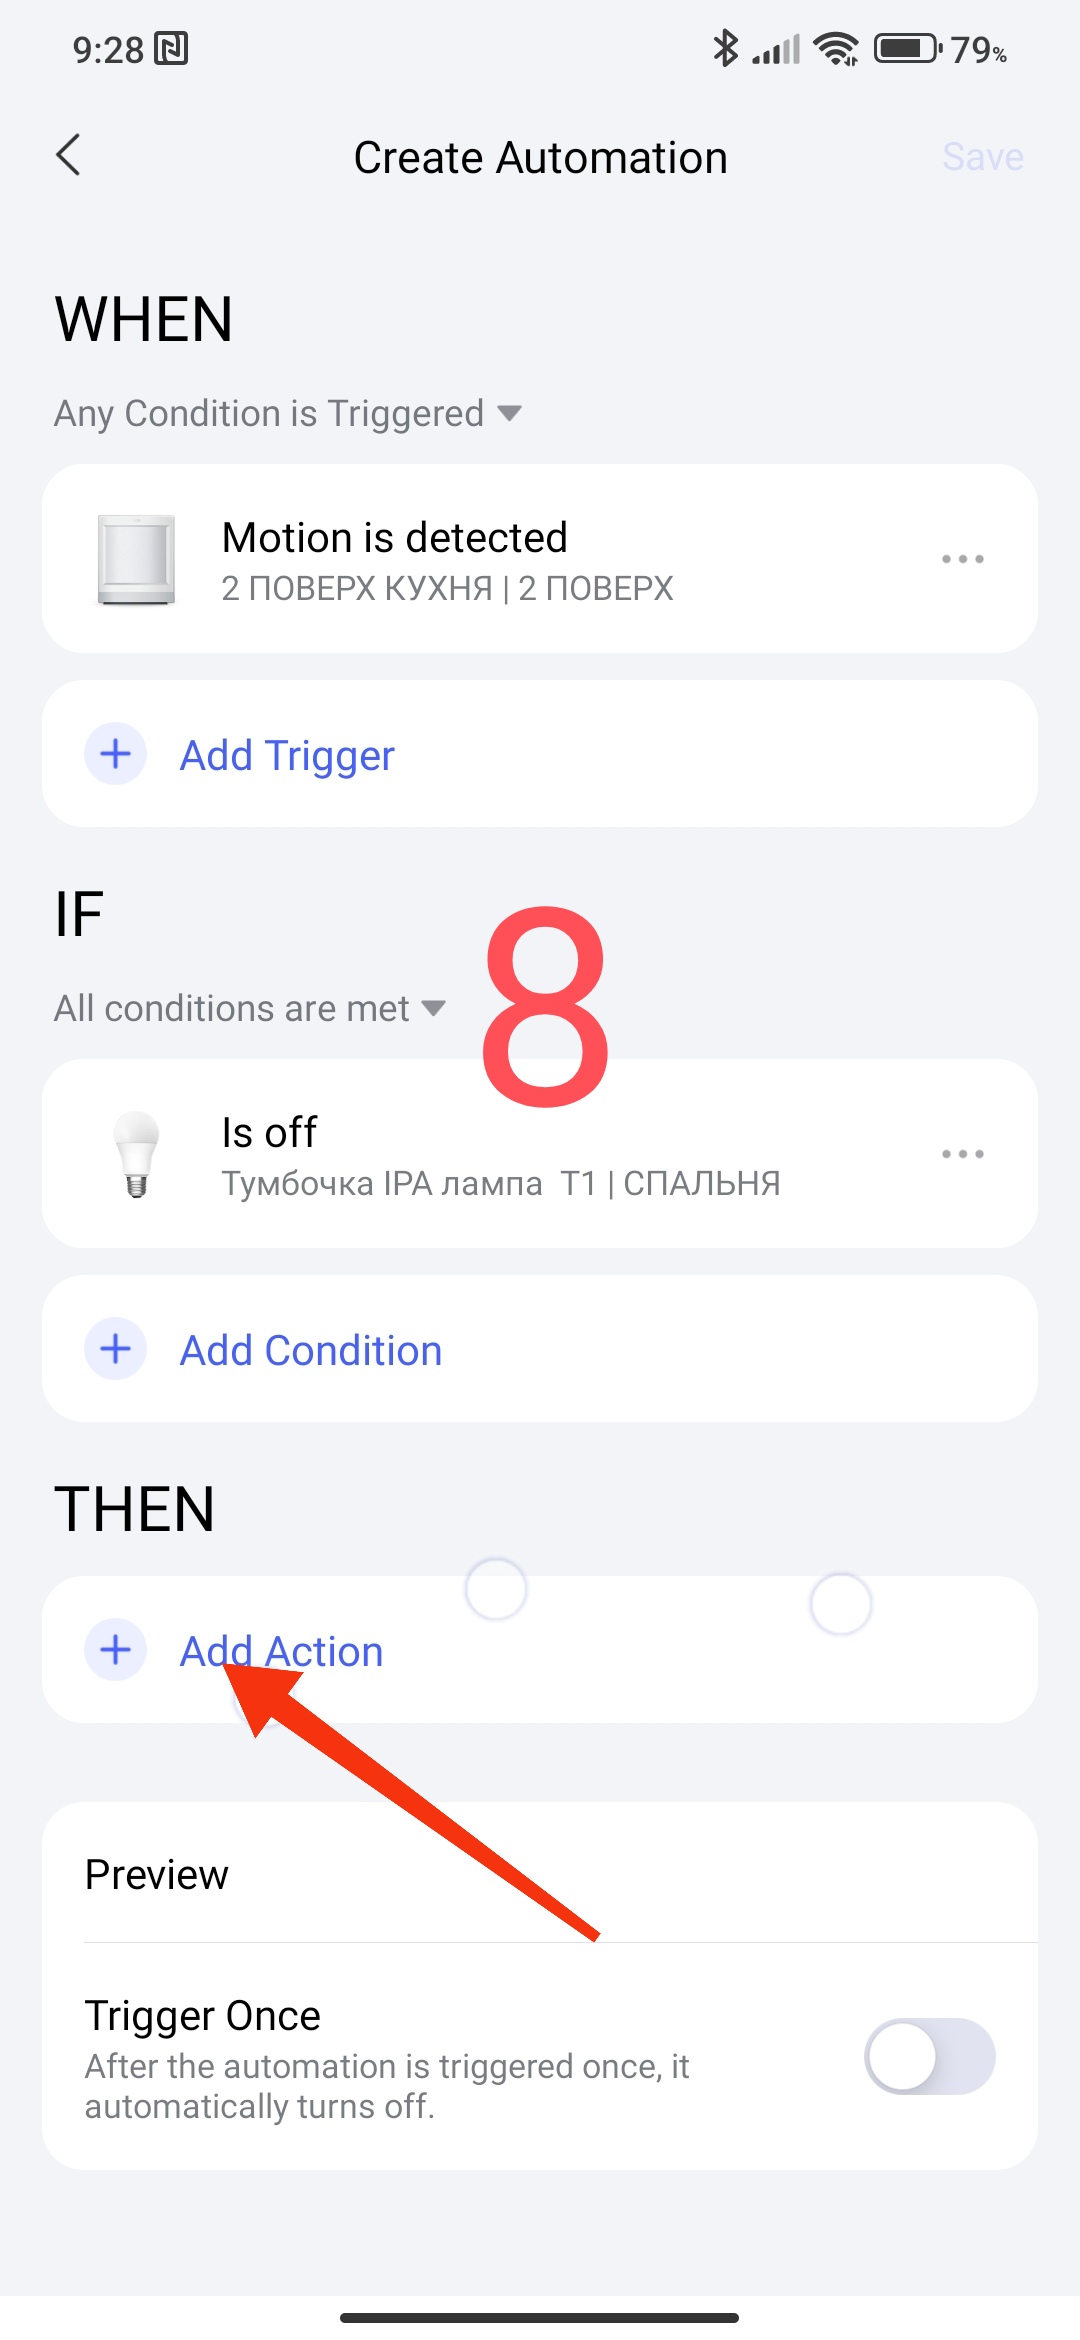
Open a new automation, in the WTEH section select the motion sensor->“there is movement”.
Fig. 1,2,3,4.
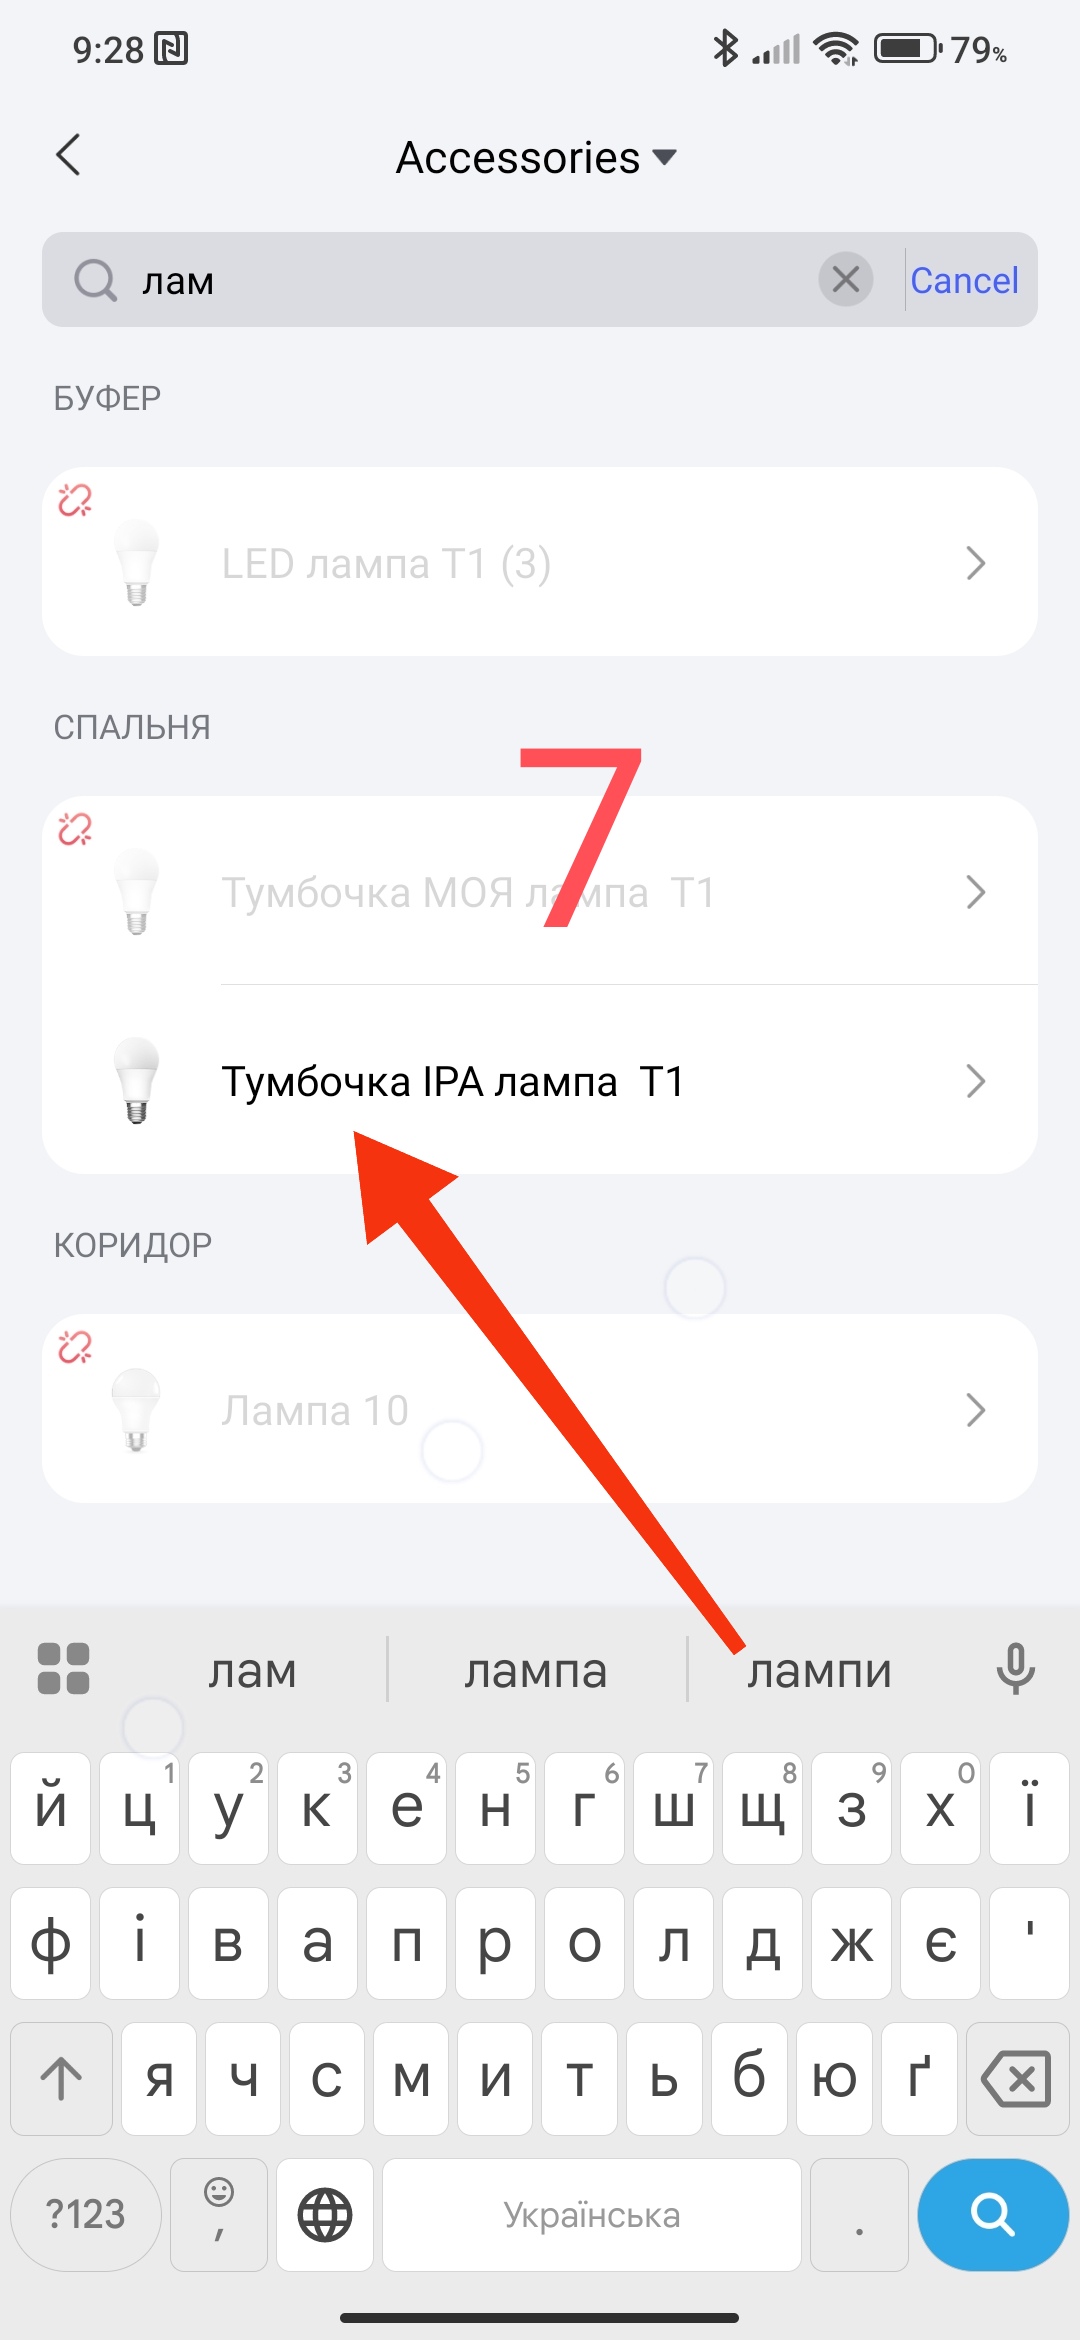
In the “IF” section, select “Off lamp”. We use this parameter so that the automation does not spam constantly and does not trigger the lamp to turn on with each movement.
Fig5,6,7

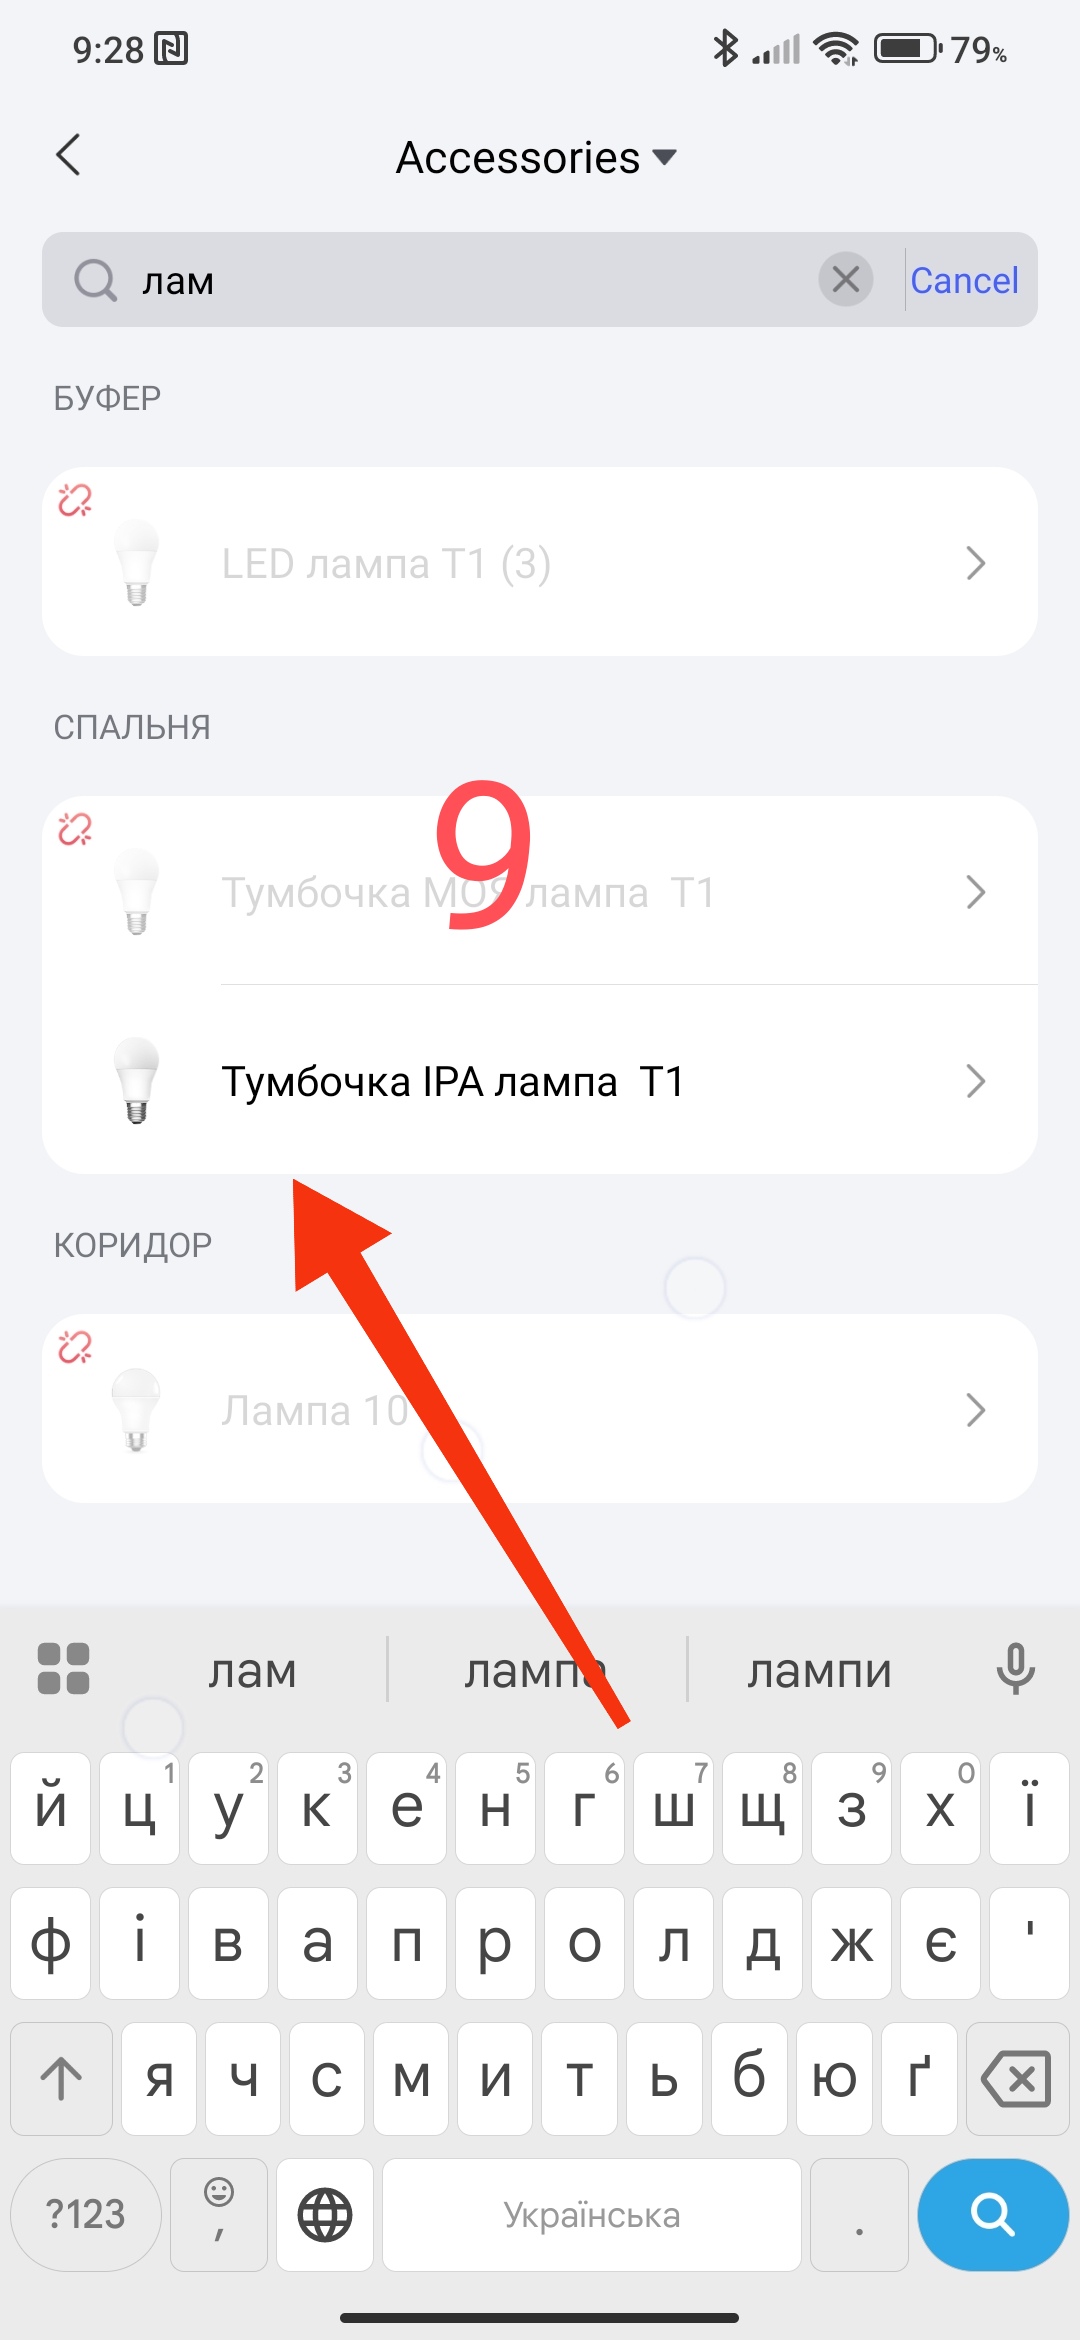
In the TNE section, select the lamp->“On lamp”
Fig8,9,10,11.

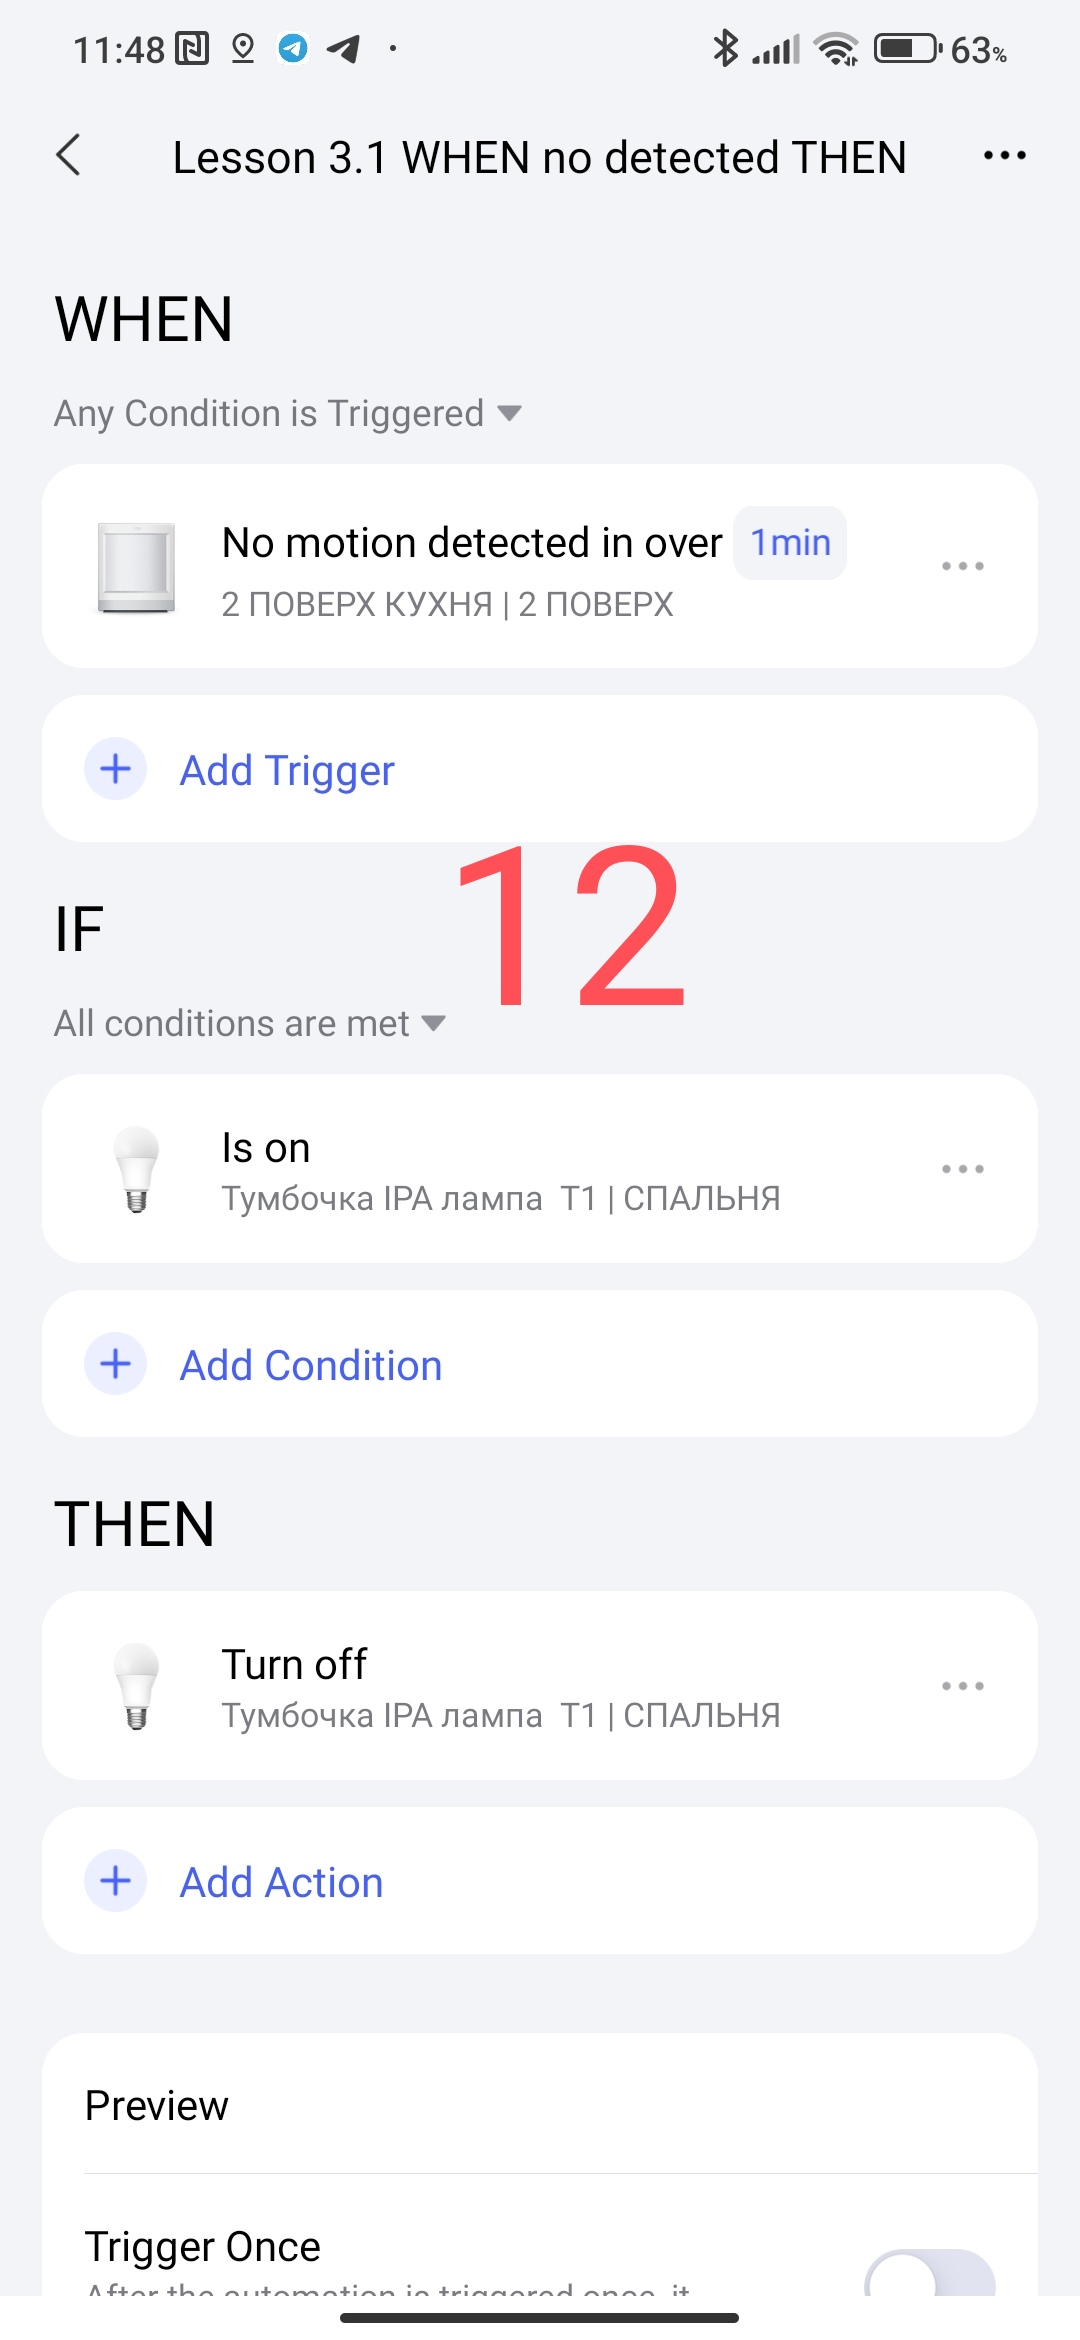
1.2 If there is no movement (a certain period) then turn off the light.
Fig 12
That’s it, we have the simplest automation for On/Off light ready.
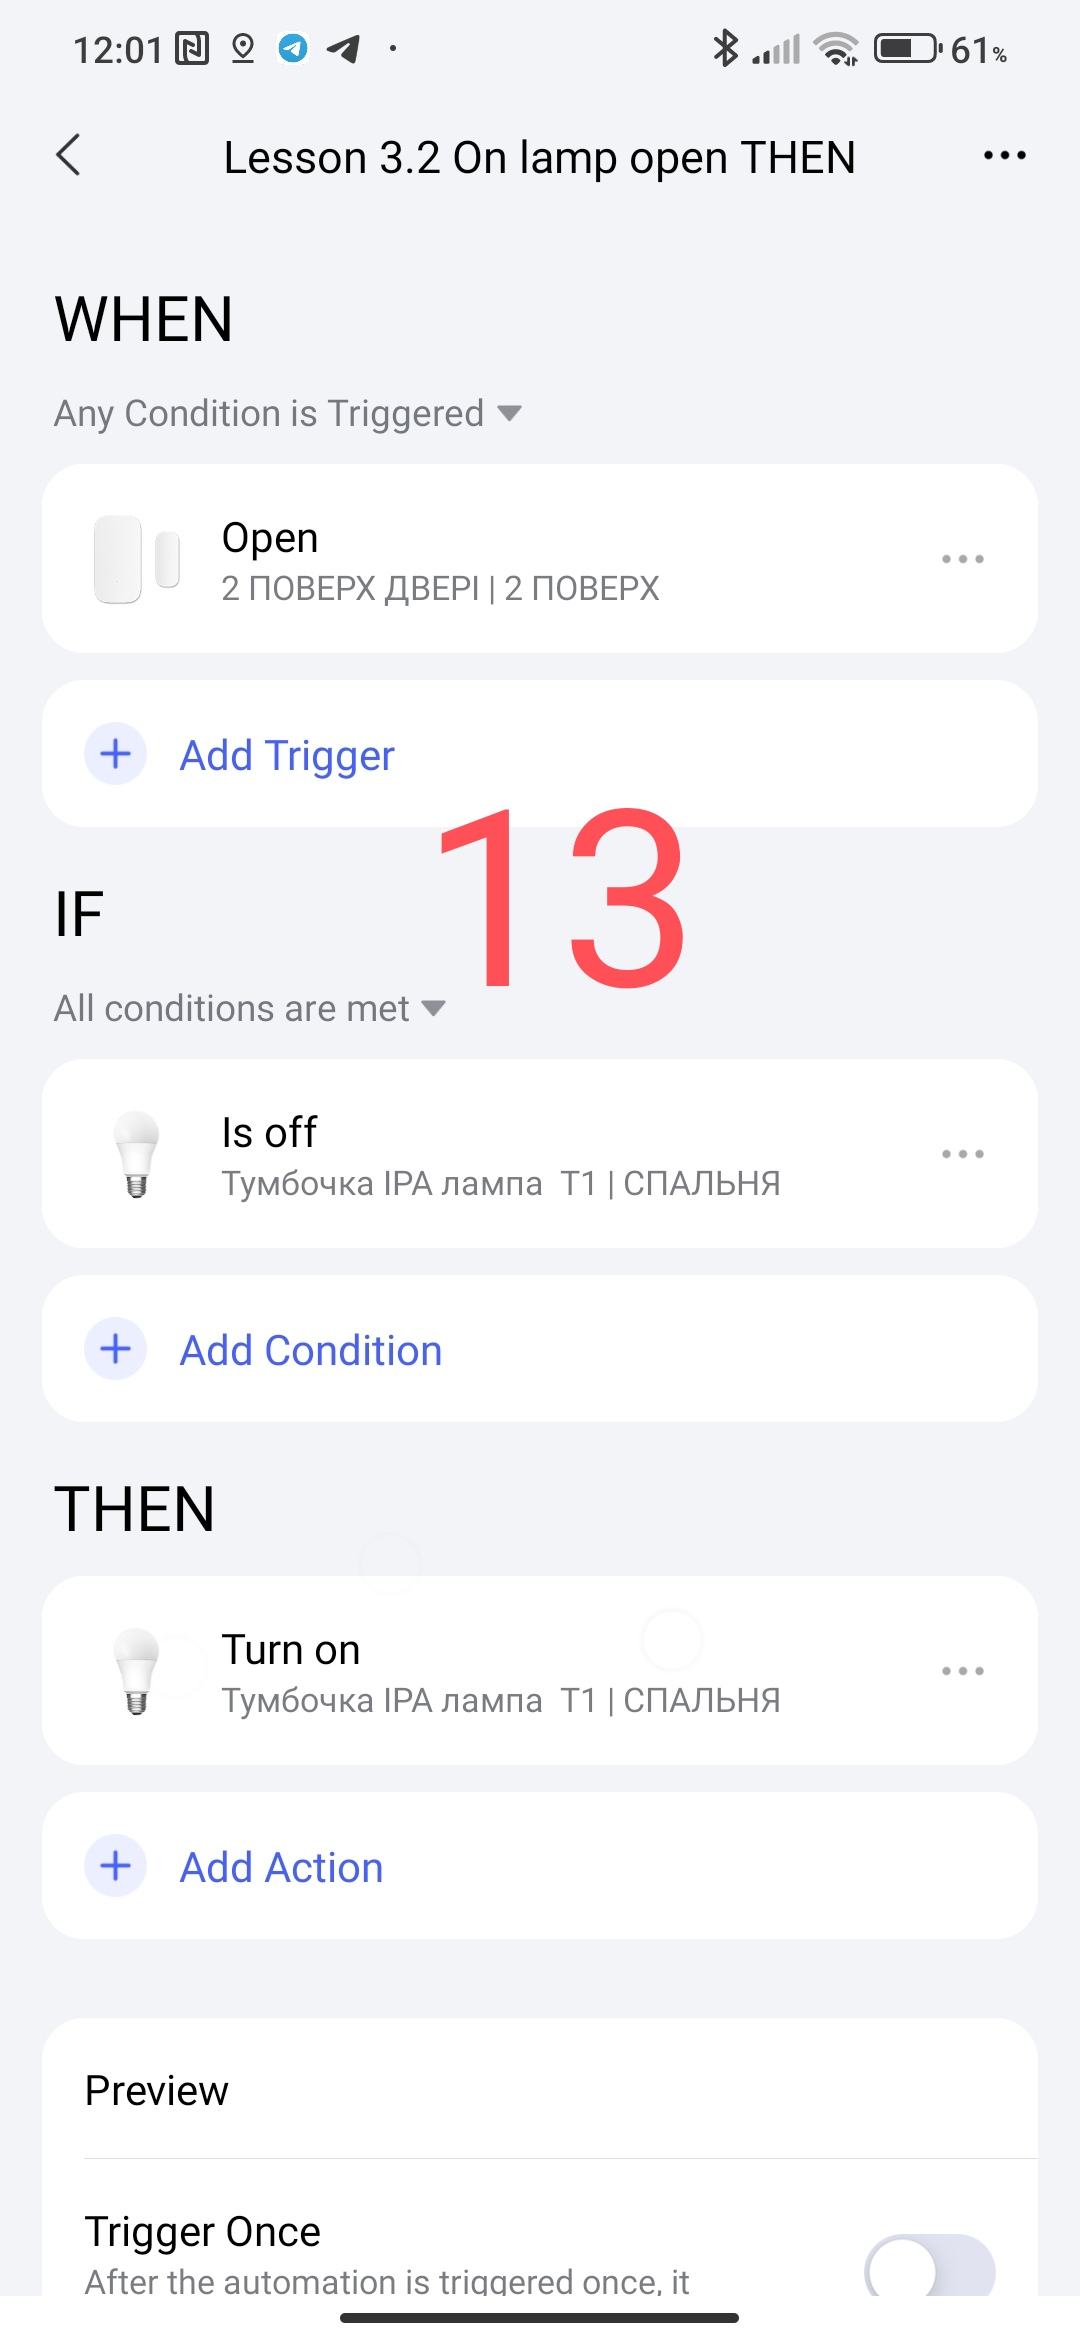
2.1 If the door is open, turn on the light.
Such automation is also of the simplest type. A feature of this automation is the addition of the “Off lamp” condition to the “IF” section, this condition is added so that the same trigger (door opening) controls both “On” and “Off” lamps.
Fig 13
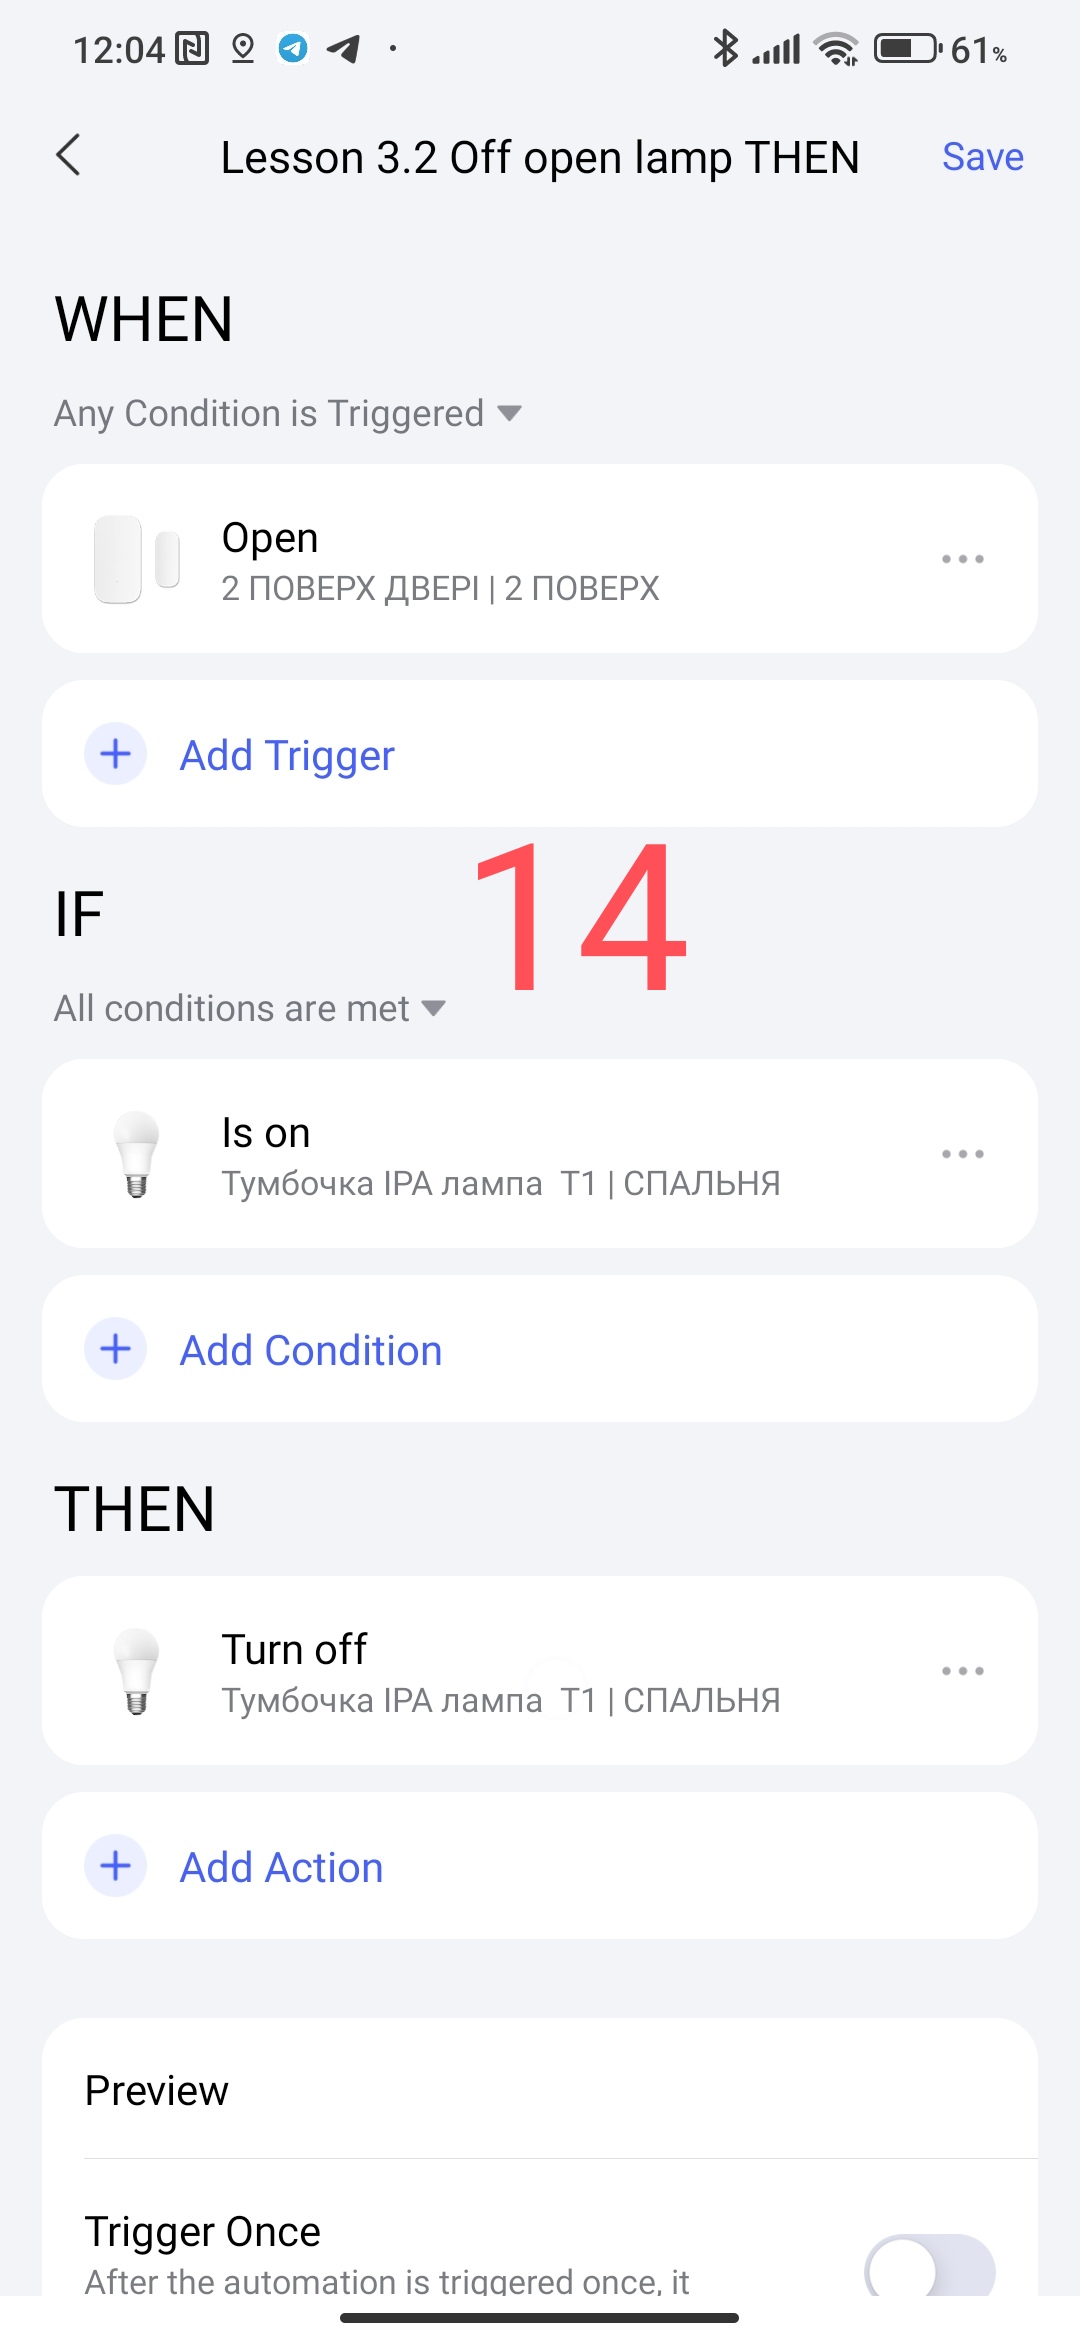
2.2 If the door is open, then Off lamp.
Please note that in the “IF” conditions we changed the lamp state to “On lamp”, this is what I said, one command (opening) controls the turning off of the lighting lamp.
Fig. 14
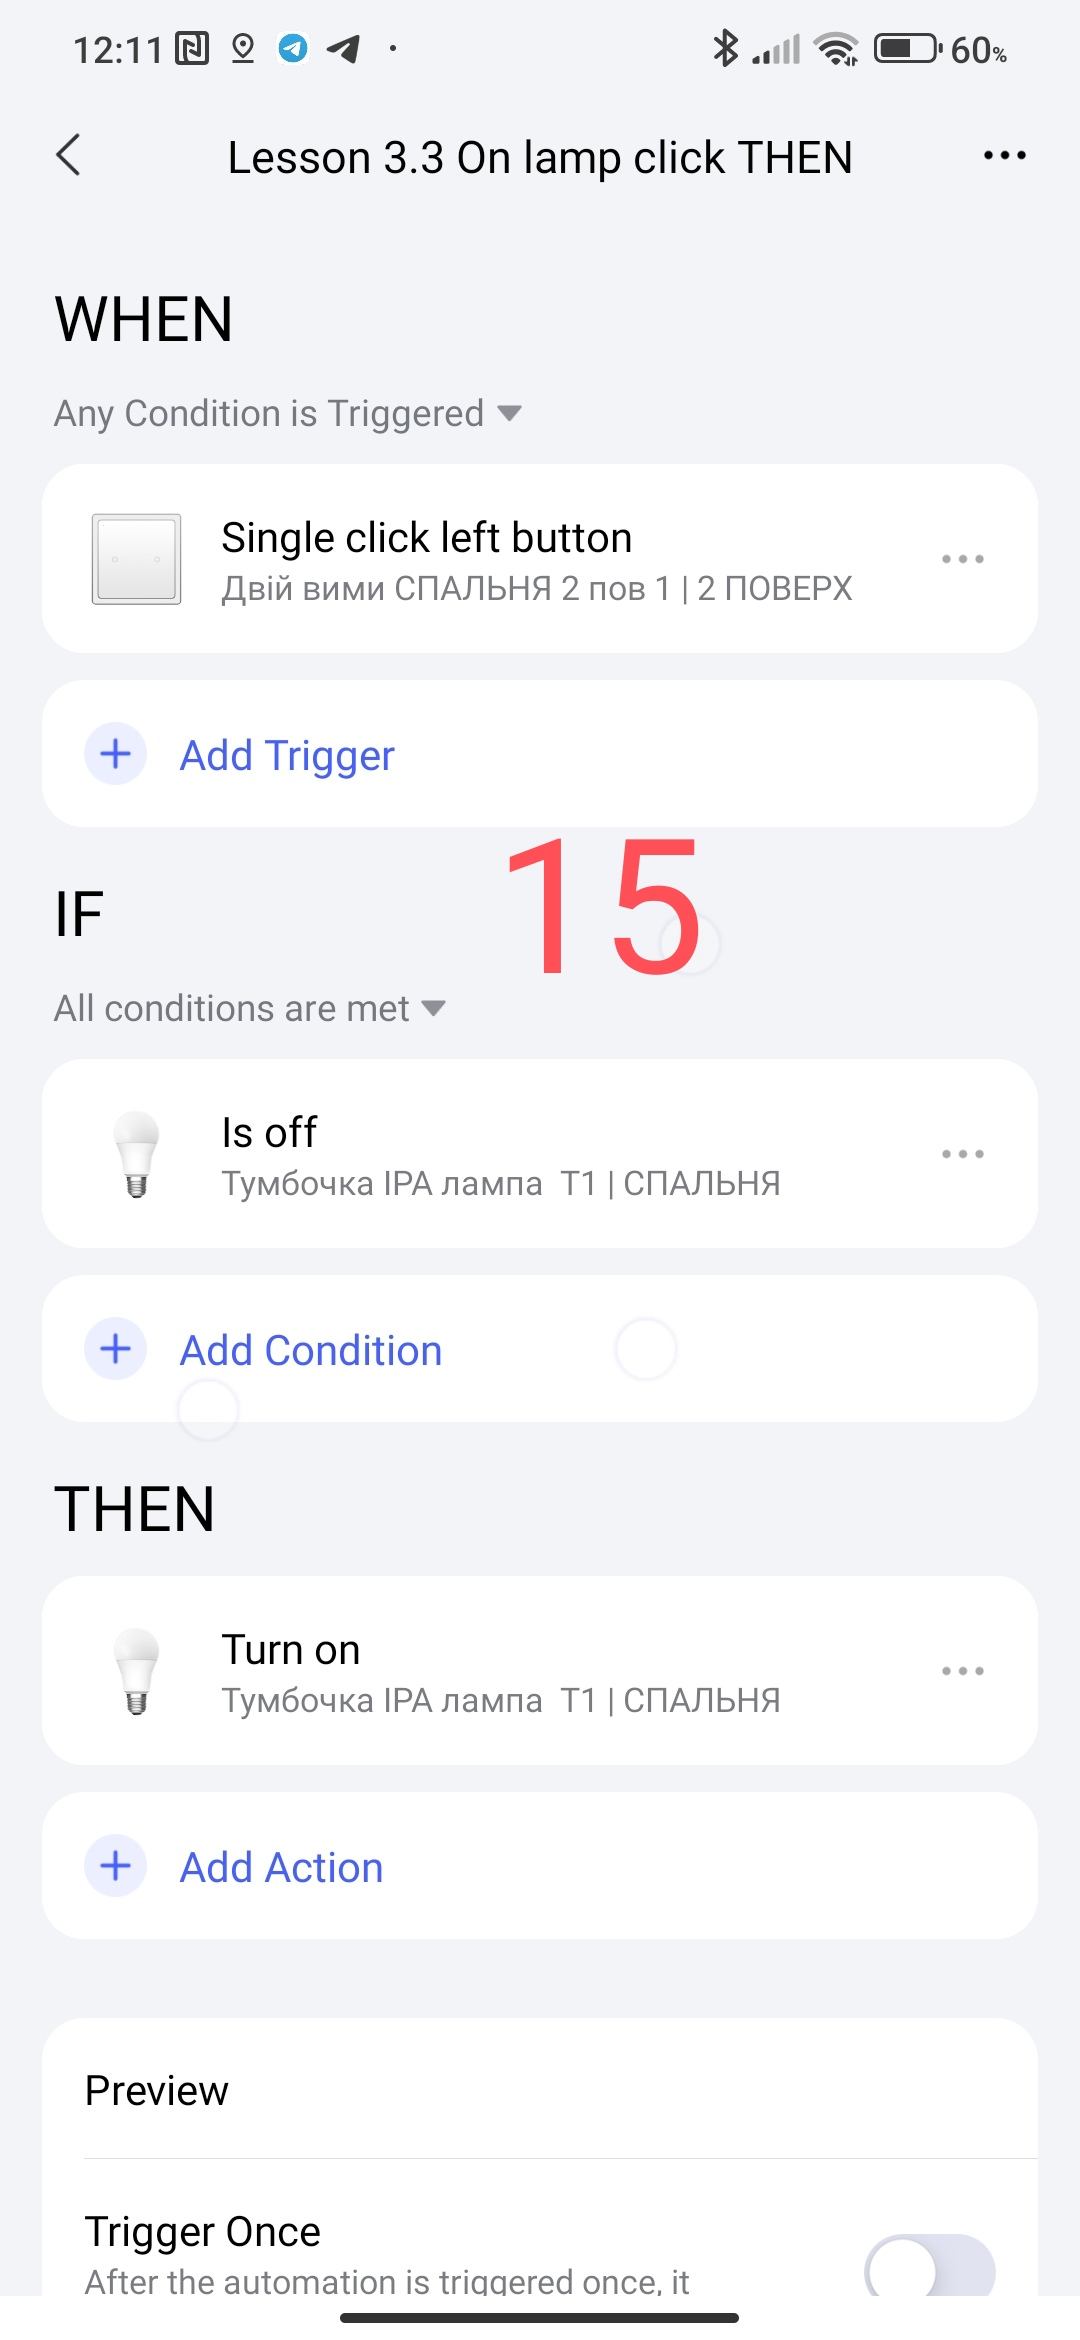
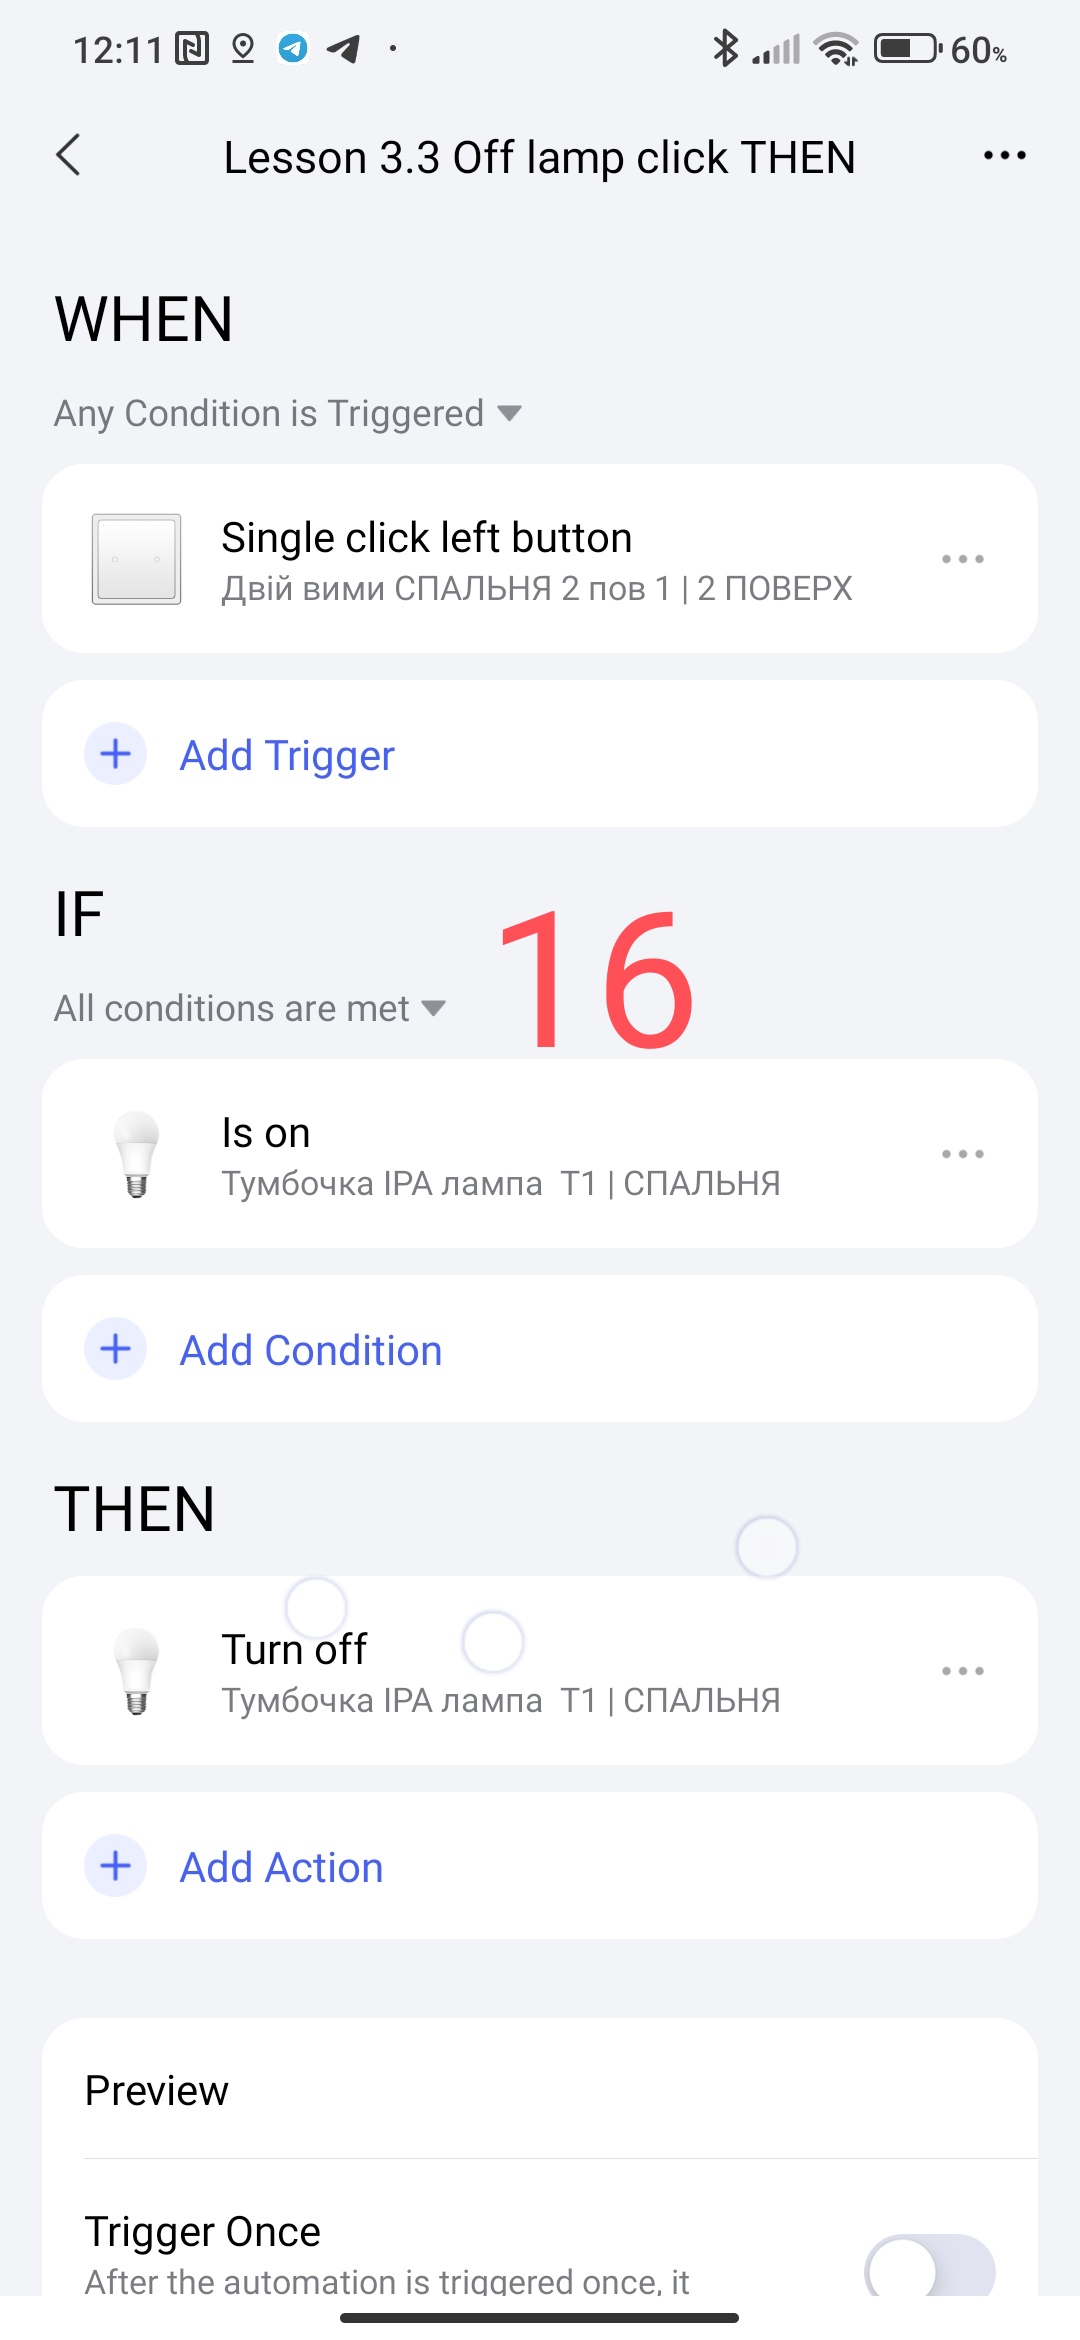
- If you press the button once, then turn on the light (turn off the light).
I will not describe it here, it is an analogue of the opening sensor.
Fig. 15, 16.
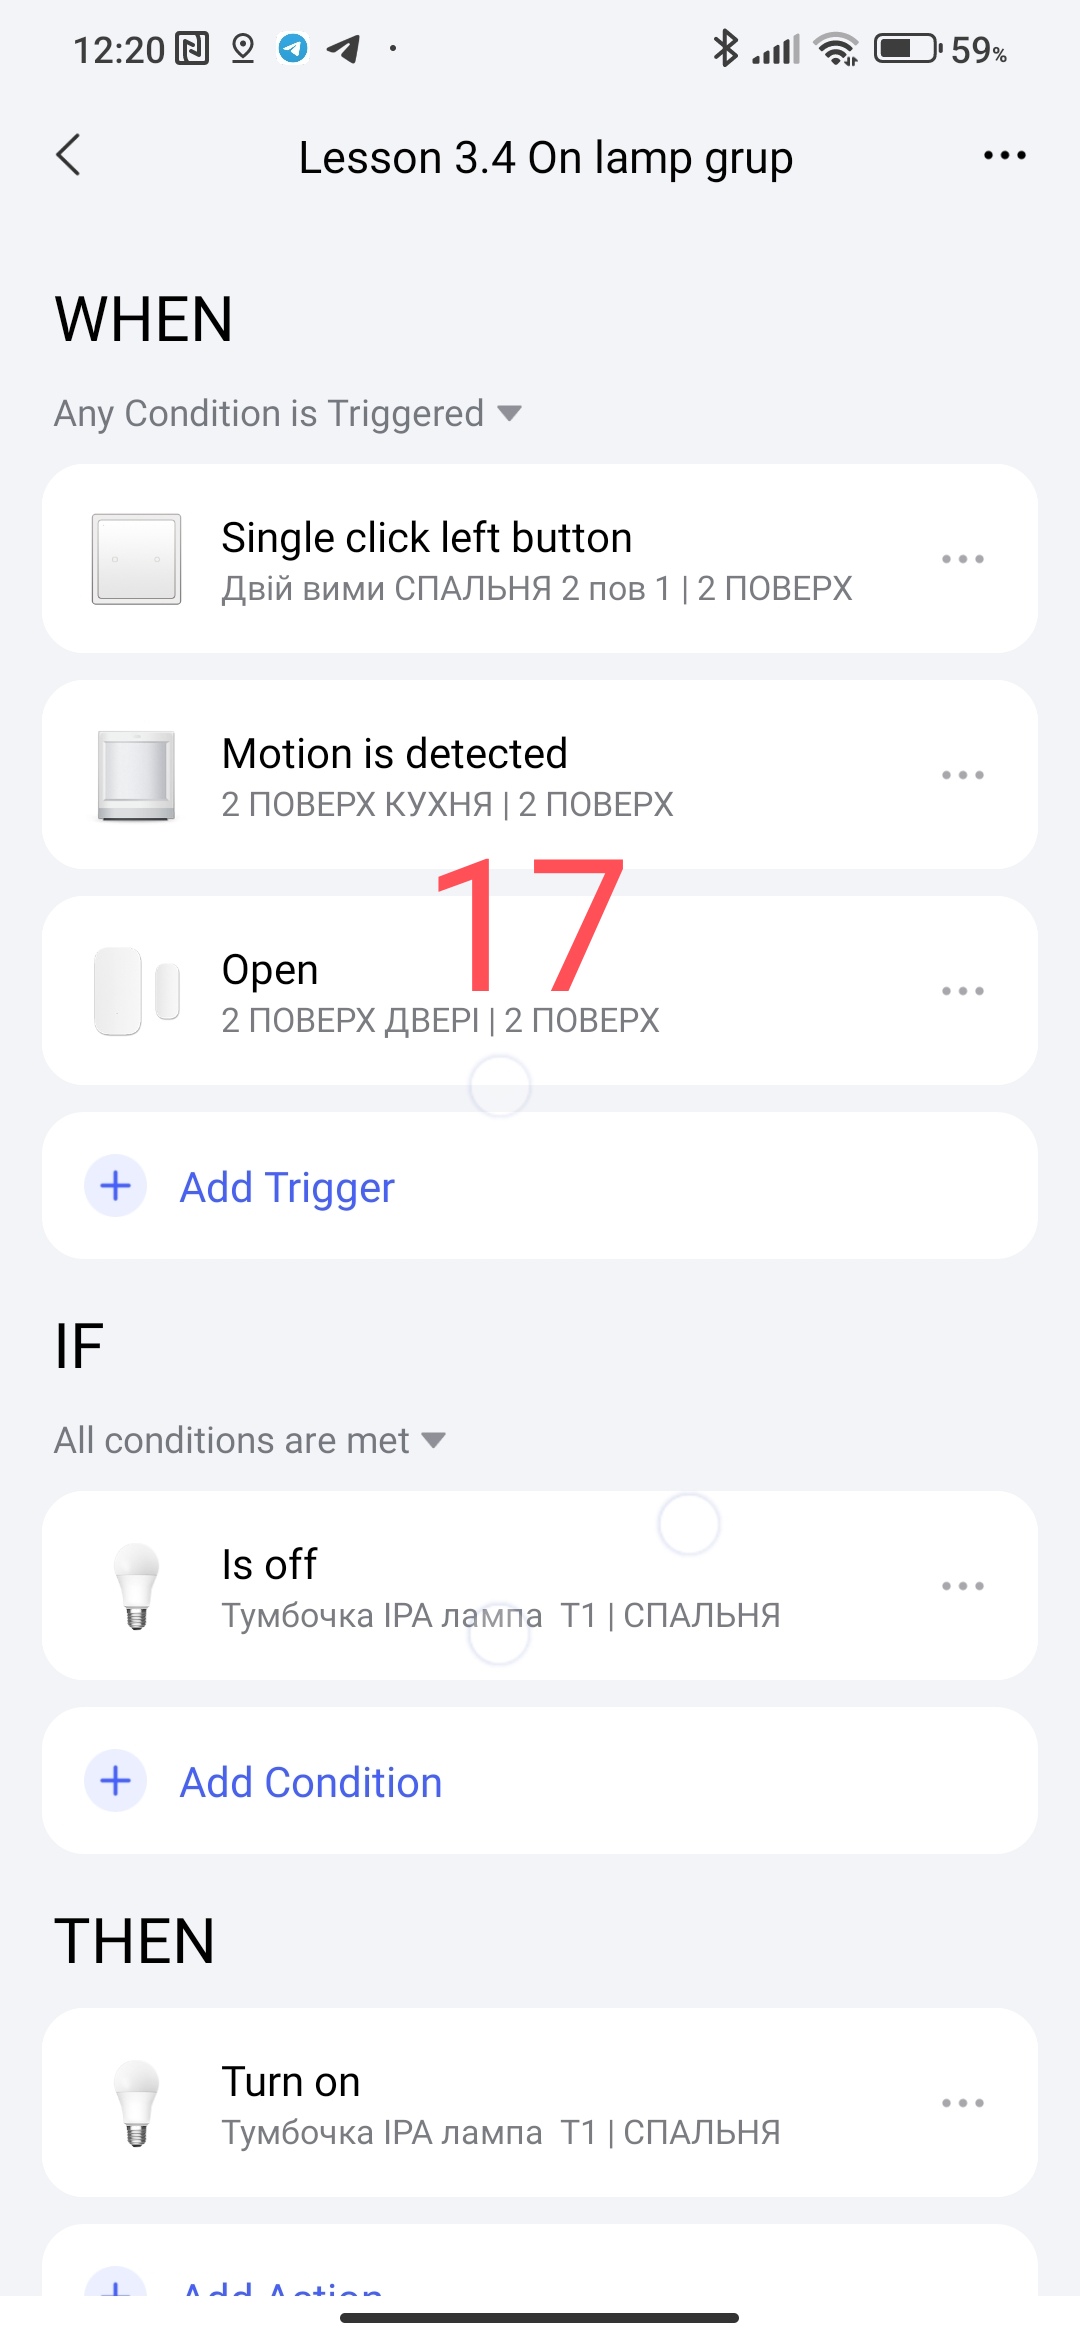
We create group automation.
The next part of the lesson will be combining these automations into one automation. To reduce the number of automations, version 2.0 makes it possible to group a group of automations (up to 5-6 pieces) into one automation in 1.0.
4. Turning on (turning off) lamps from a group of conditions.
4.1. On groups of lamps.
Add to the “WTEN” condition all the above listed device conditions (button, motion sensor, opening sensor)
In the “IF” condition, add “OFF lamps”
In “TNE” we add “On lamps”
Fig. 17
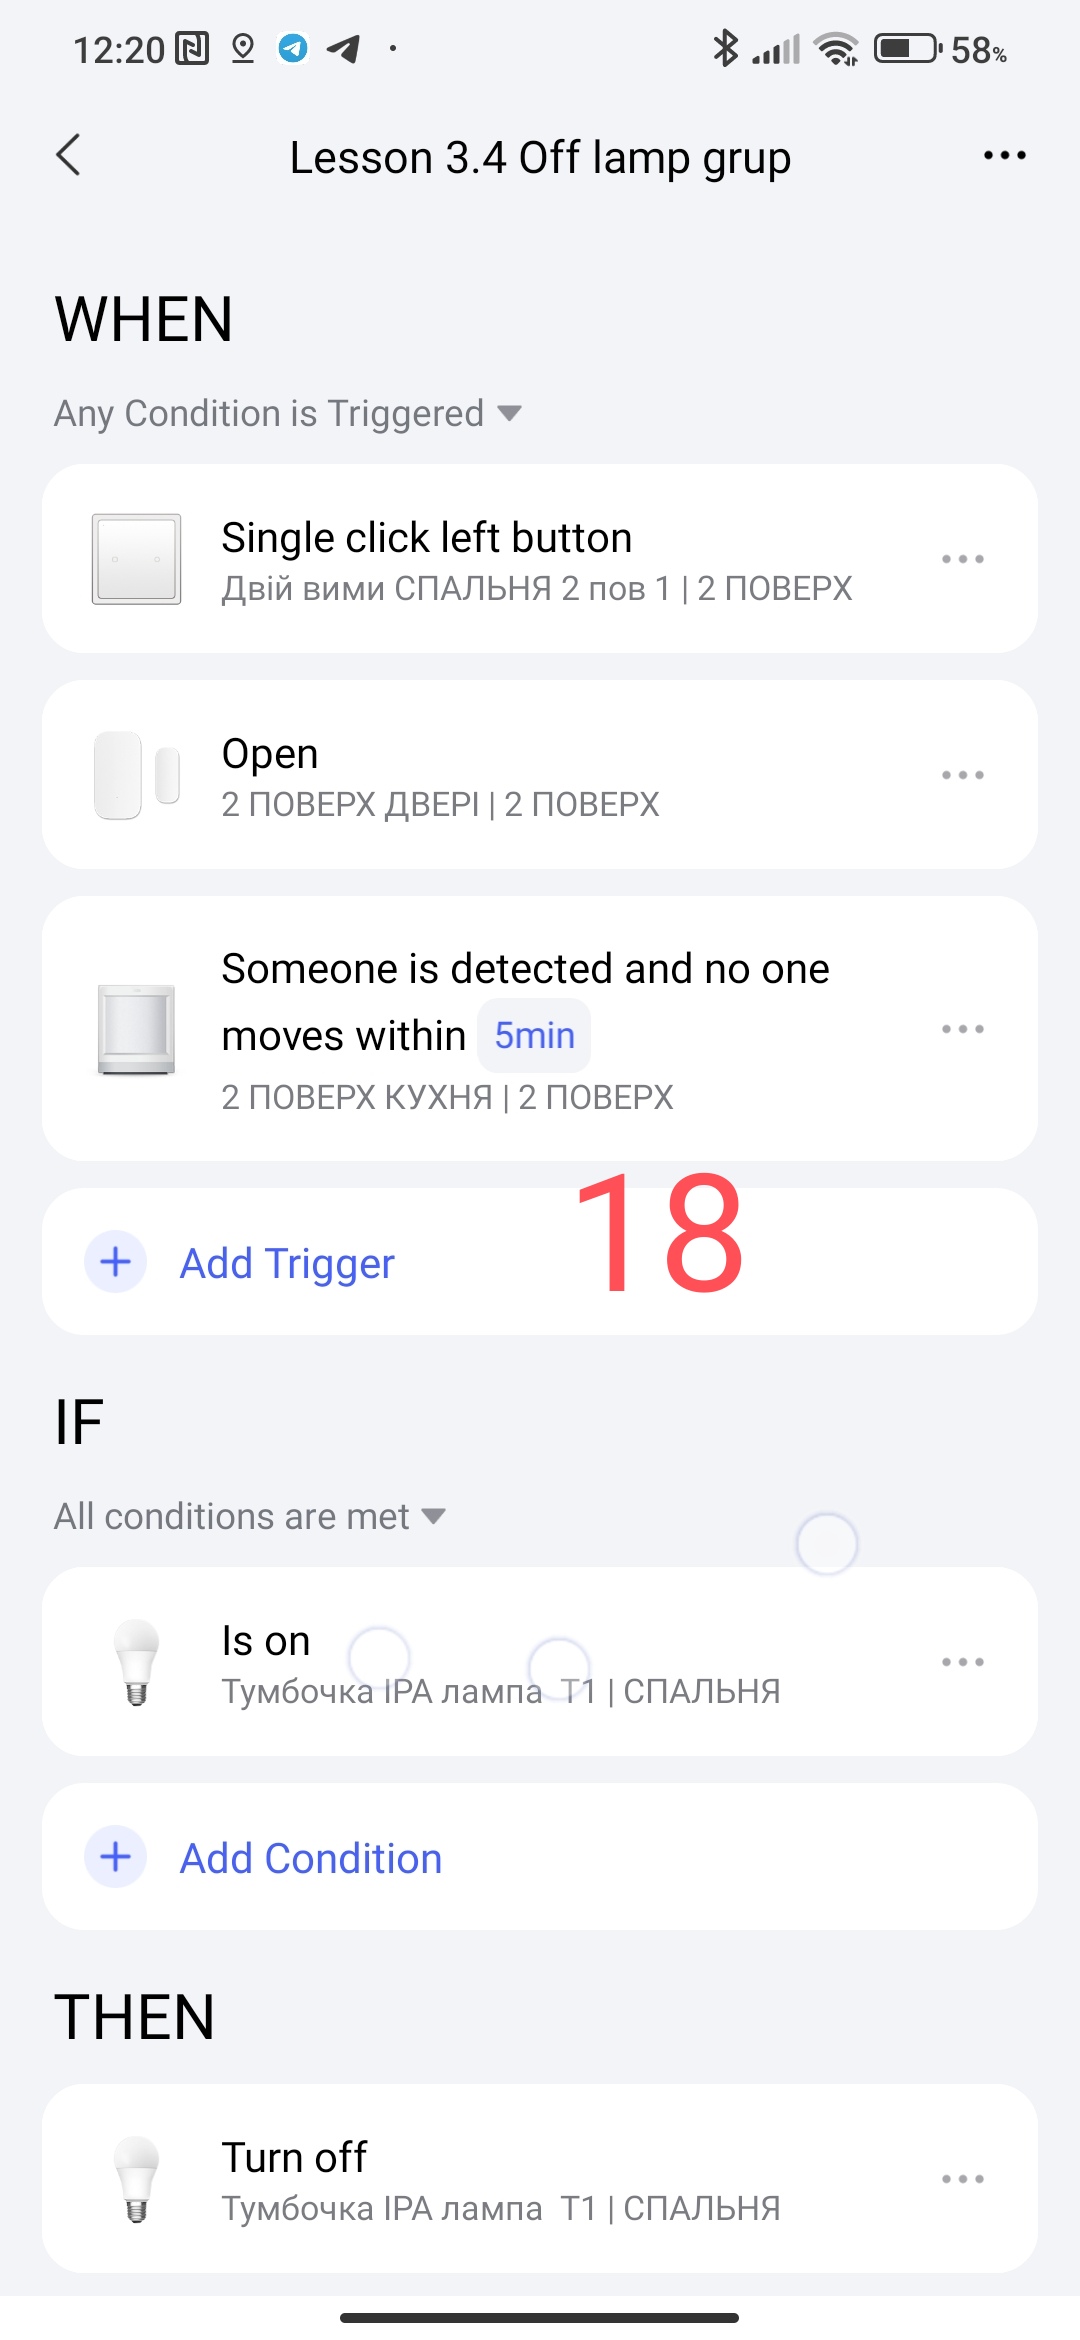
4.2. Off groups of lamps.
Add to the “WTEN” condition the same as in 4.1. just change the motion sensor to the command “No movement for 5 minutes”.
In the “IF” condition, add “On lamps”
In “TNE” add “Off lamps”
Fig. 18
These are two ready-made automations that will perform On/Off lamps without time restrictions of the day.
In order not to overload the lesson, we will end it here.
In the next lesson 4, I will tell you how to organize lighting by time periods (day, evening, night, morning).
This is my know-how that I came up with for the versatility of lighting control in one automation, yes, this is not a typo, it is in one automation to start lamps by time periods.
See you in the next lesson 4.
Thank you for reading and sharing the topic (you can also on other platforms with a link to our forum).
Lesson 4 Automation 2.0. Lesson 4. Lighting control by time periods