Lesson 1 (continued) Automation 2.0, lesson 1 (continued), description of the algorithm for transitioning automation 1.0 to 2.0
Good afternoon.
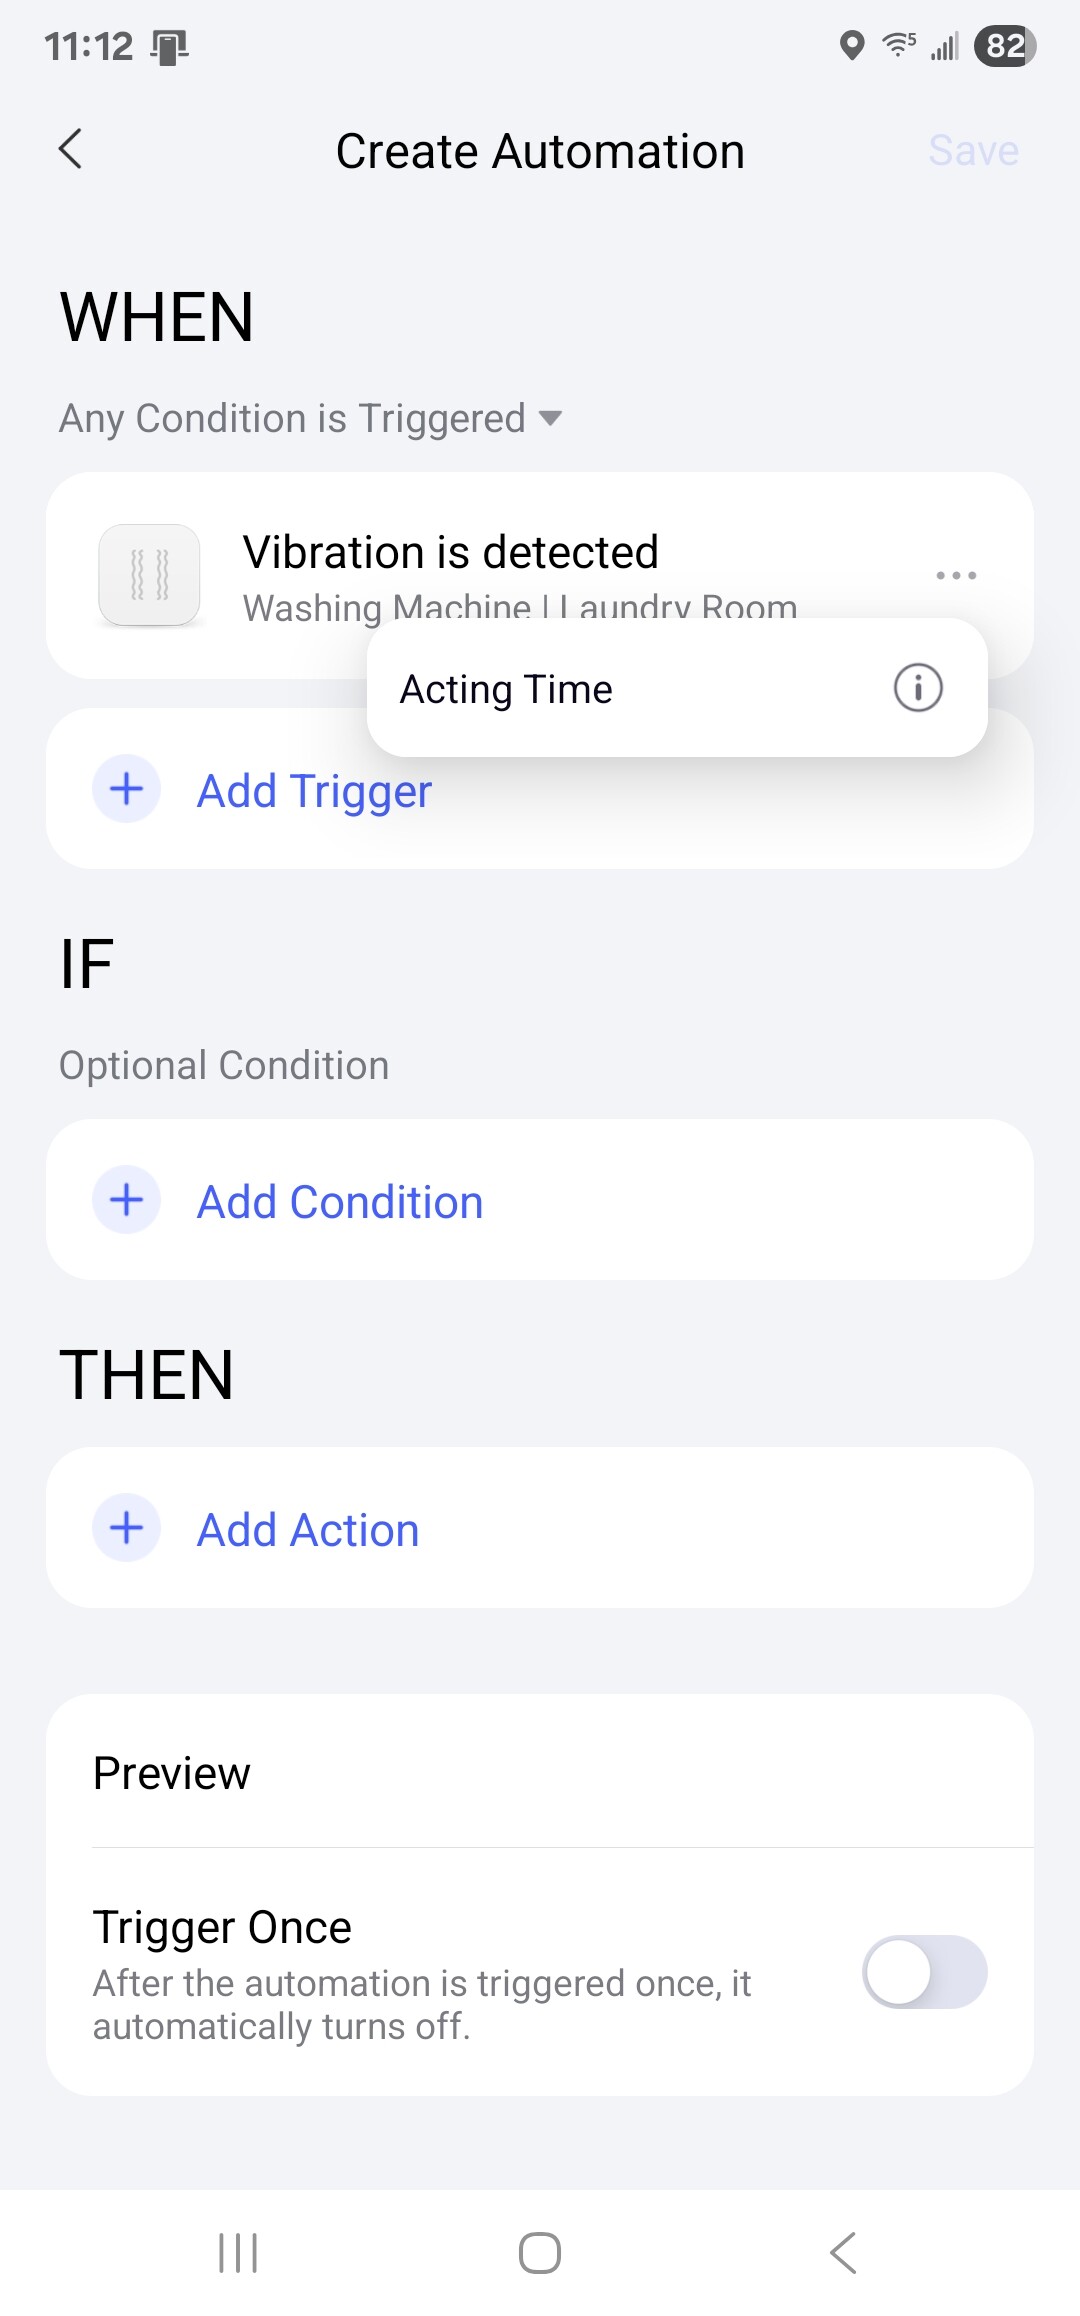
Some users do not pay attention to this symbol next to the automation conditions “…”, these are very important updated components of automation 2.0.
Let’s consider the conditions that are hidden under the “…” icon.
Fig1
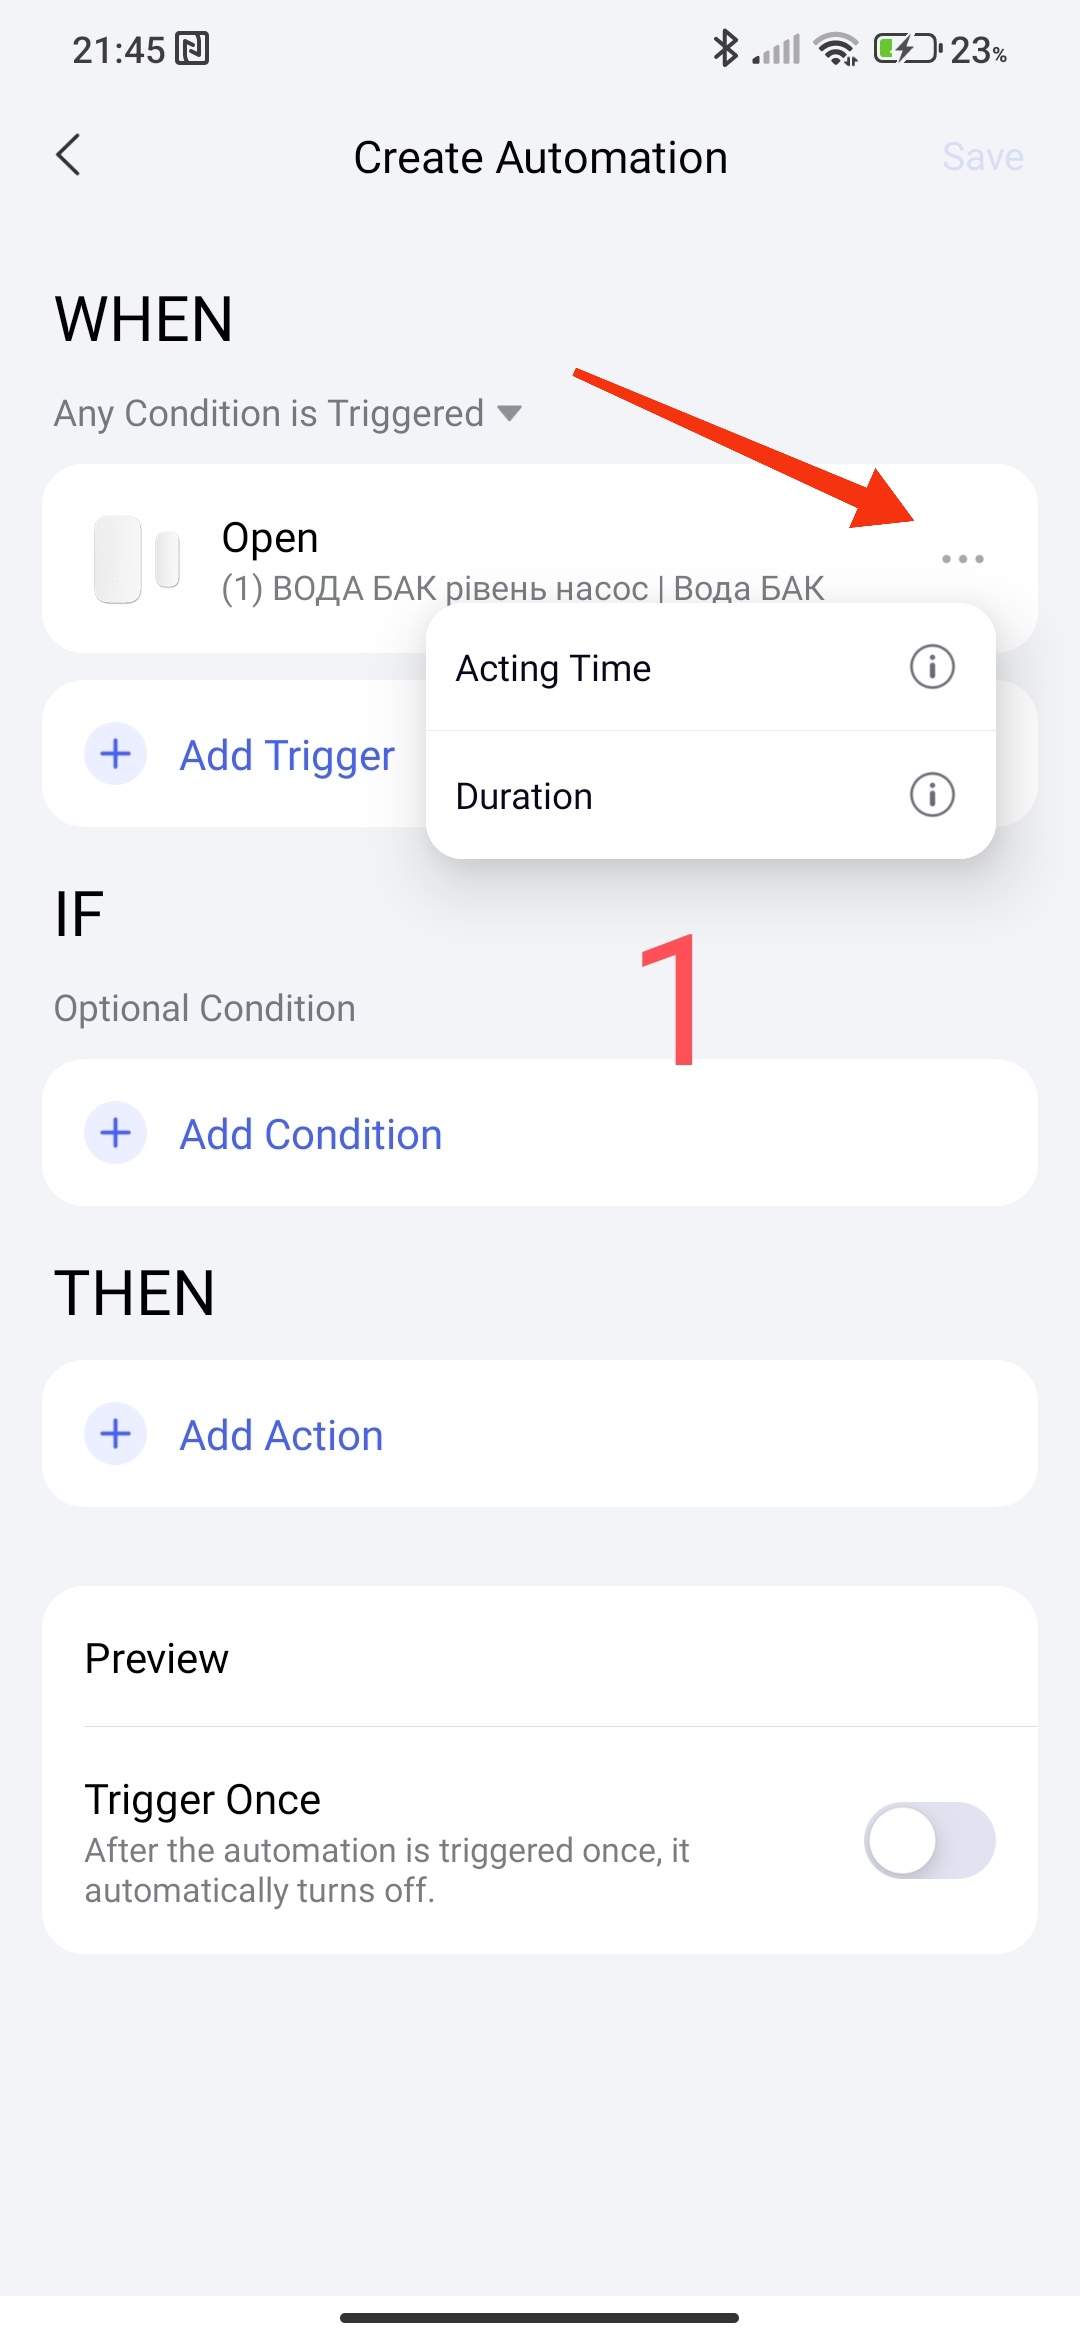
CONDITIONS “…” WHEN.
The first condition, the time interval for executing the conditions. In this setting, you can select the period for controlling the sensor or the condition of the device state (selected hour, day, night).
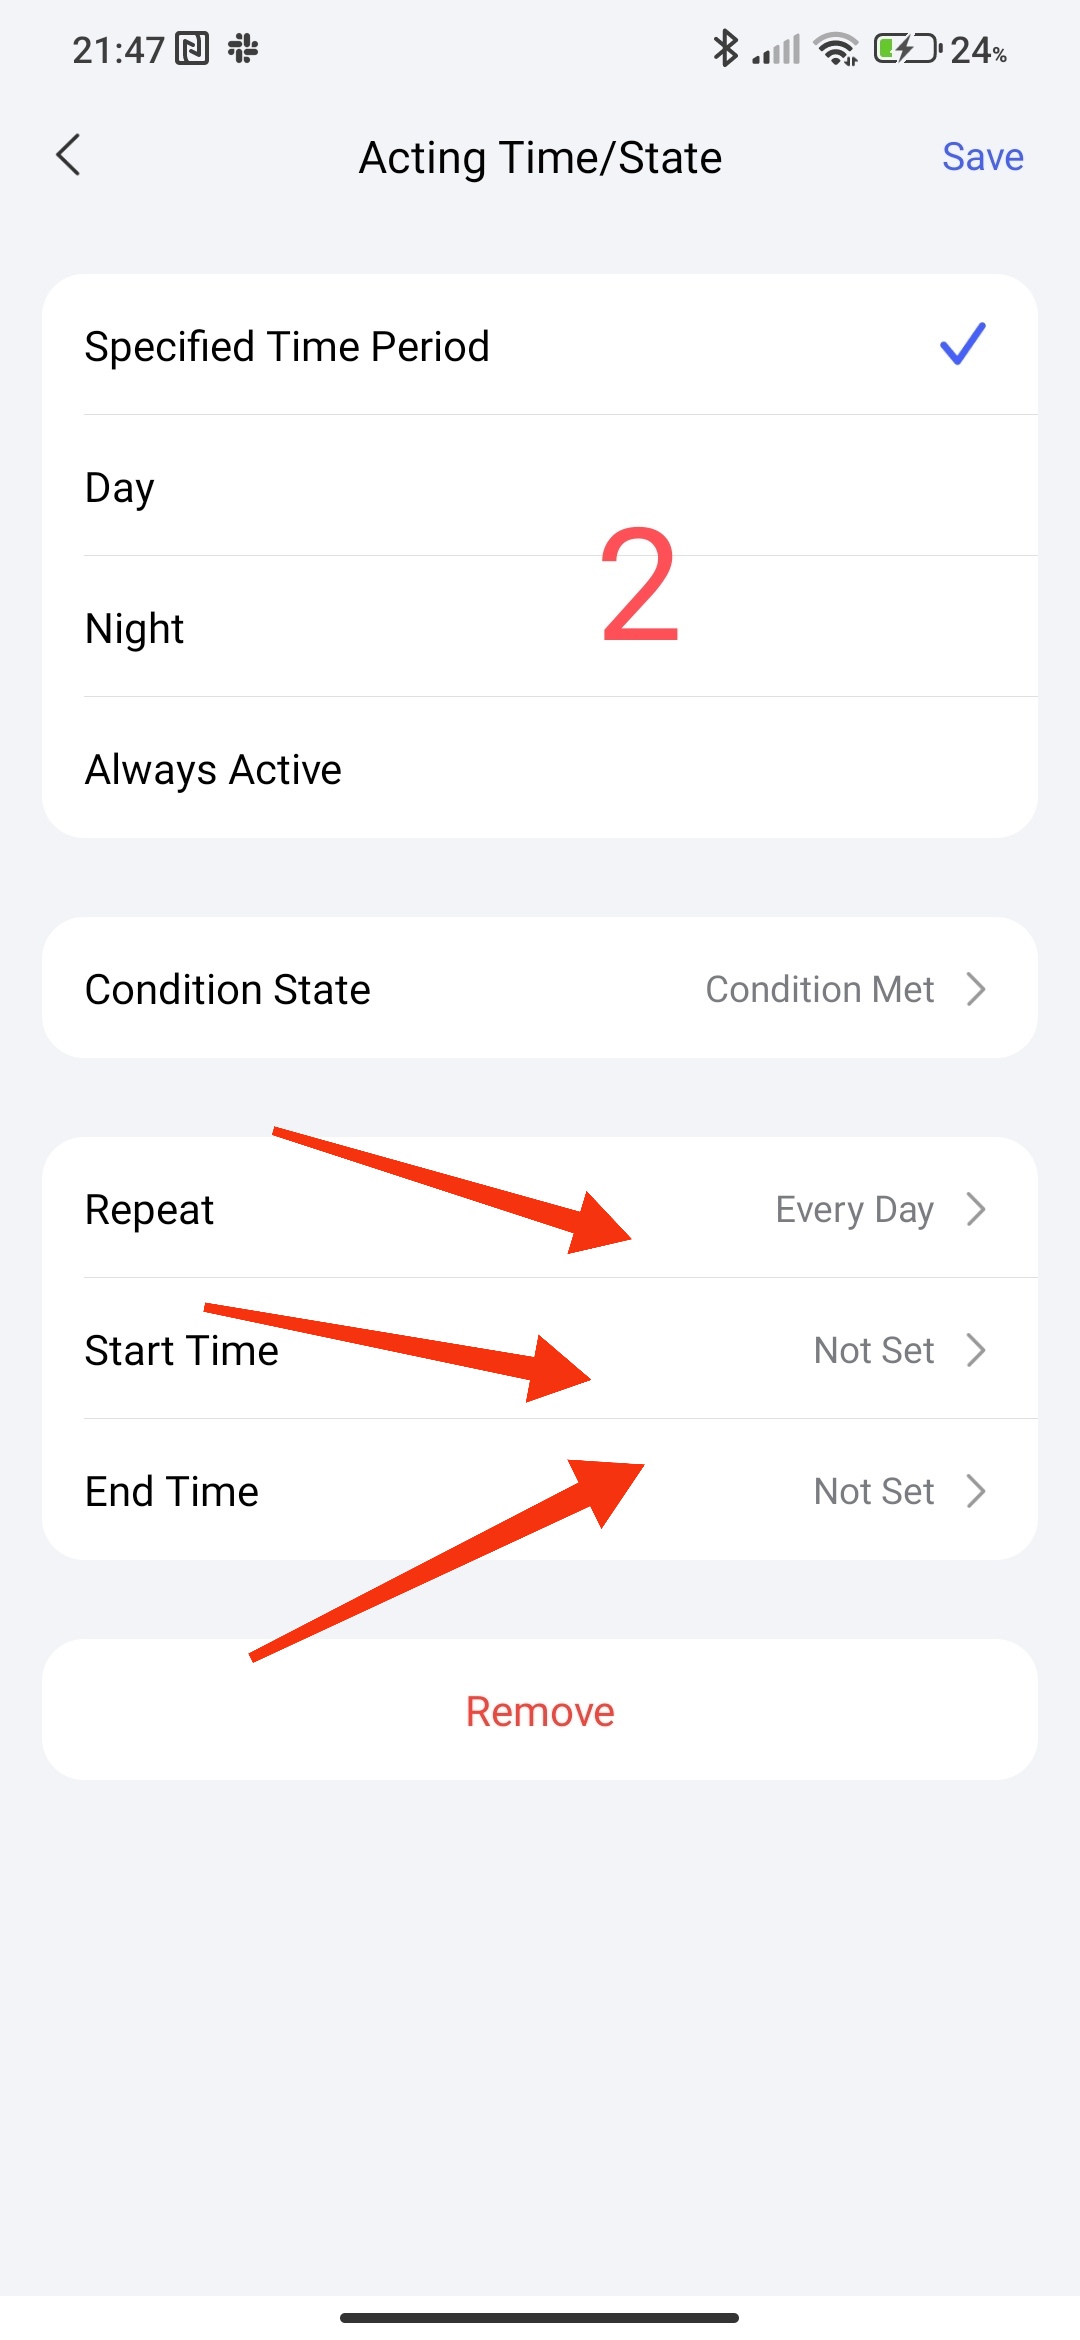
There are four states:
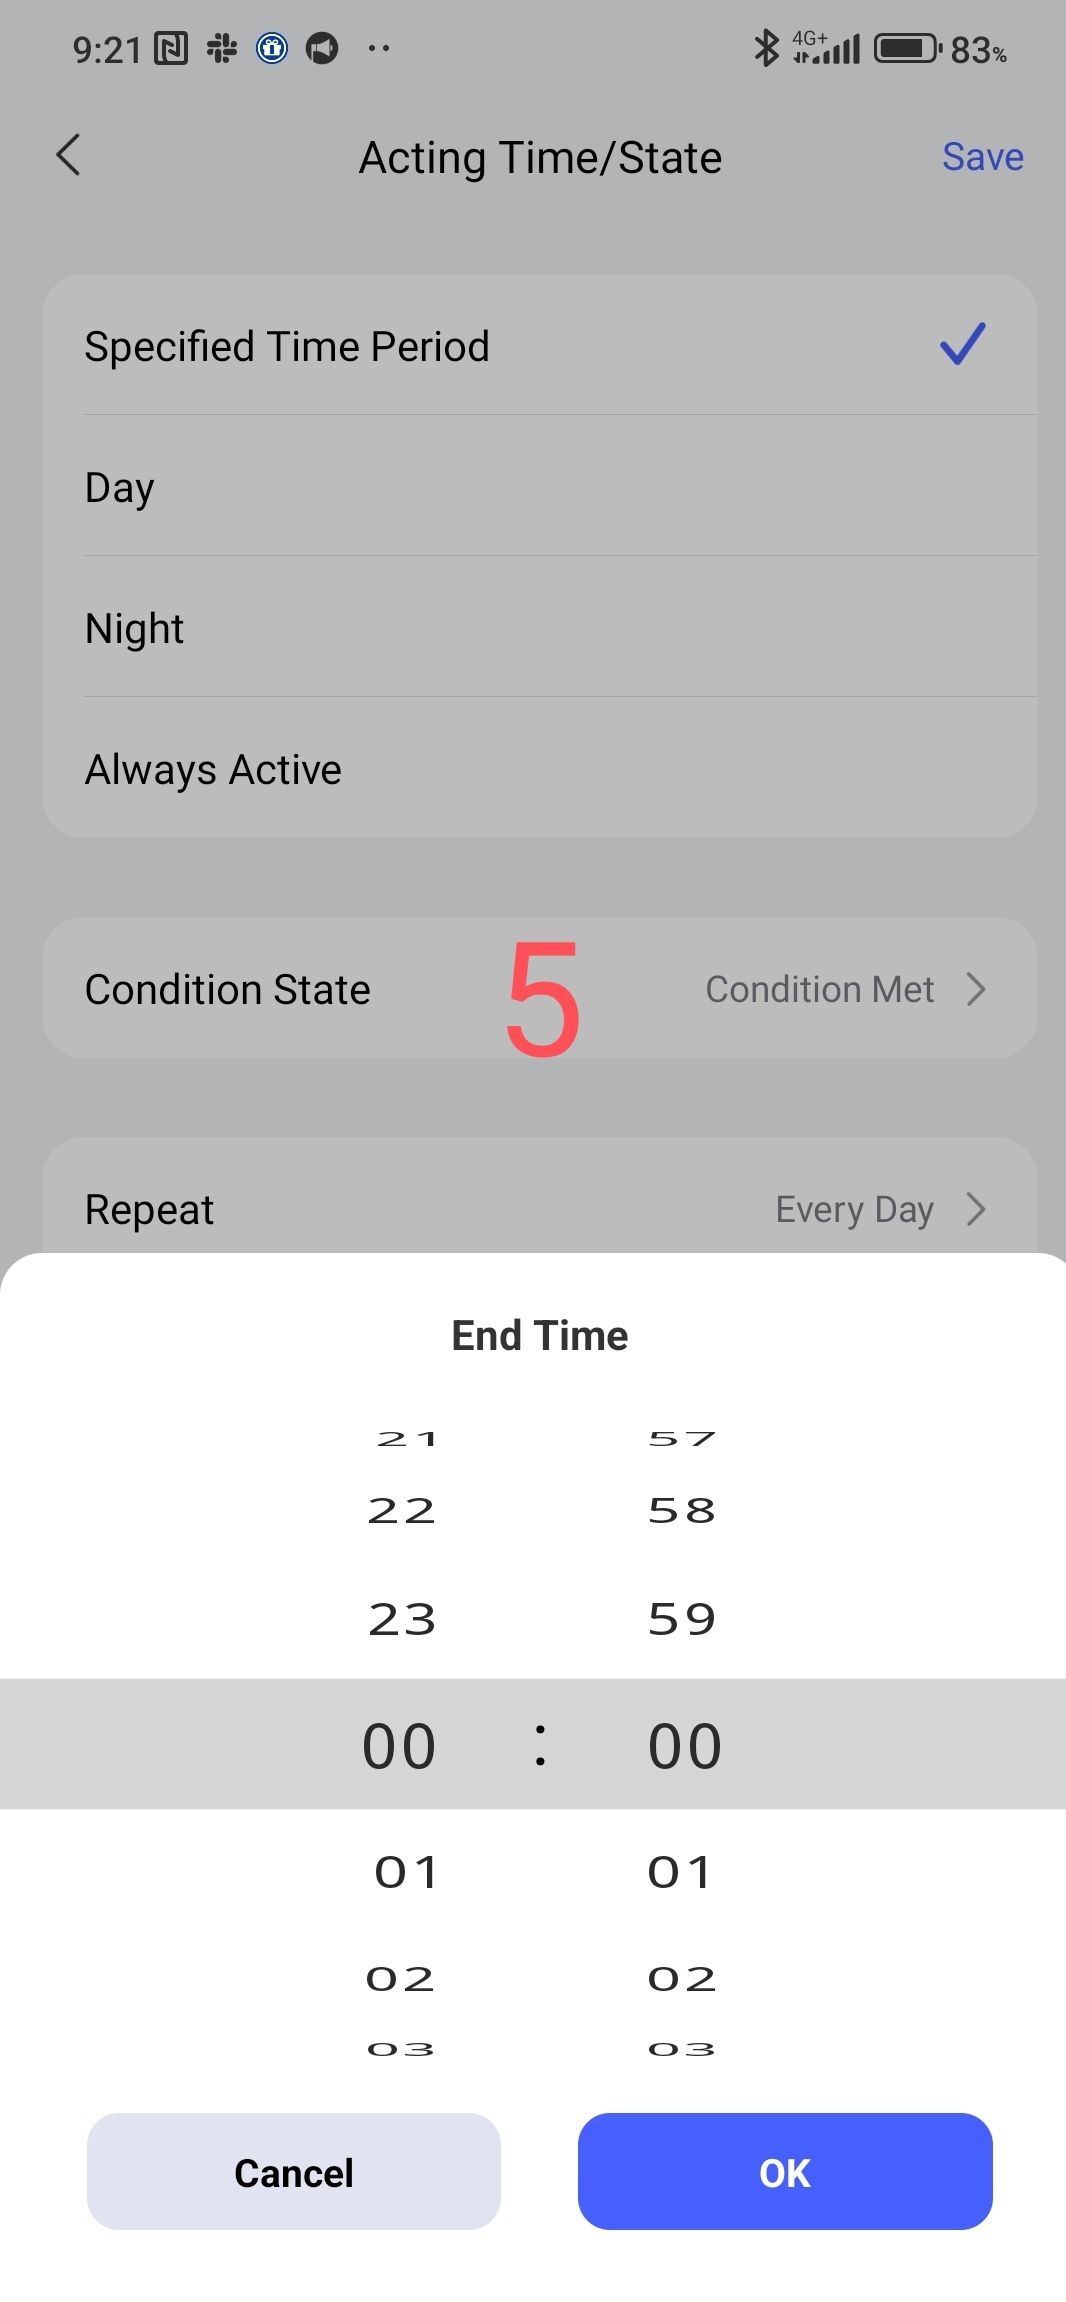
-specified time period;
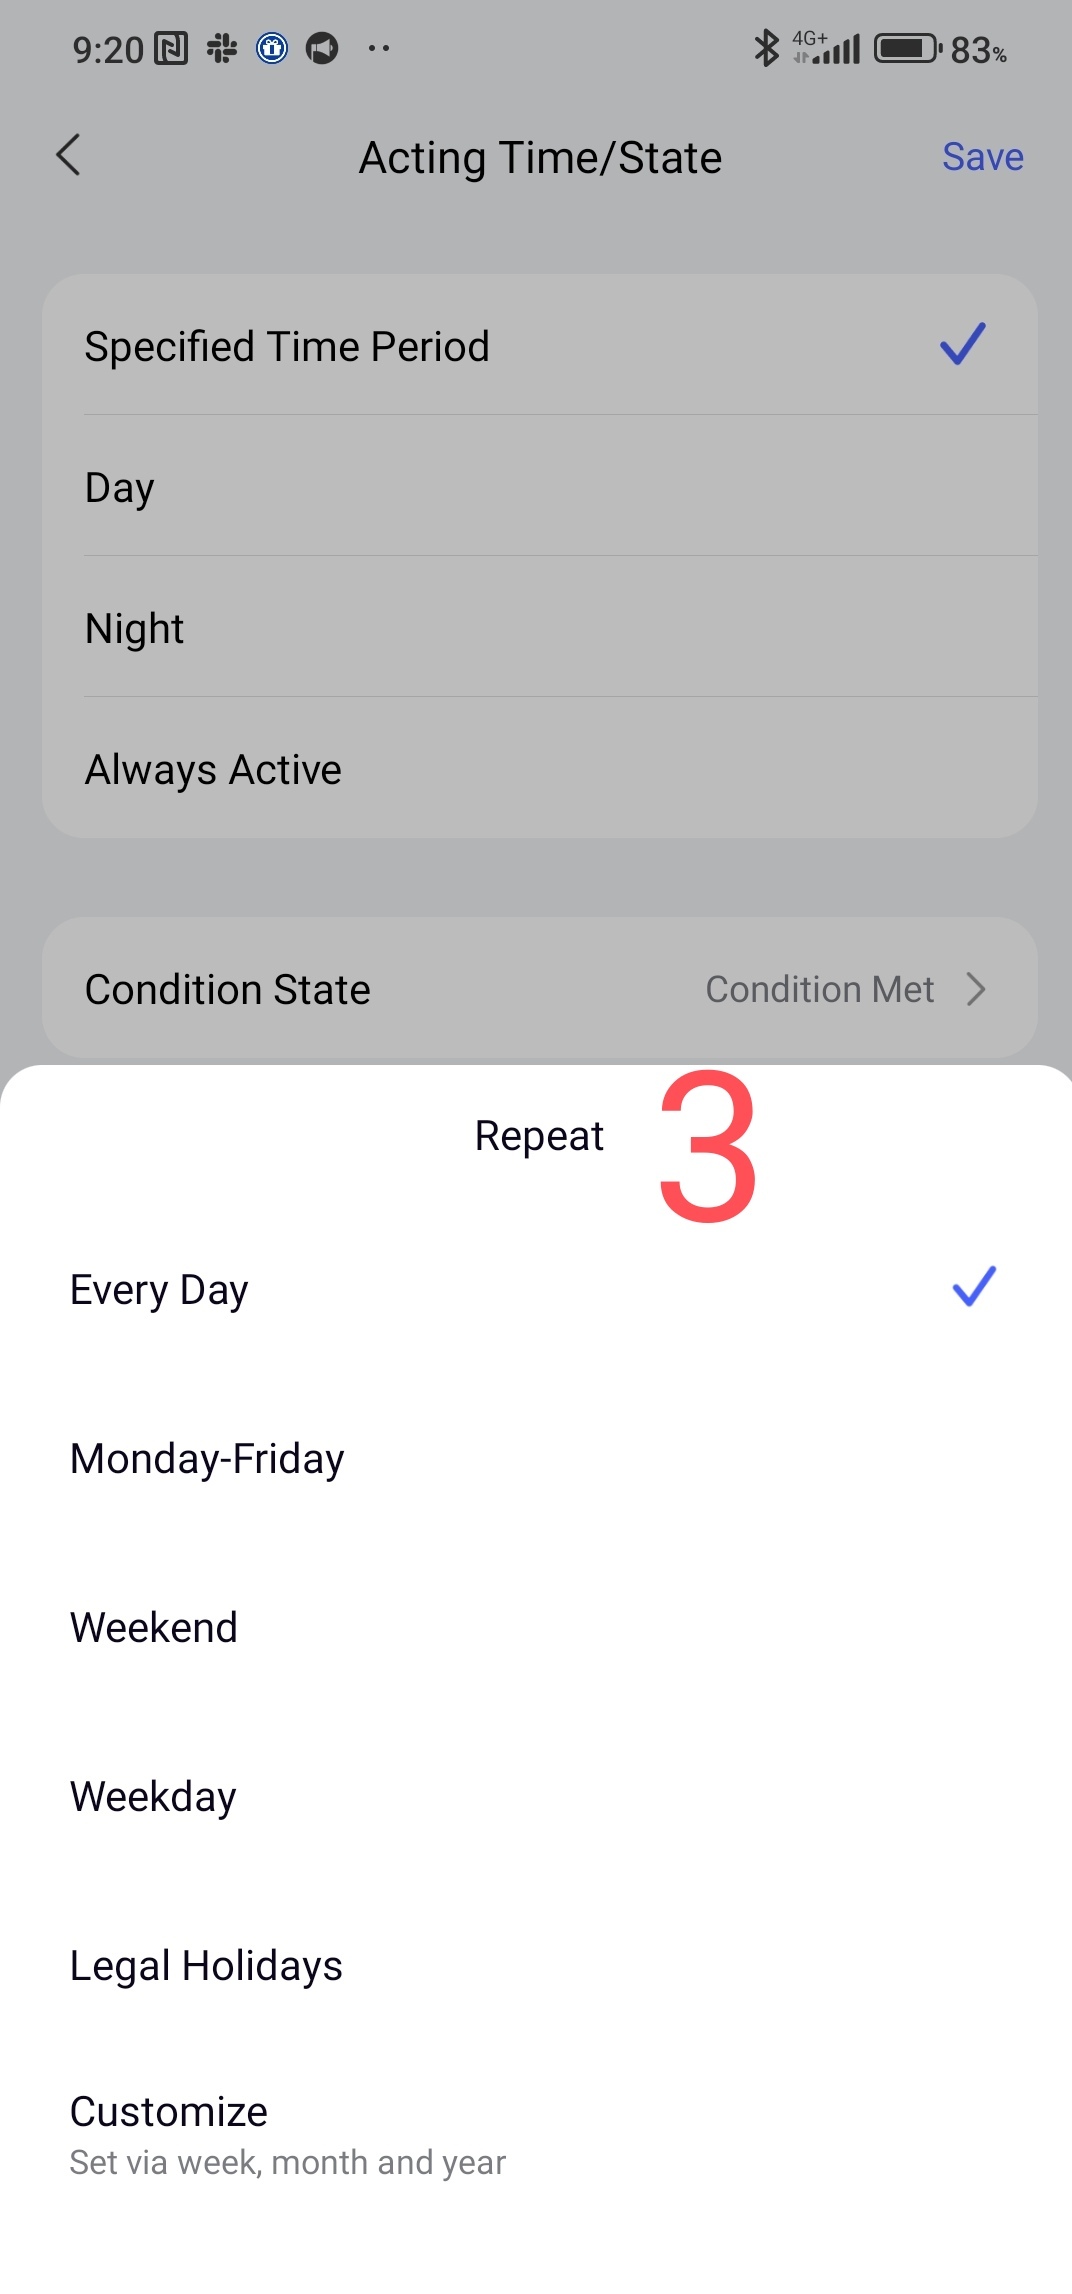
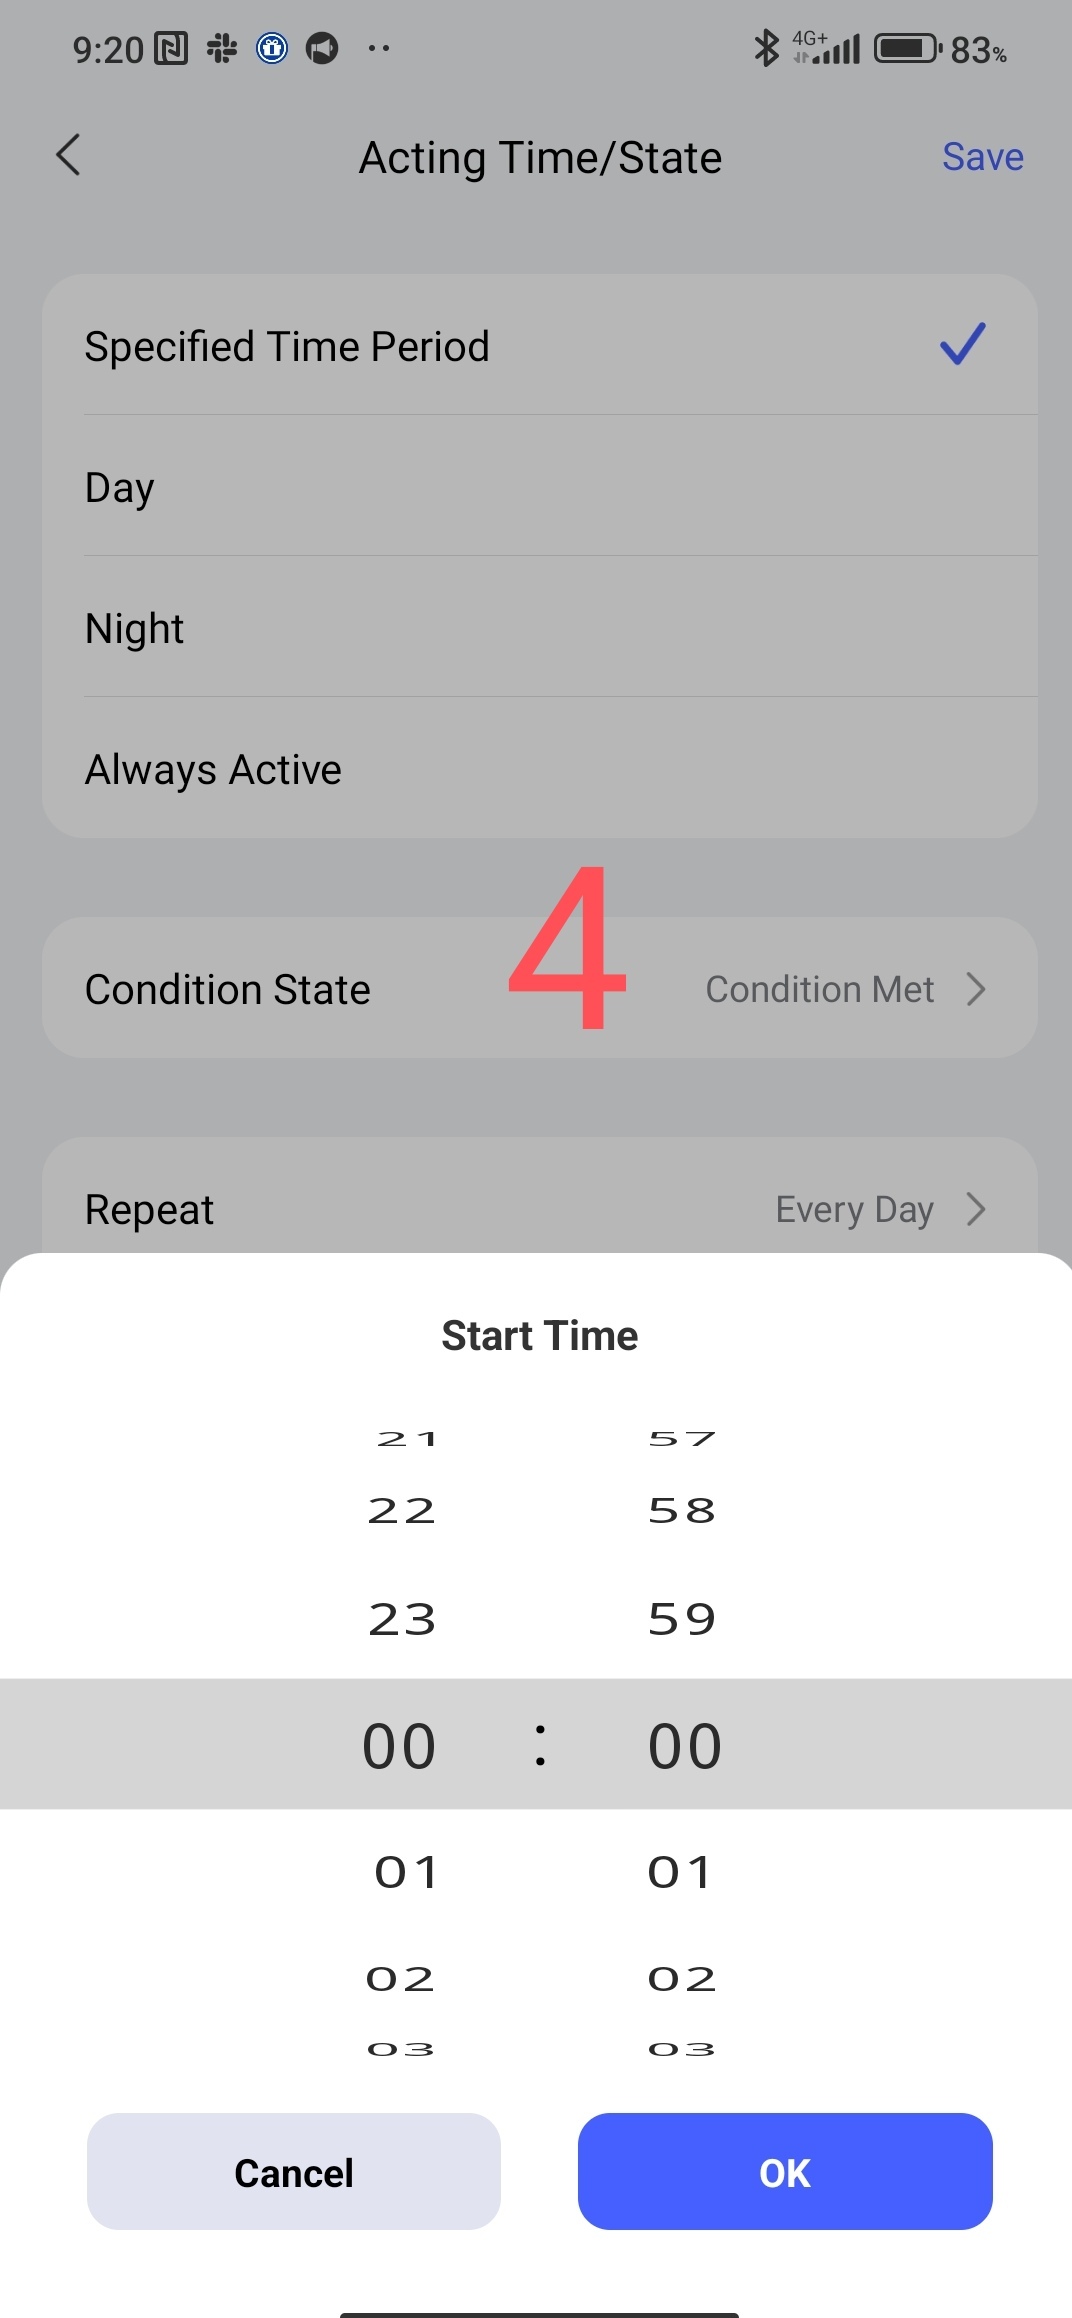
allows you to set the start and end time of the action within 24 hours (3,4) and set days/weeks/months (5).
Fig2, 3,4,5
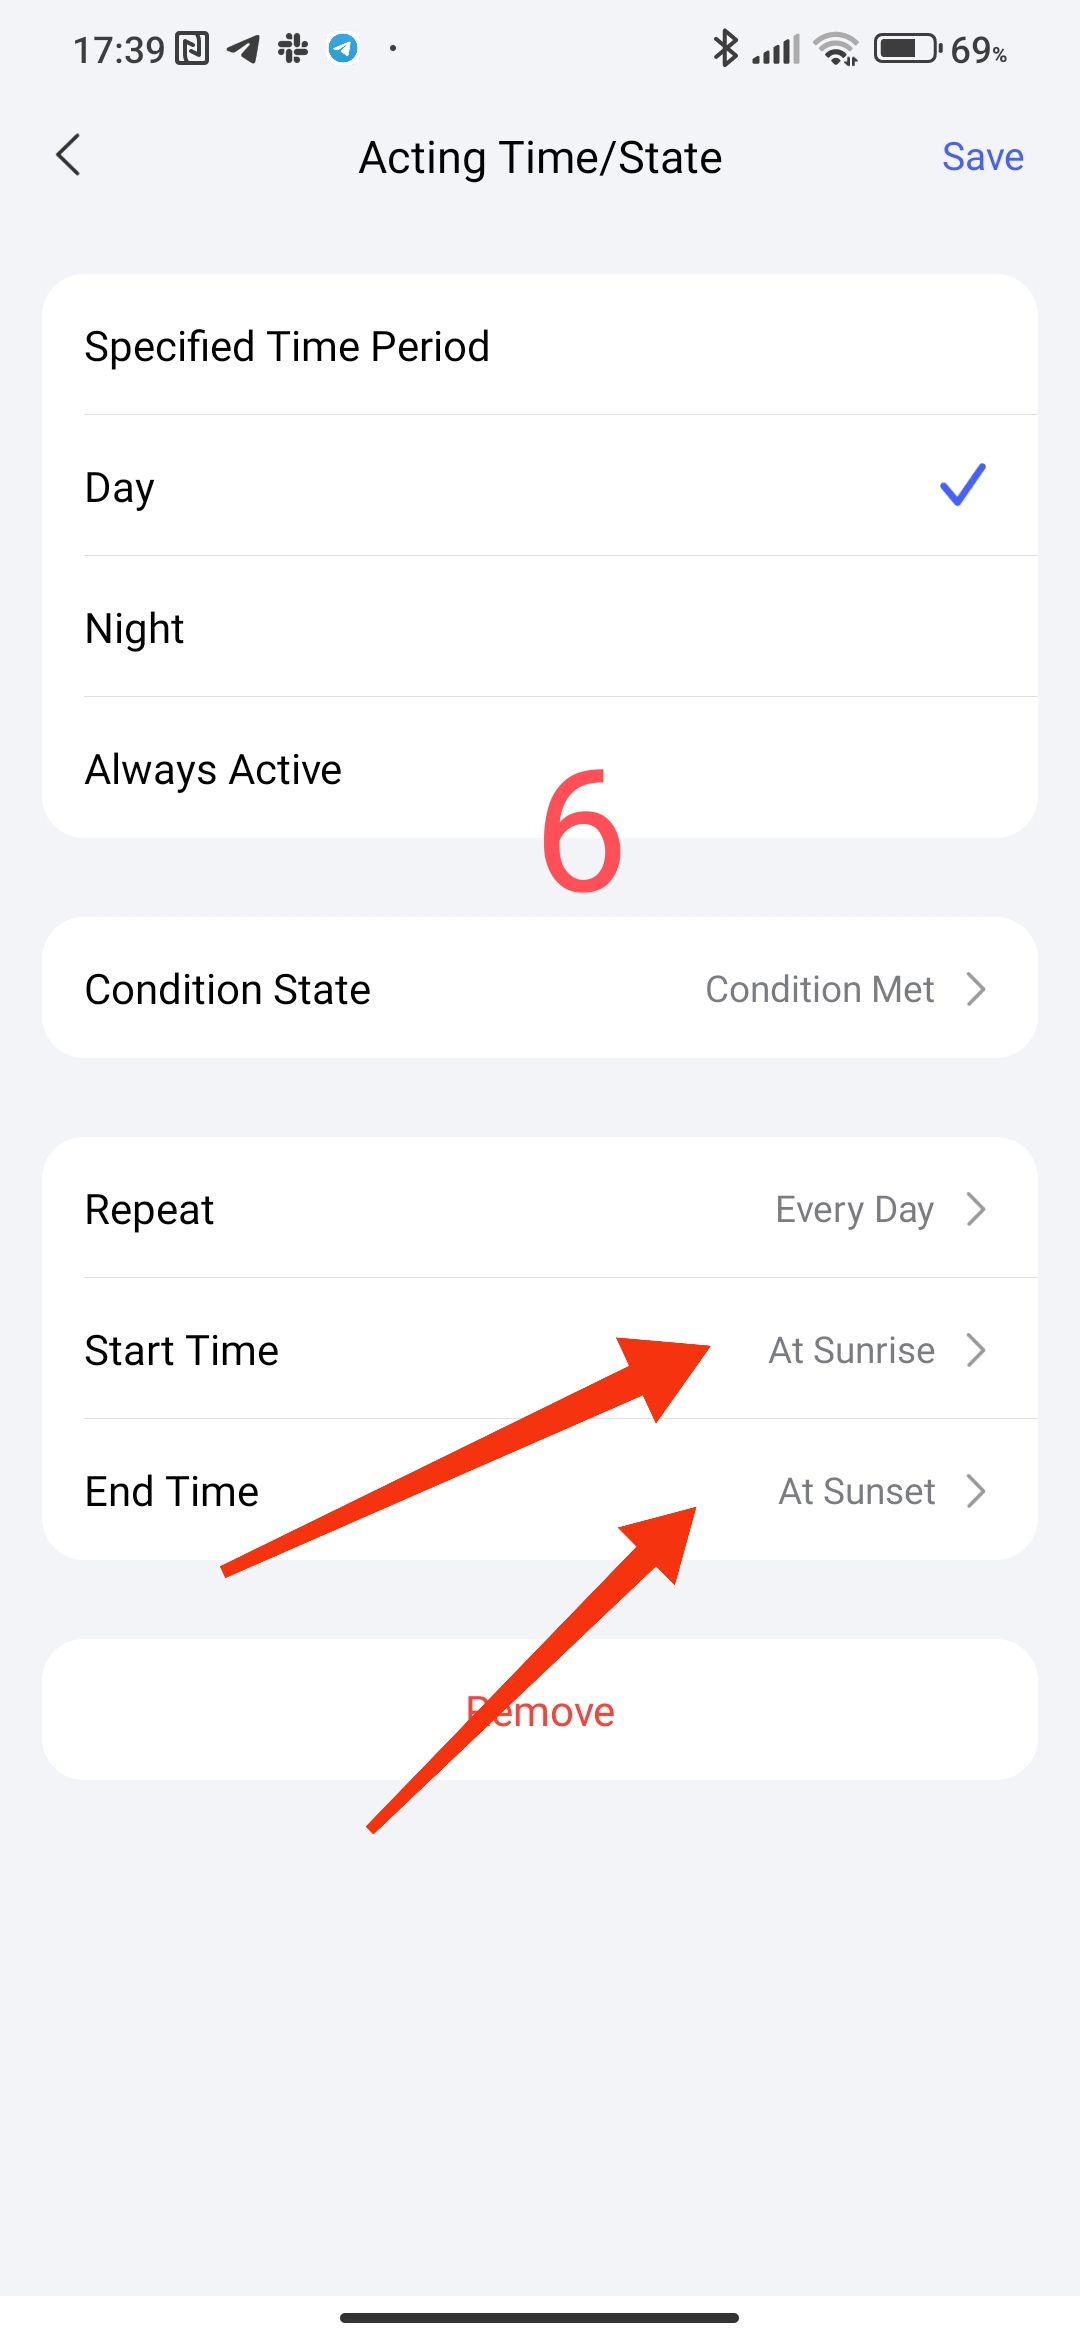
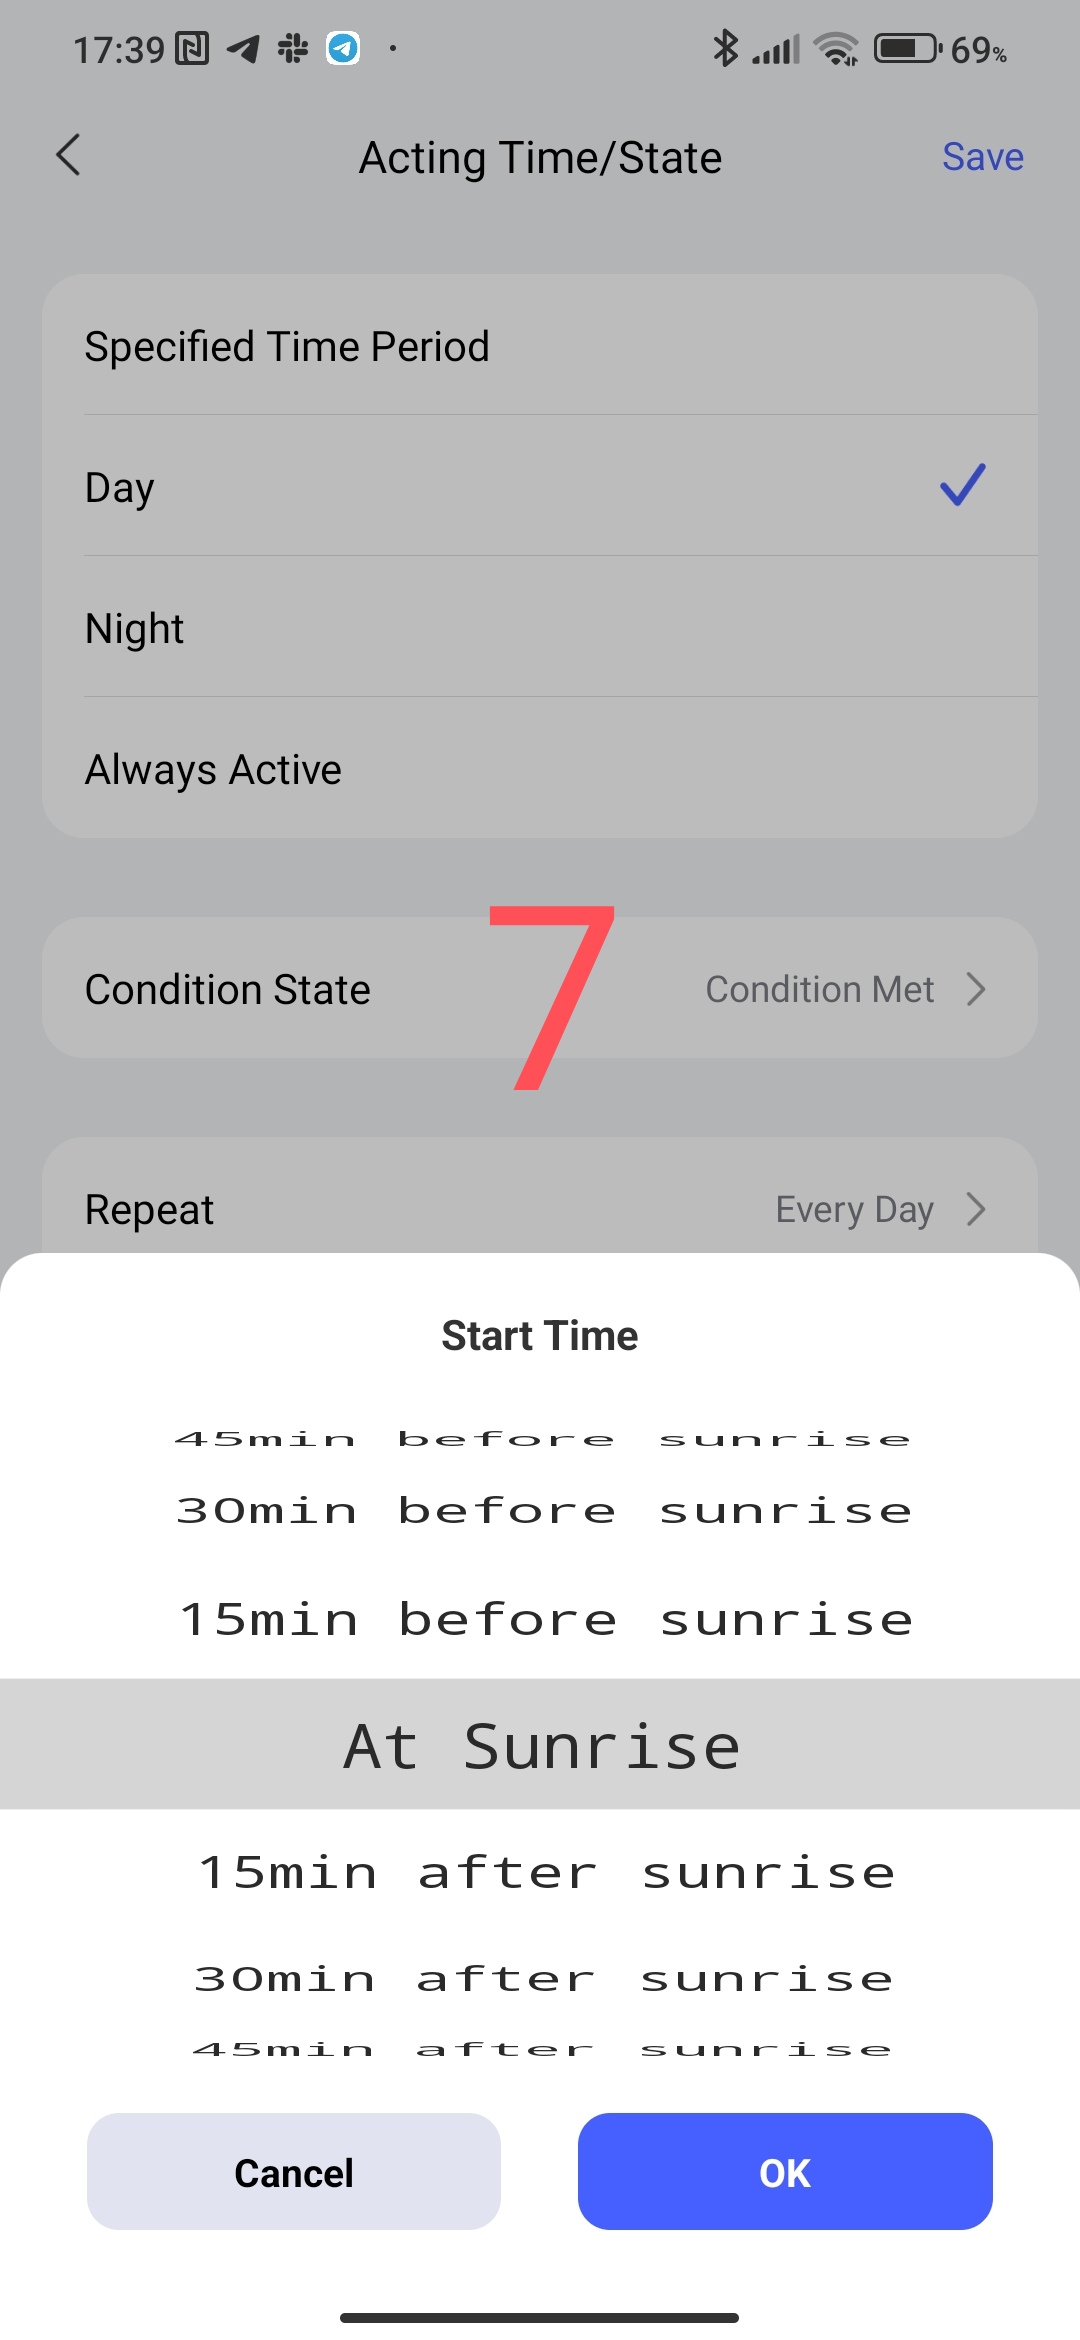
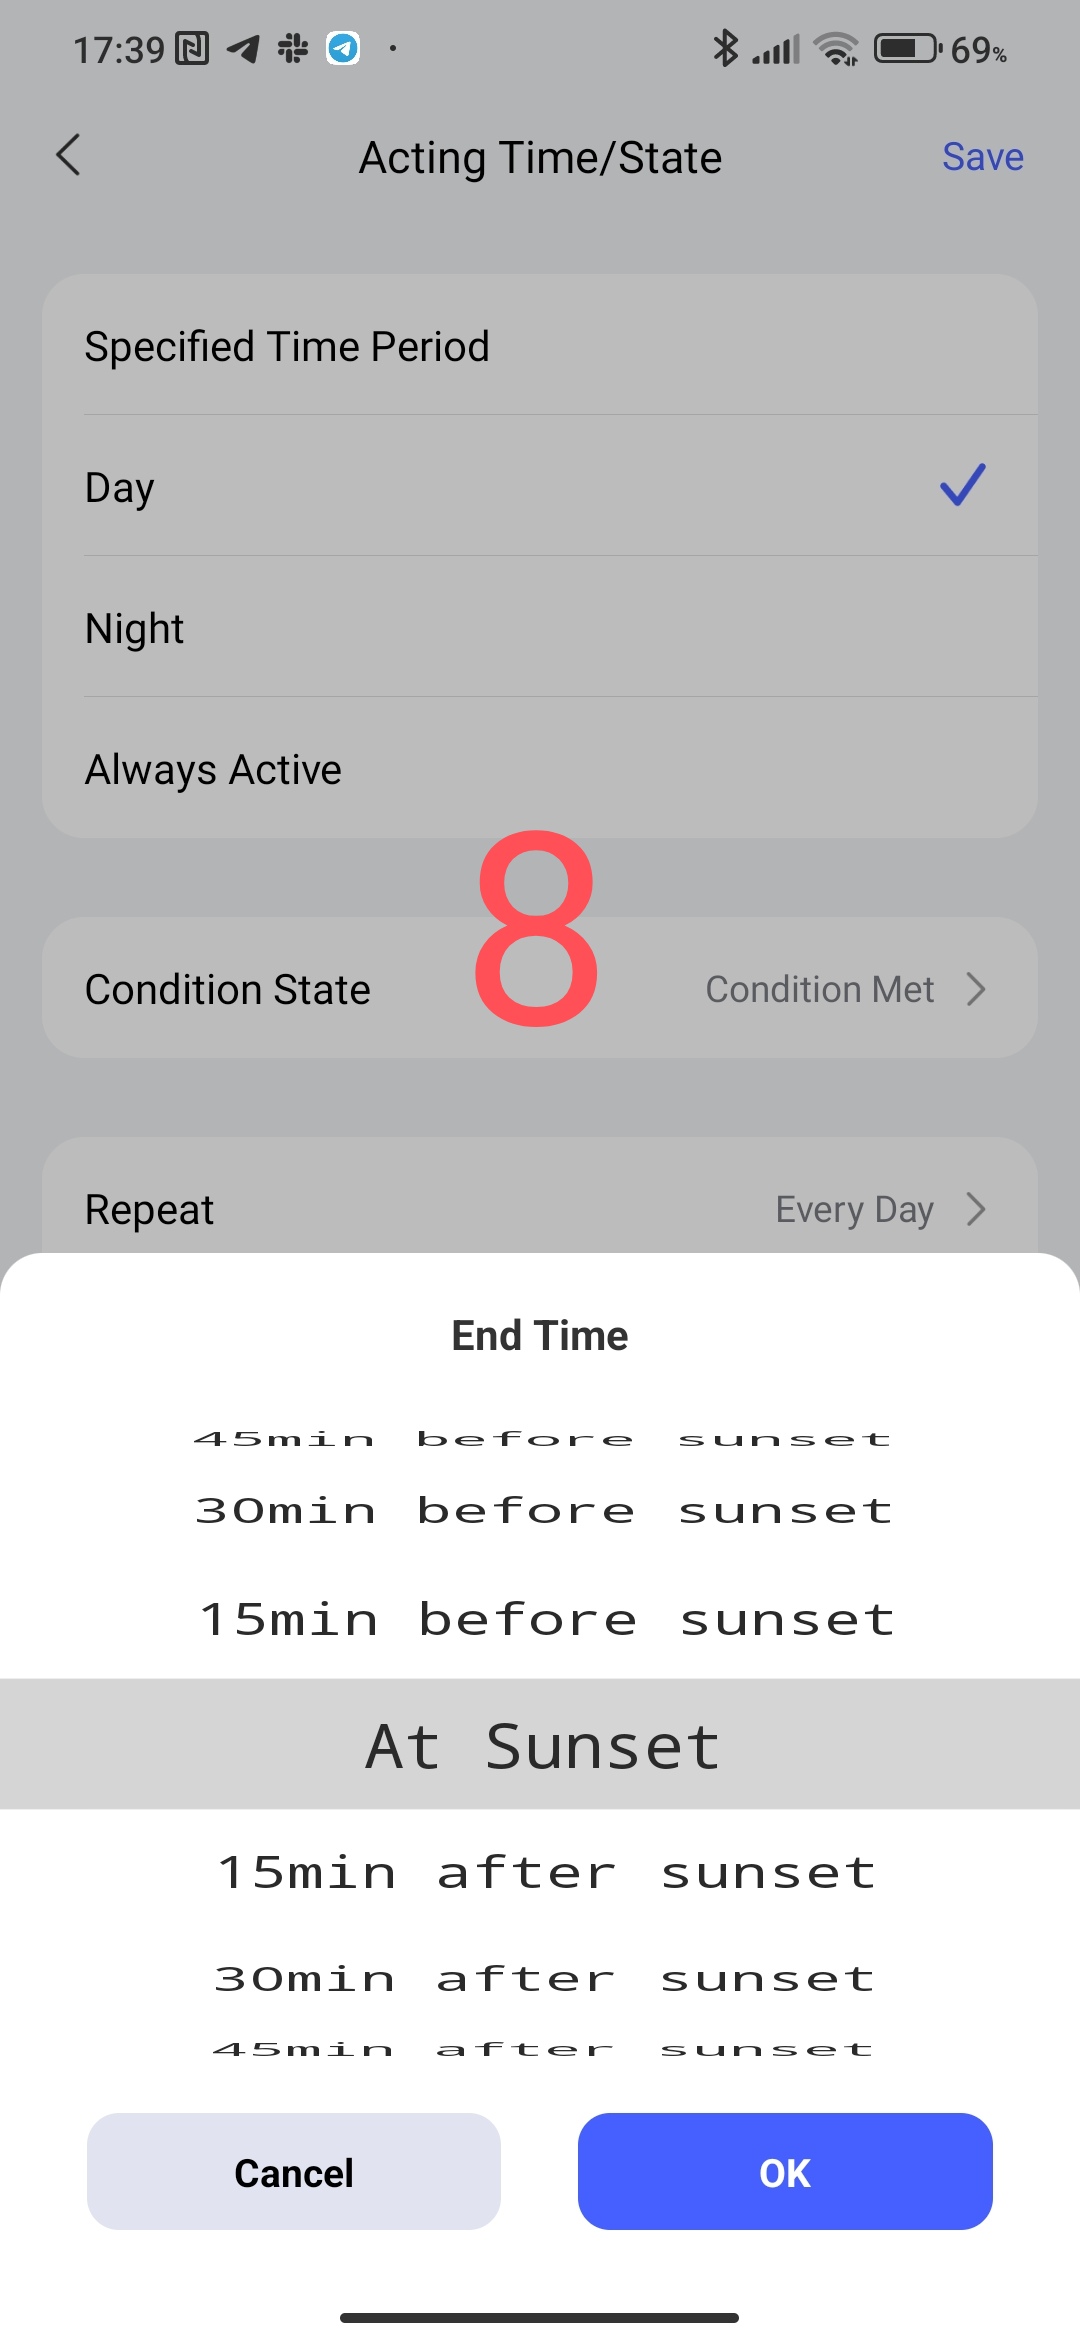
-day period;
allows you to select the period “sunrise”, “sunset” (daily time interval). The parameter interval is quite extended from 15 minutes to 4 hours relative to the event (sunset, sunrise)
Fig6, 7,8.
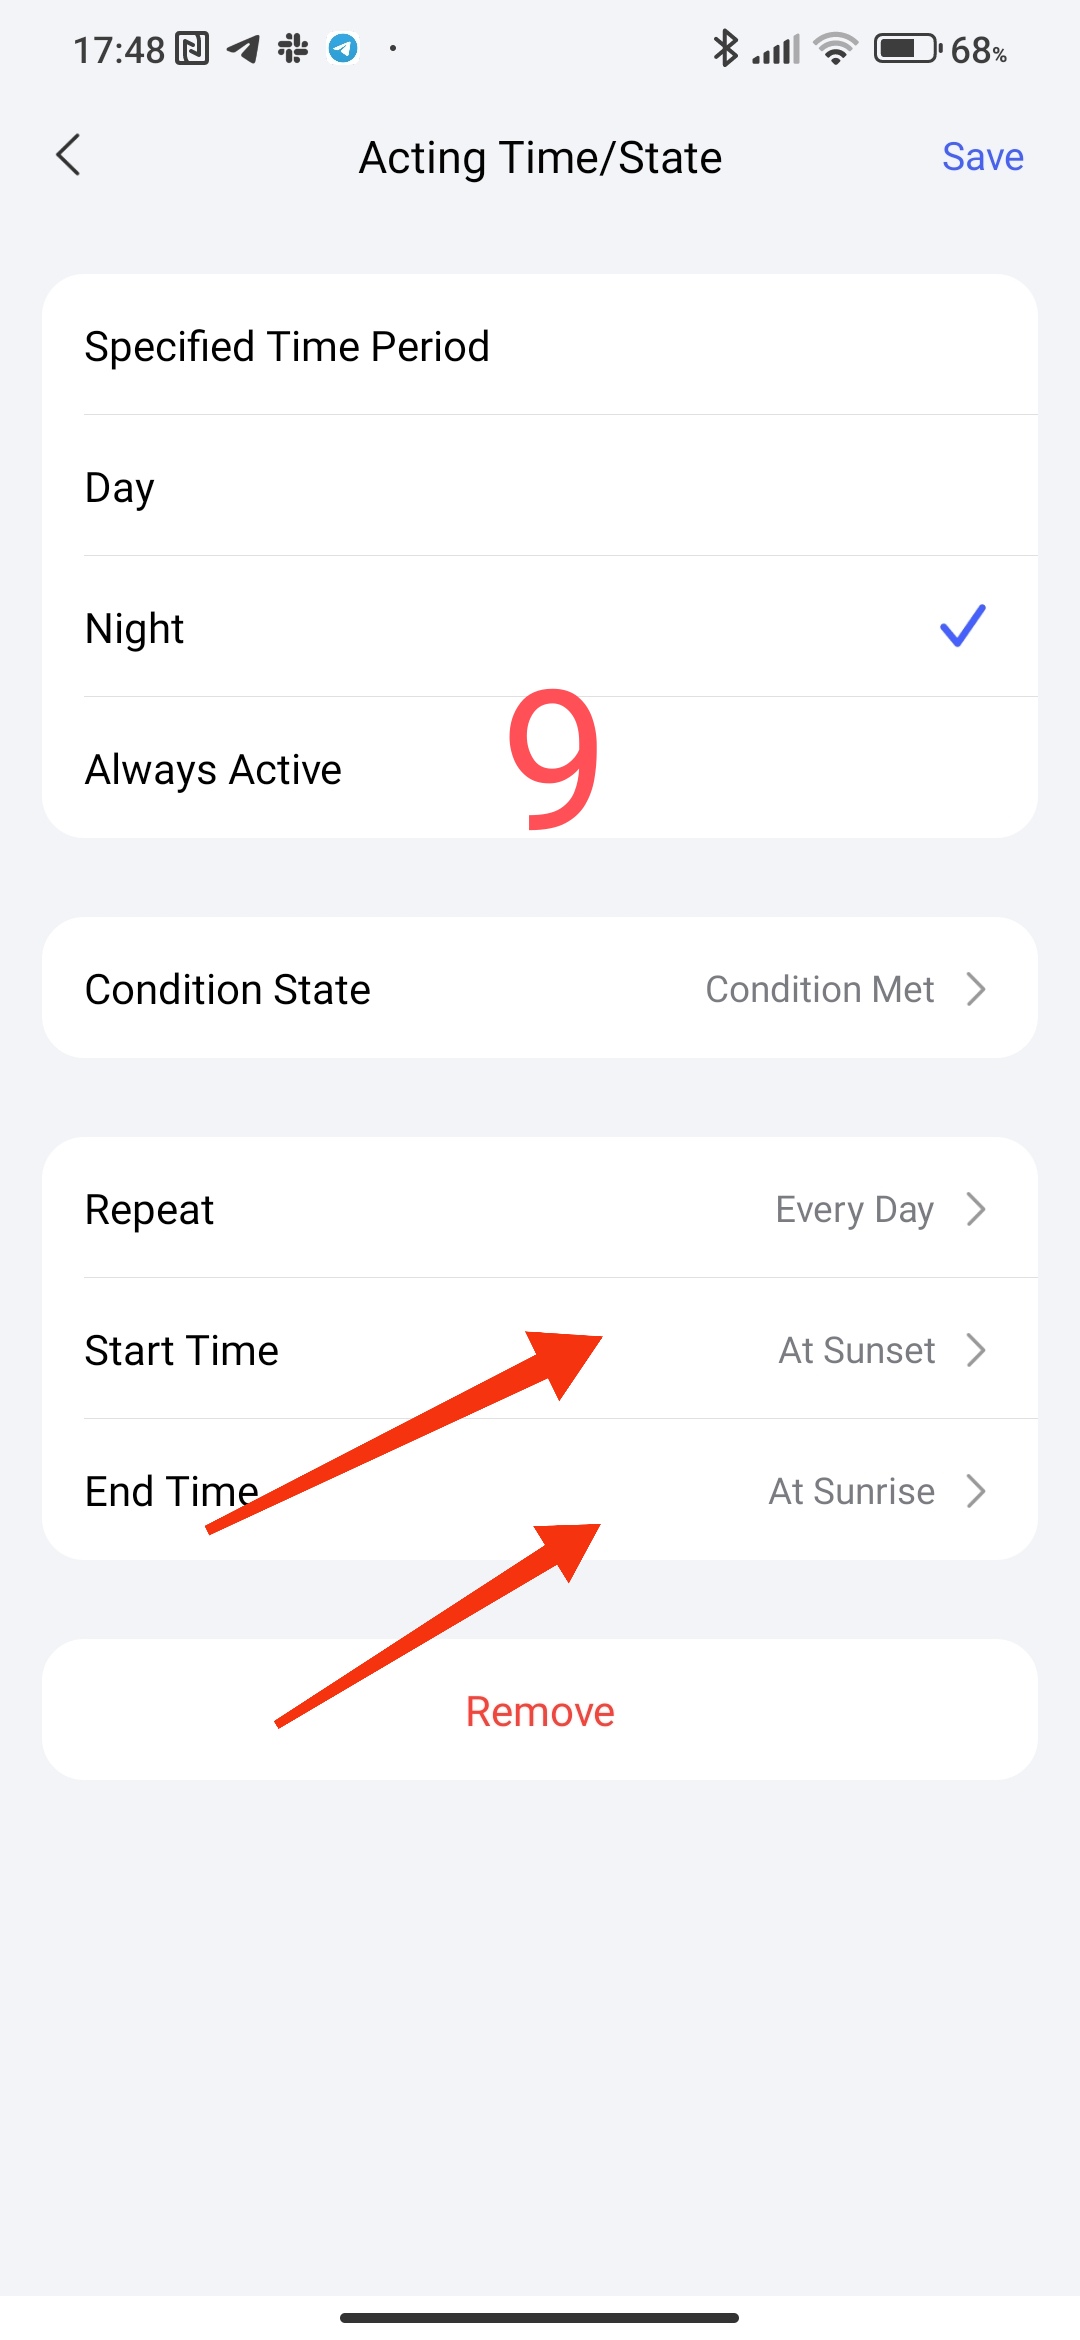
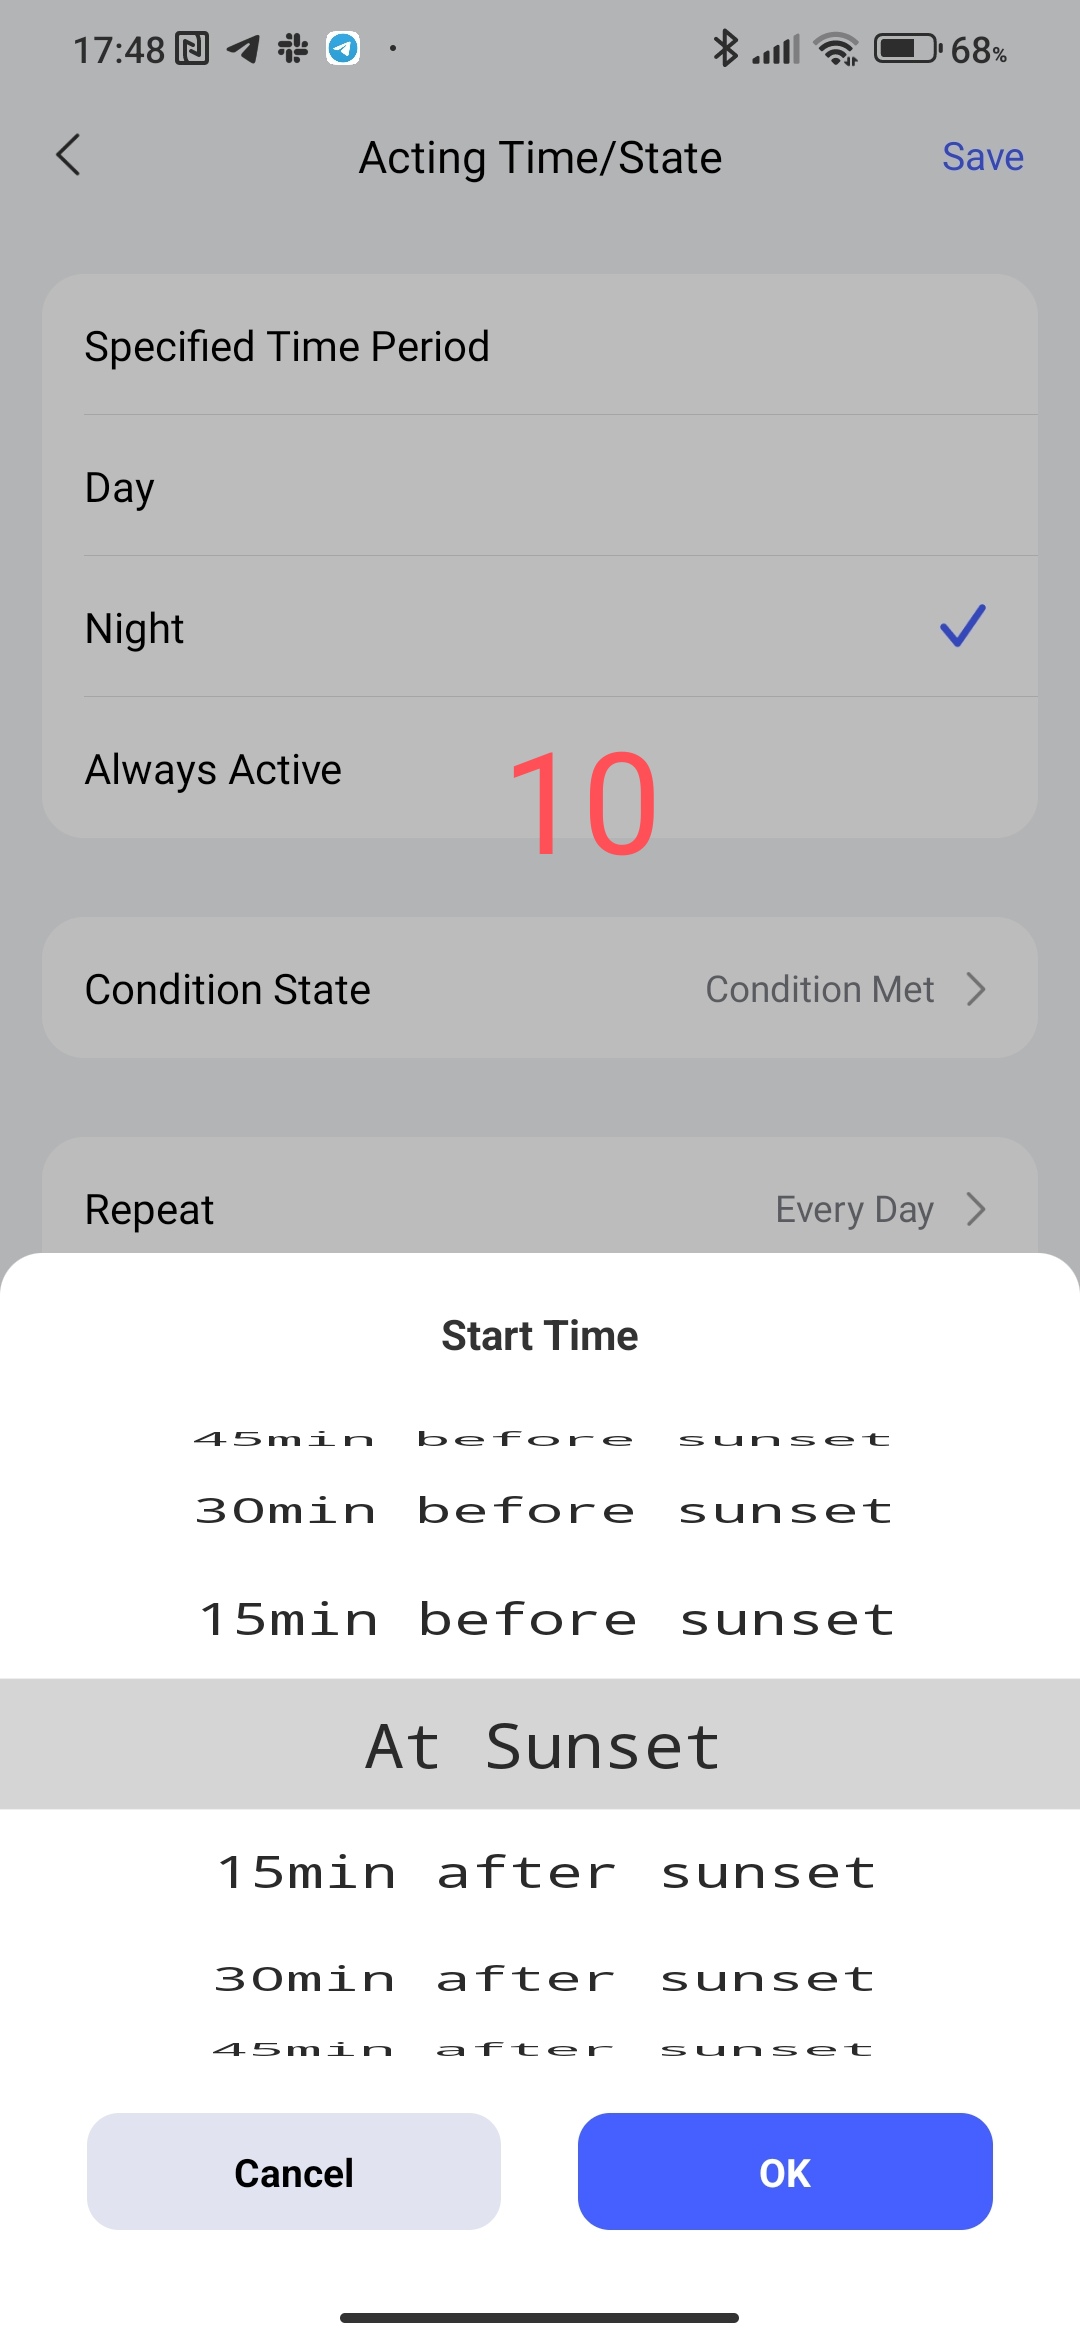
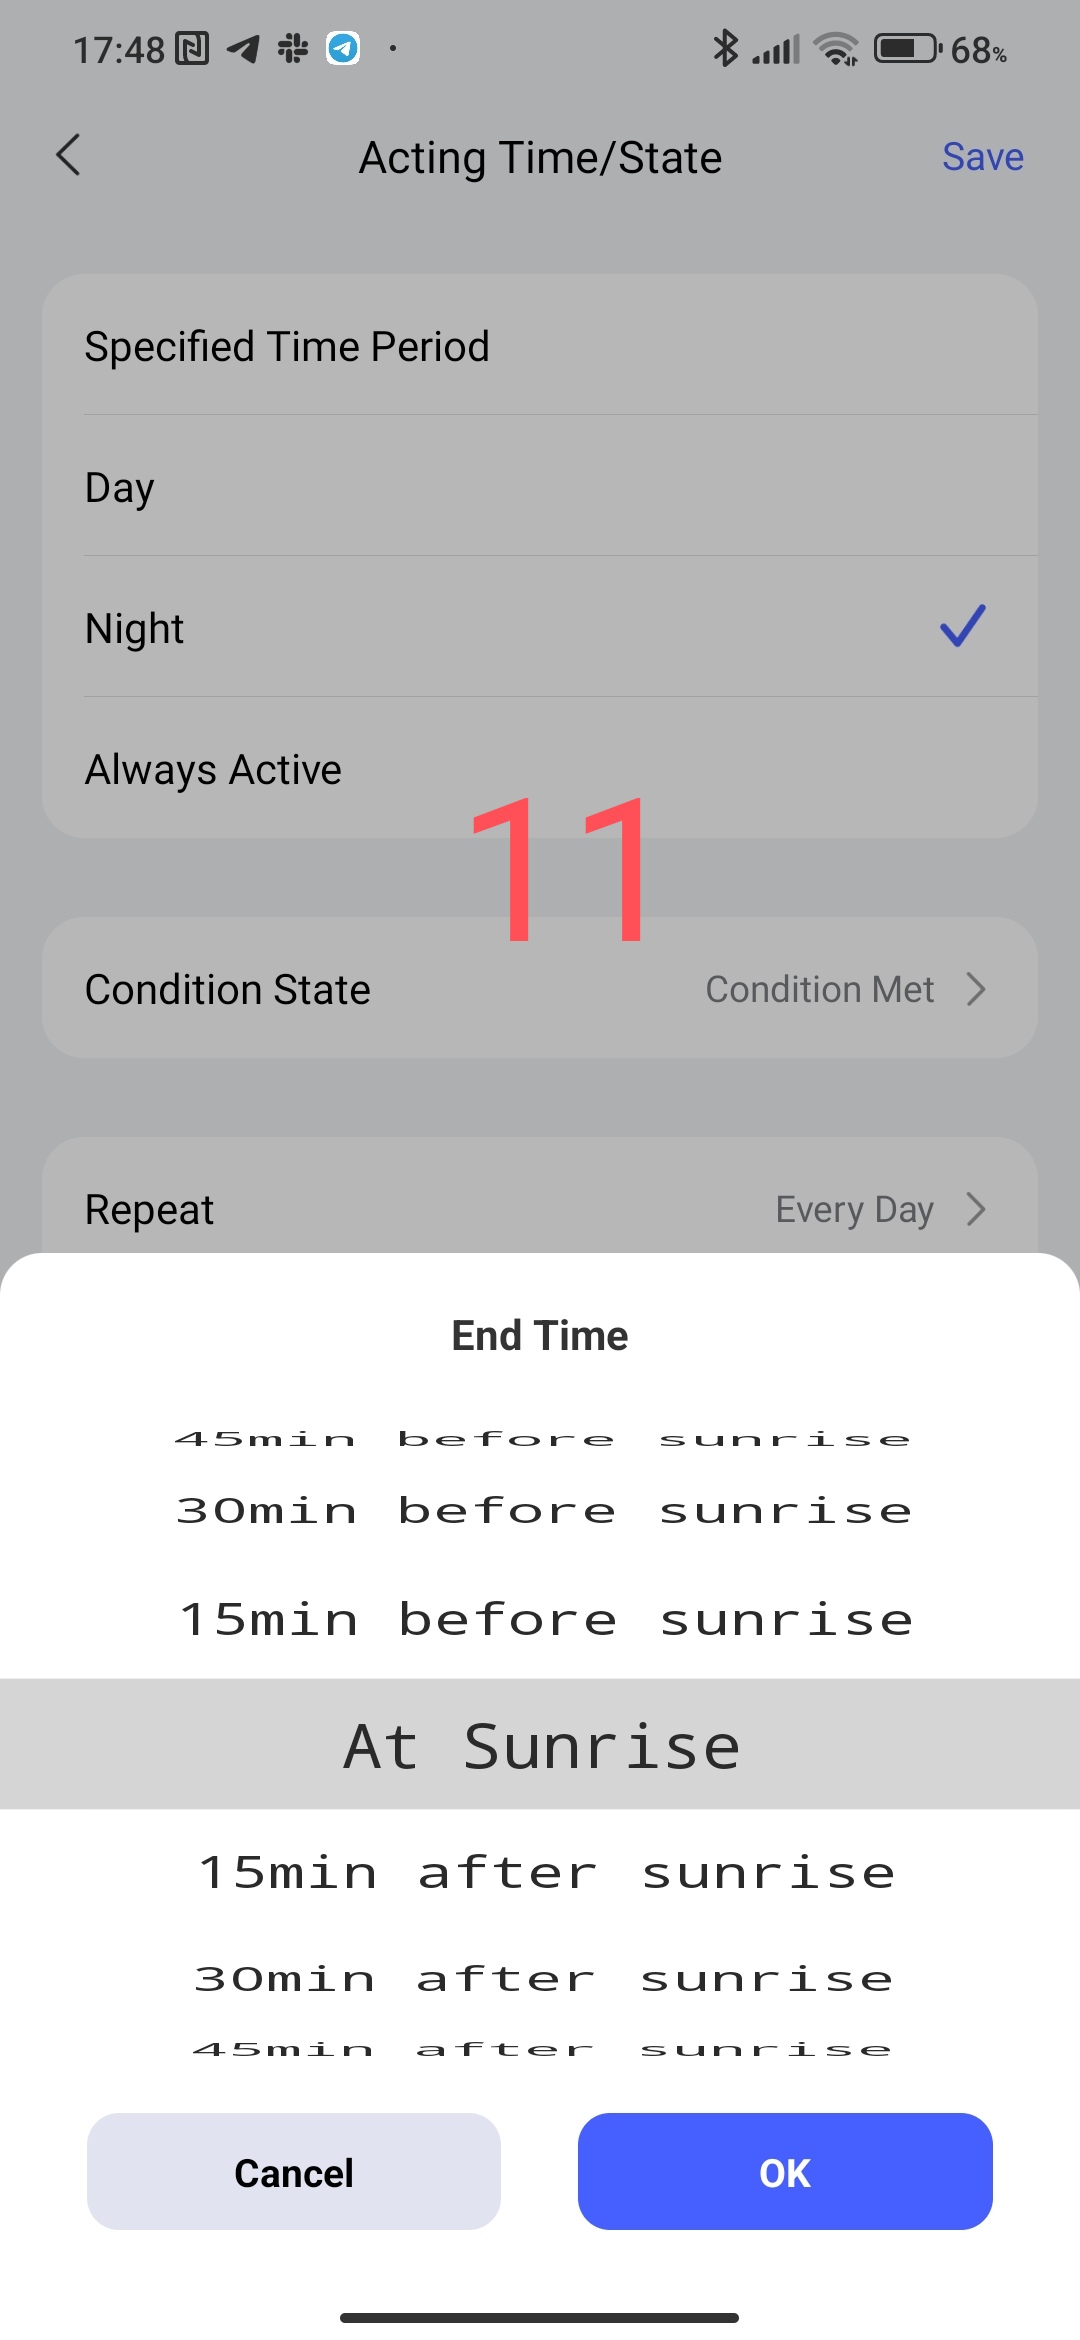
-night period;
allows you to select the period “sunset”, “sunrise” (night time period). The parameter interval is quite extended from 15 minutes to 4 hours relative to the event (sunset, sunrise).
Fig9,10,11
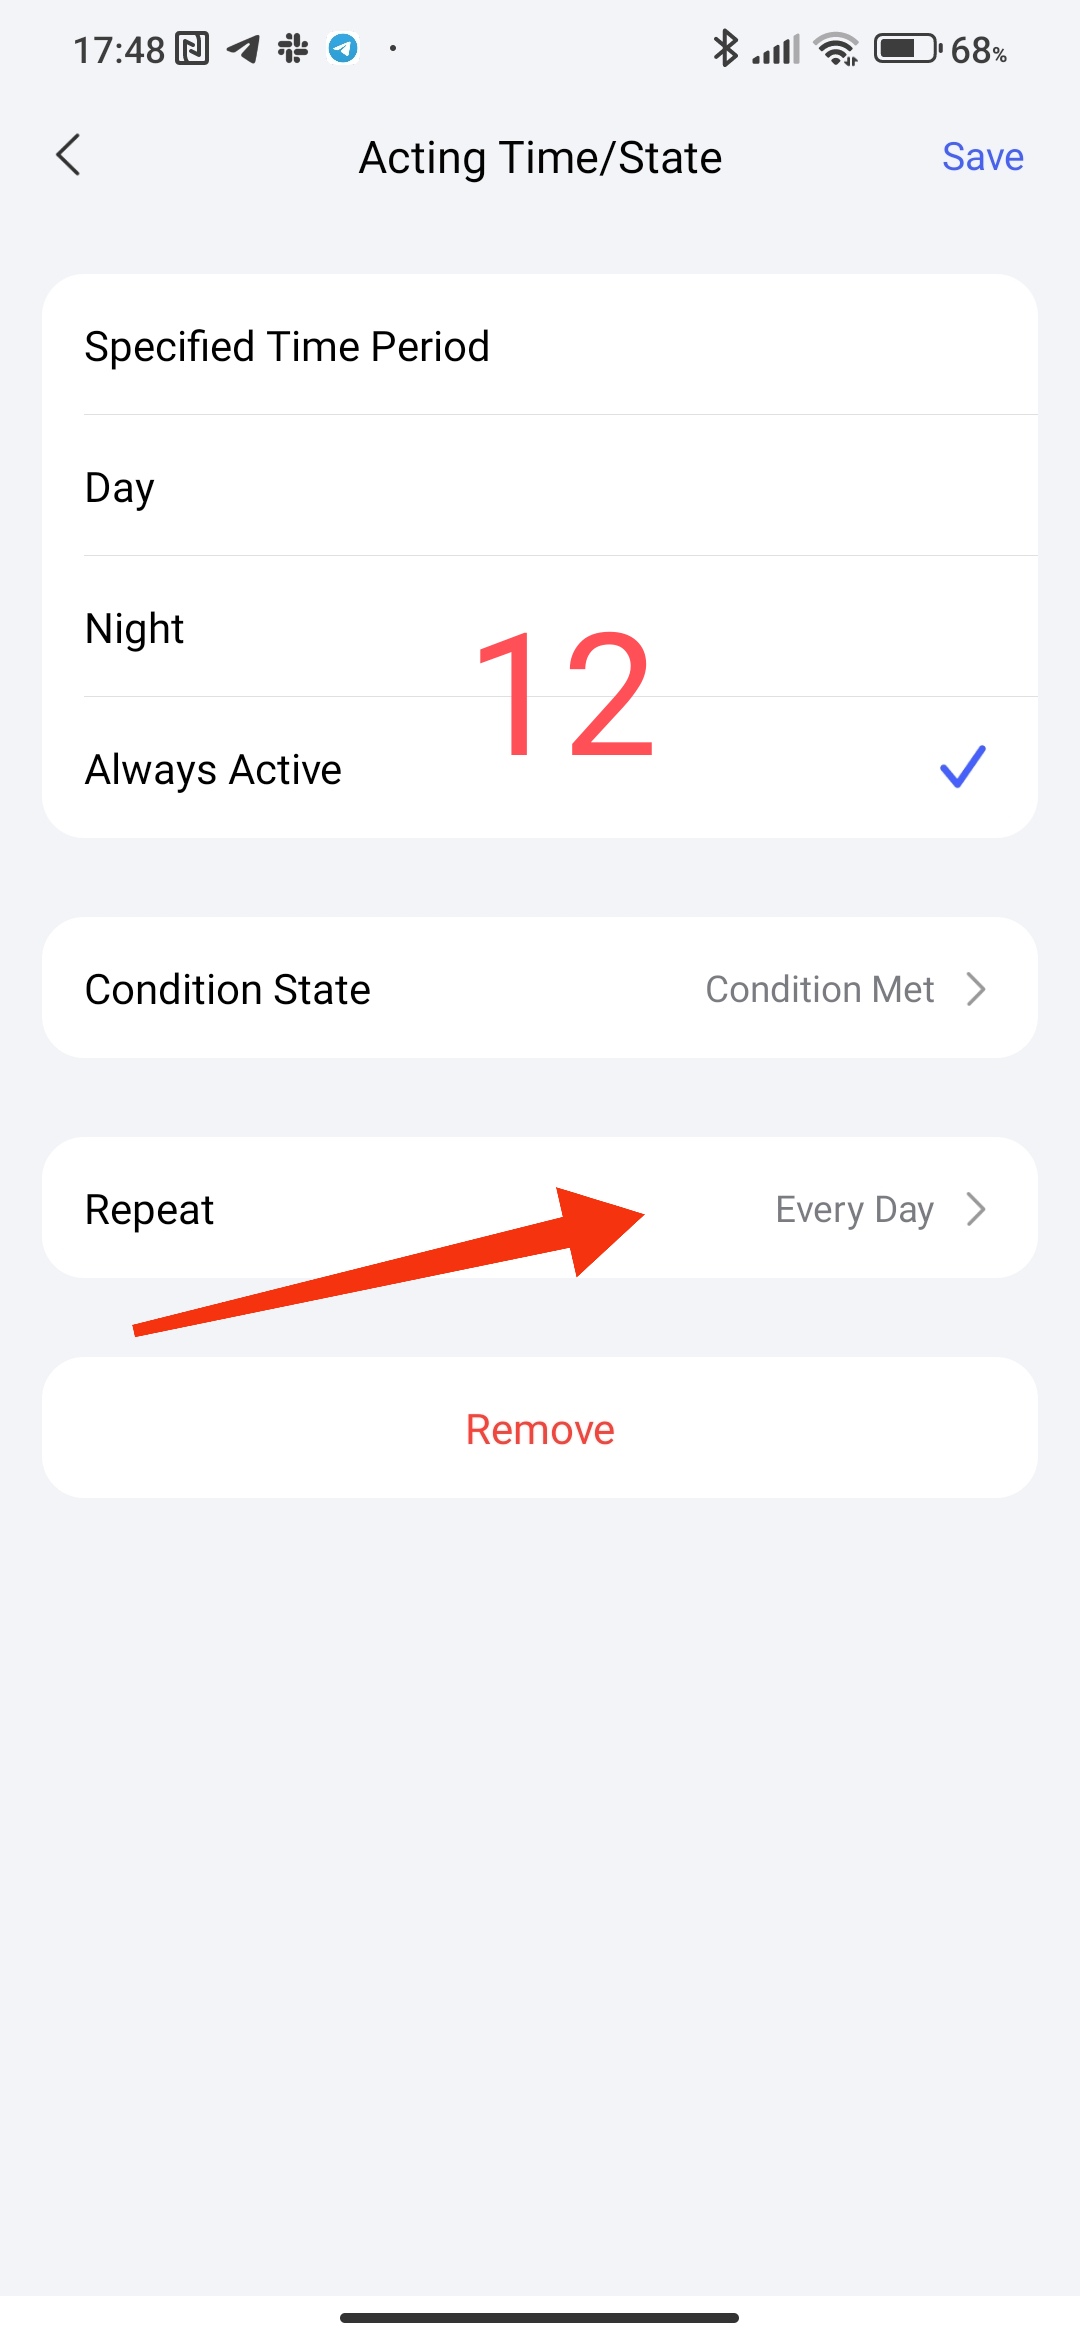
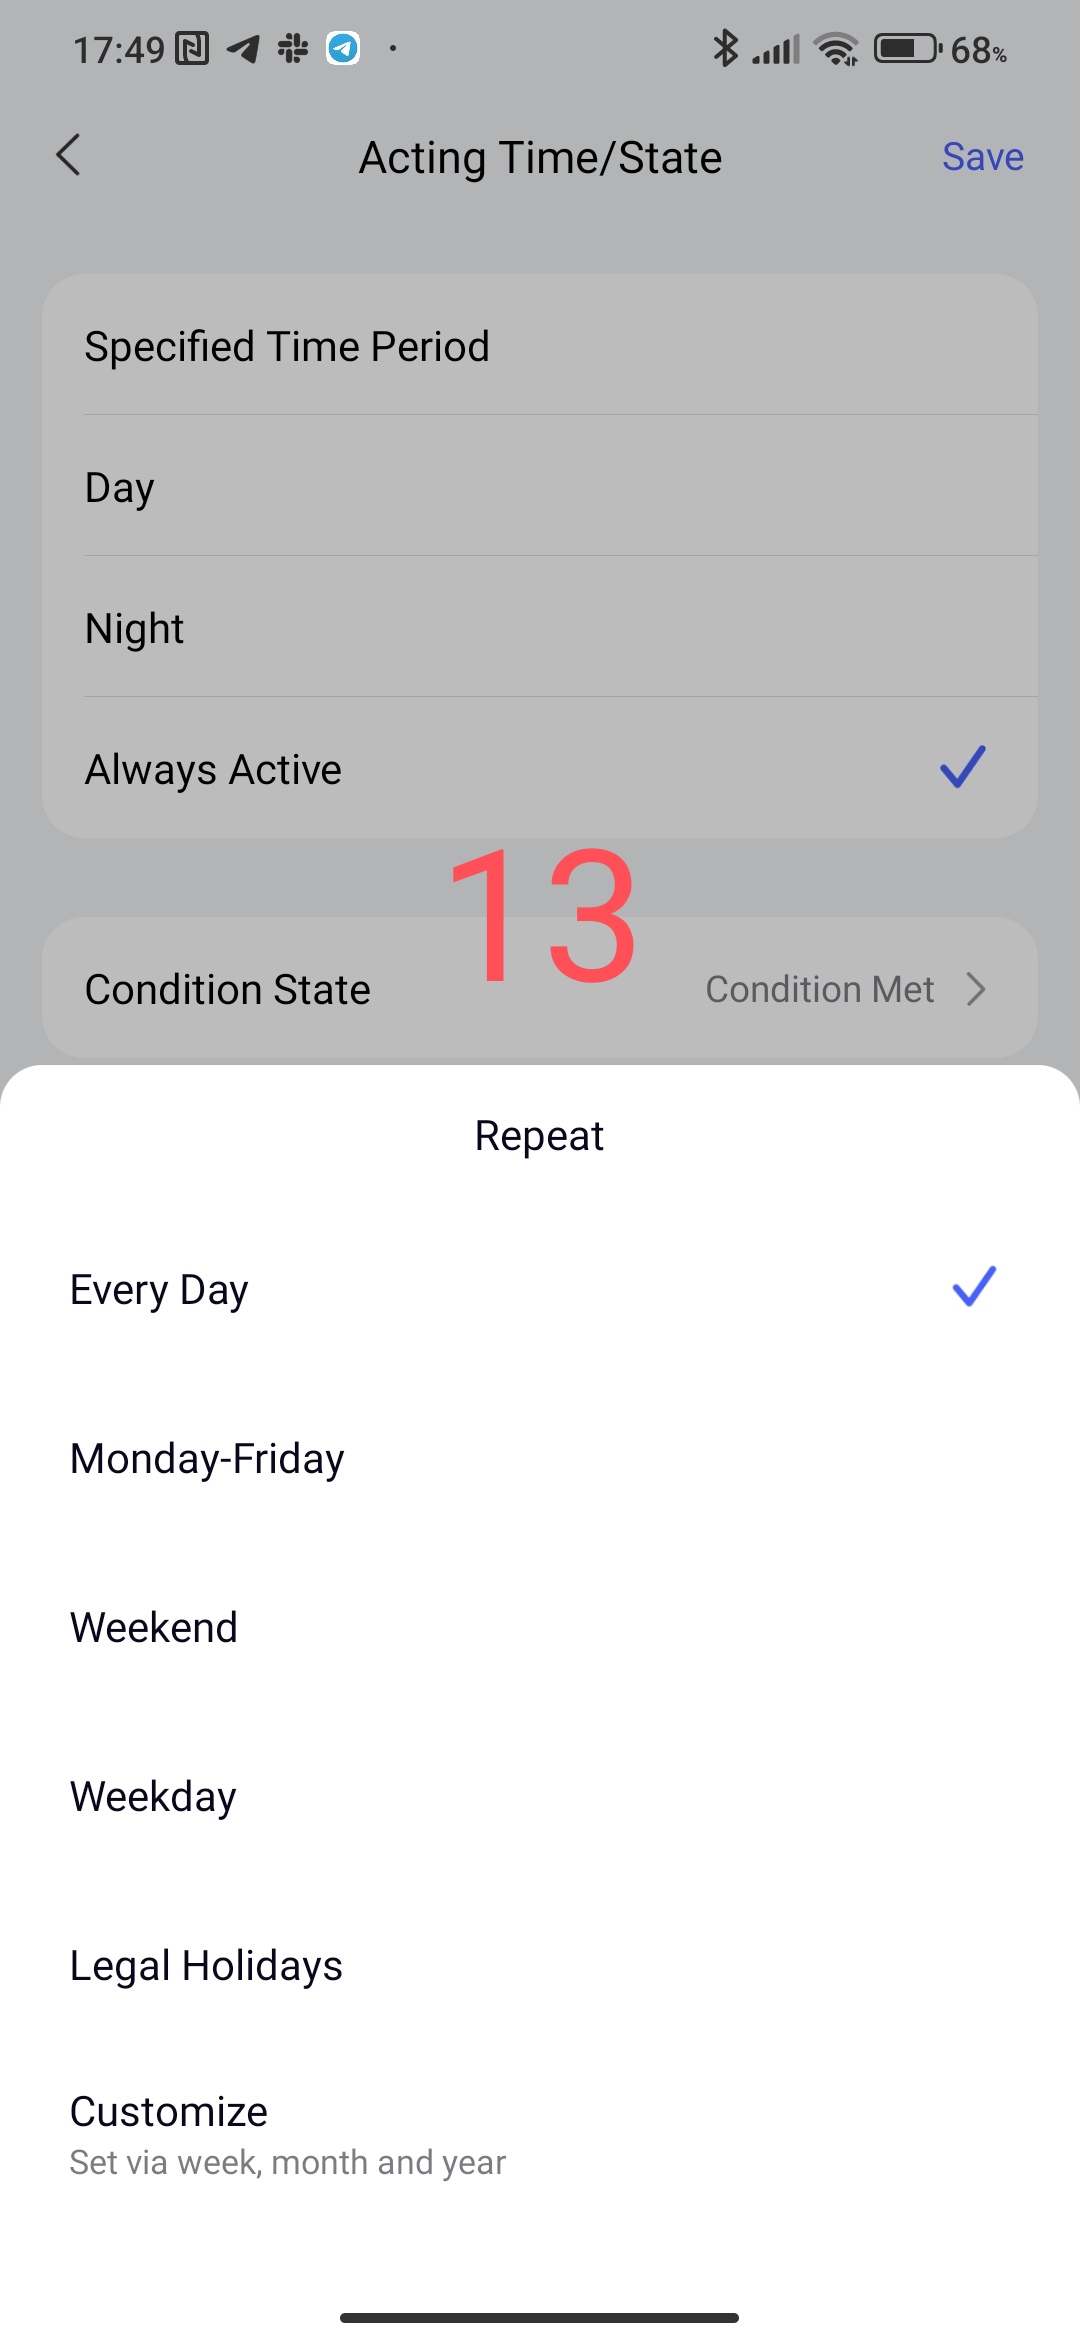
-whole day (selection not by hours but by days, weeks, months).
This parameter works for a whole day (without a time interval), allows you to select the day of the week, day of the month, whole month.
Fig12, 13.
Note!!!
Automation associated with sunset and sunrise is now carried out by the gateway (locally). Each gateway is tied to its location, a mathematical algorithm calculates sunset and sunrise for a smart home. I am writing this for users who have not set the region for their gateway, and then do not understand why the automation is not working correctly.
Let’s continue the review.
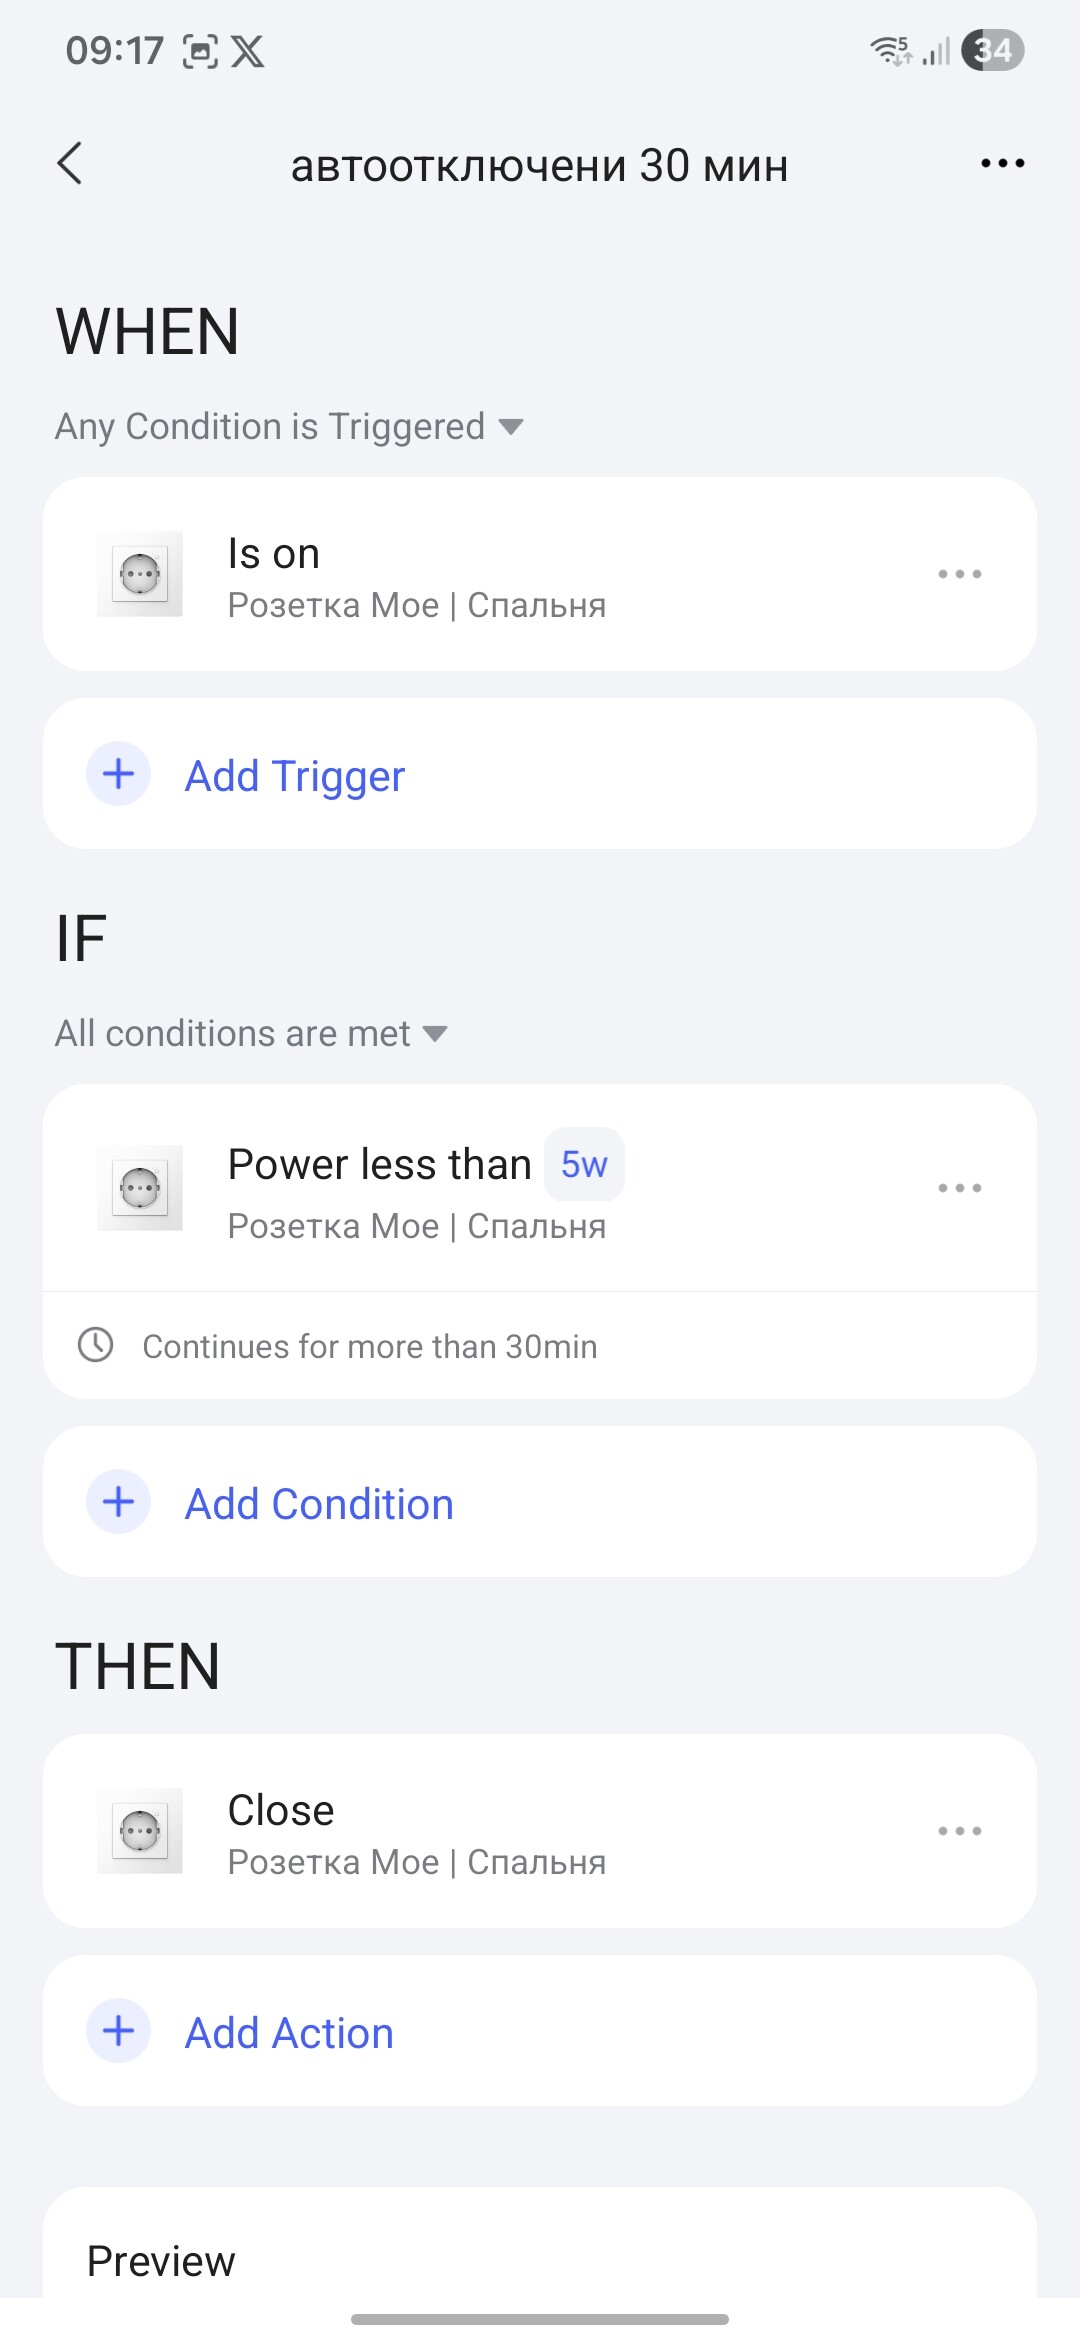
Let’s consider the second setting “Daration”.
Fig. 14
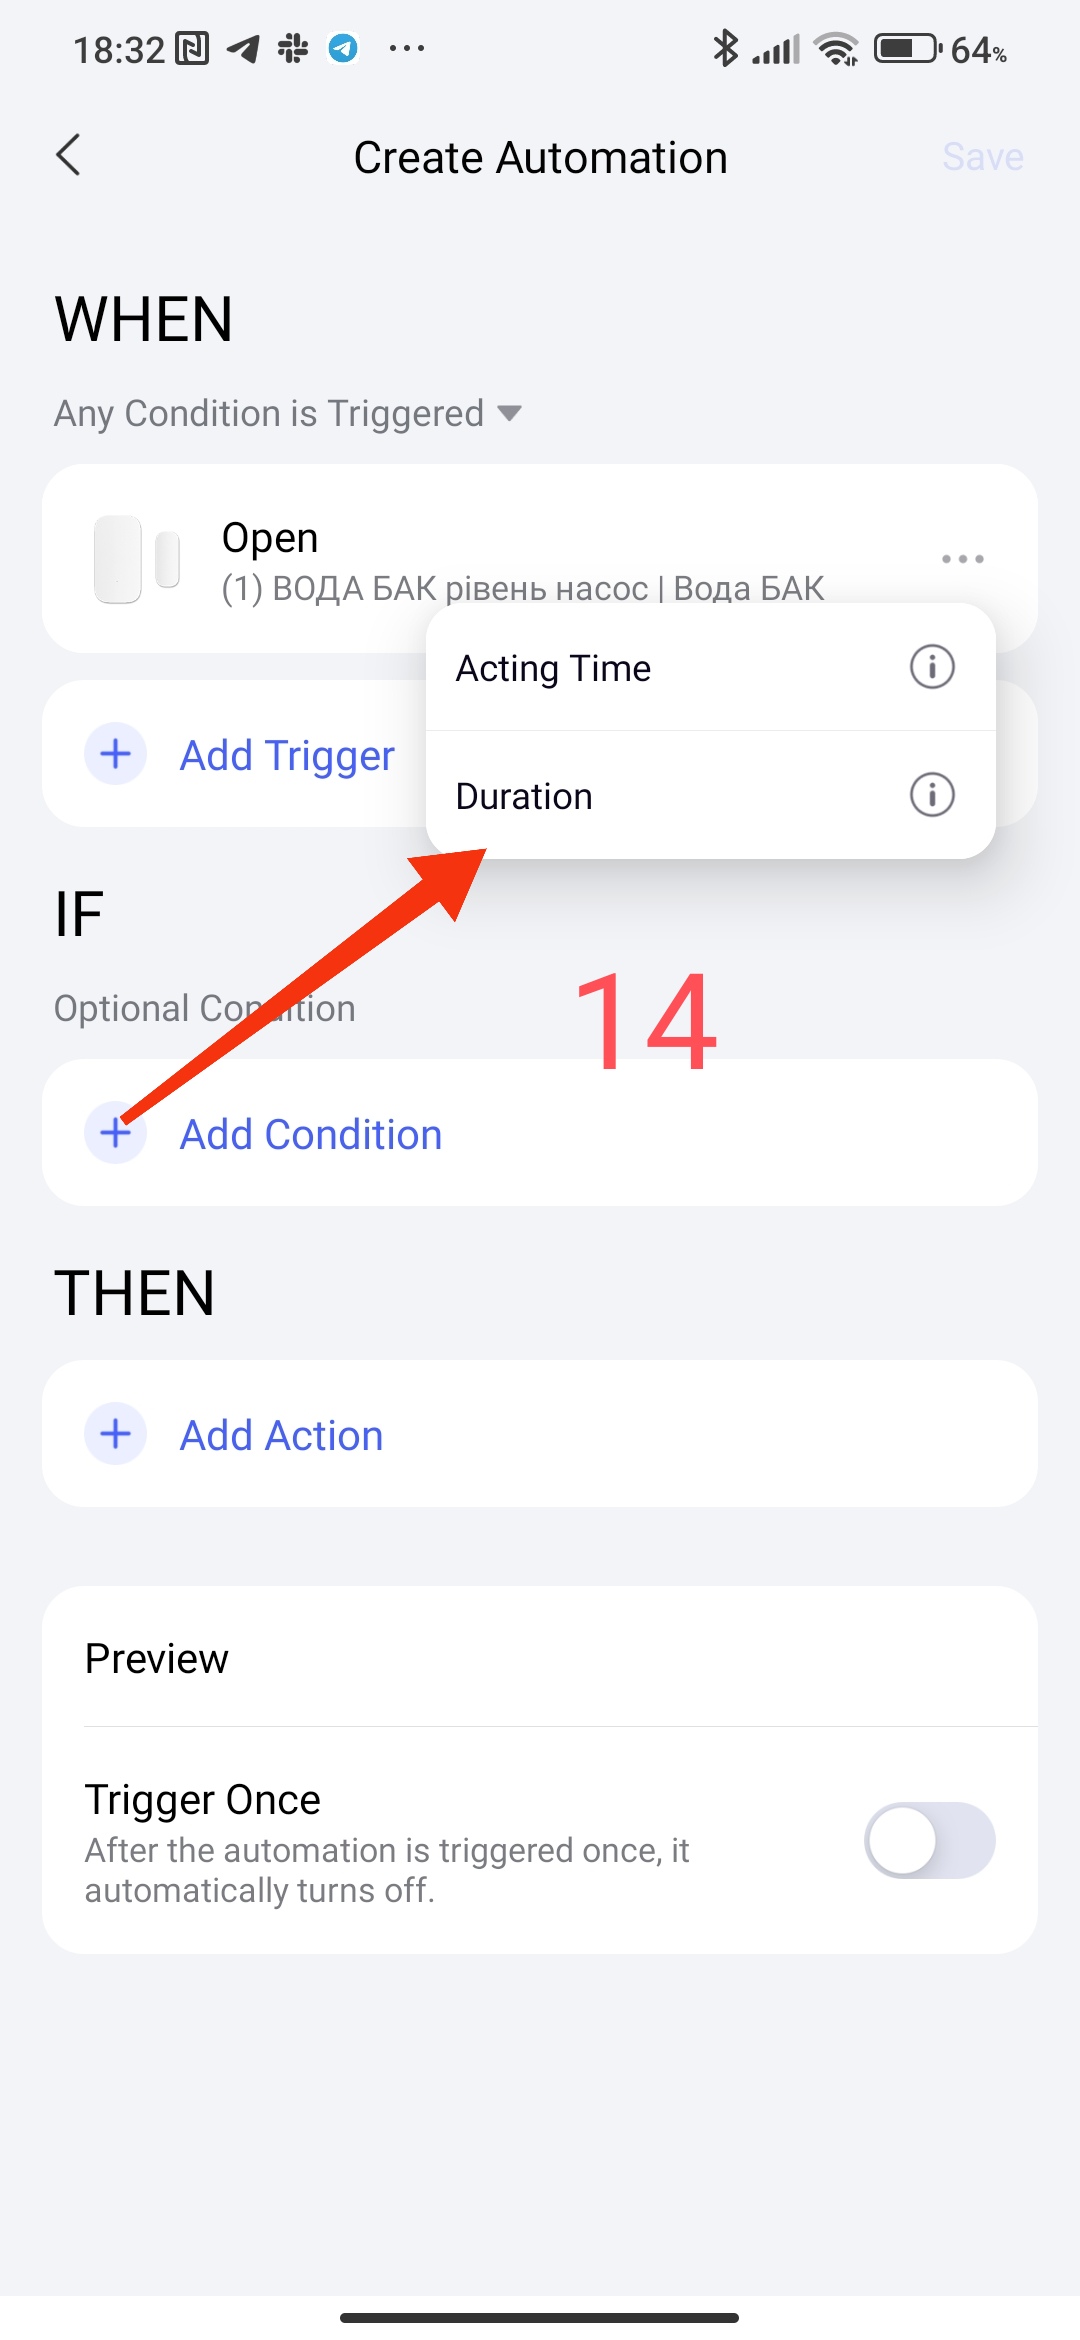
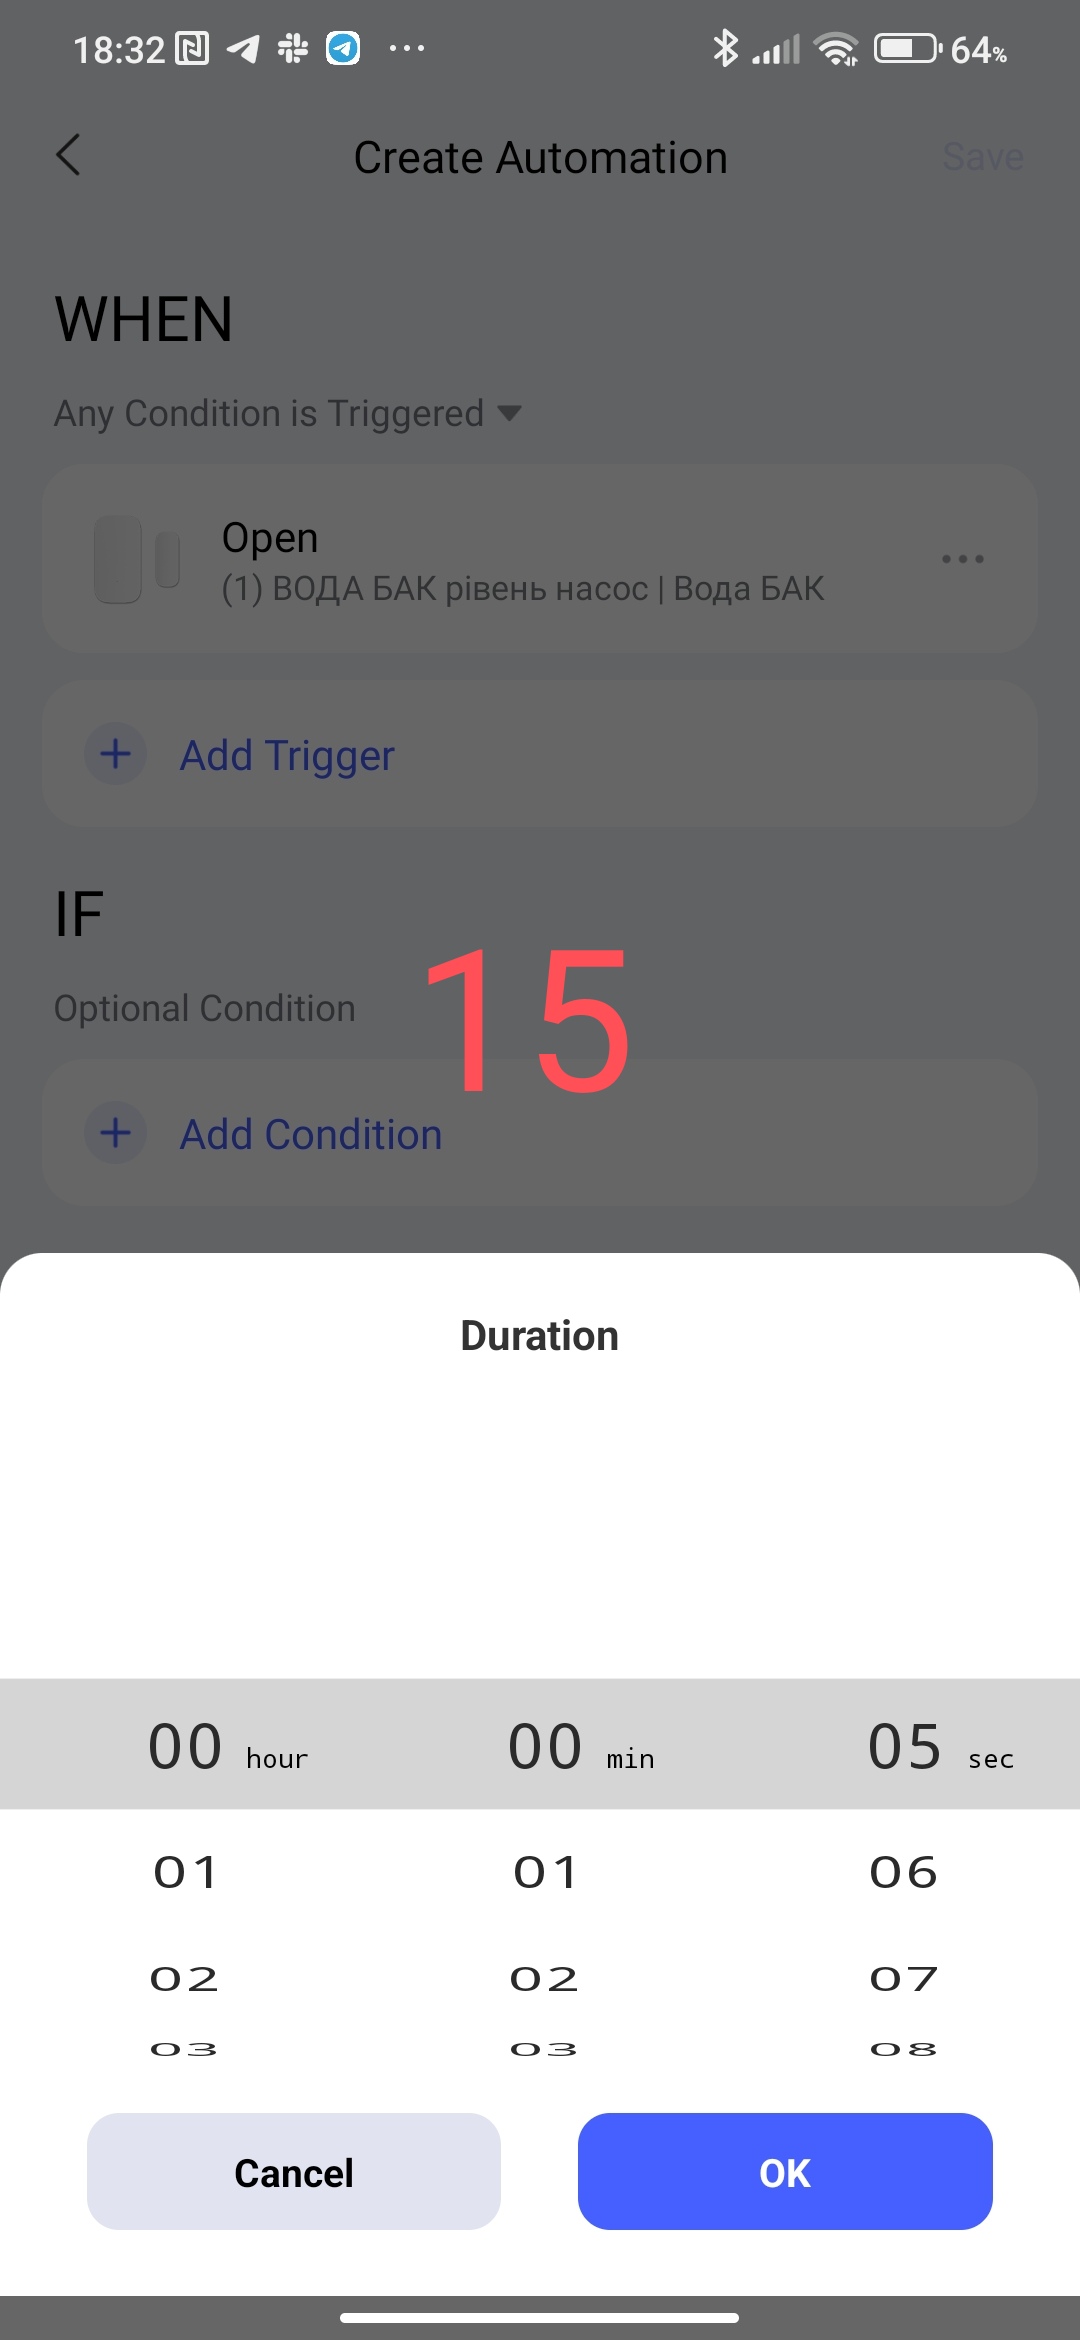
This setting allows the user to set a delay for the condition that occurred. Example - there was movement (motion sensor) after this there is a delay (set by the user) of the signal from the sensor and after this timeout, the following conditions are checked that are in the “IF” section. The delay time can be set from 5 seconds to 3 hours.
Fig. 15.
CONDITIONS “…” in “IF”
In the IF tab, the conditions for using the time range are similar to the description for “WHEN”, so I will not repeat them.
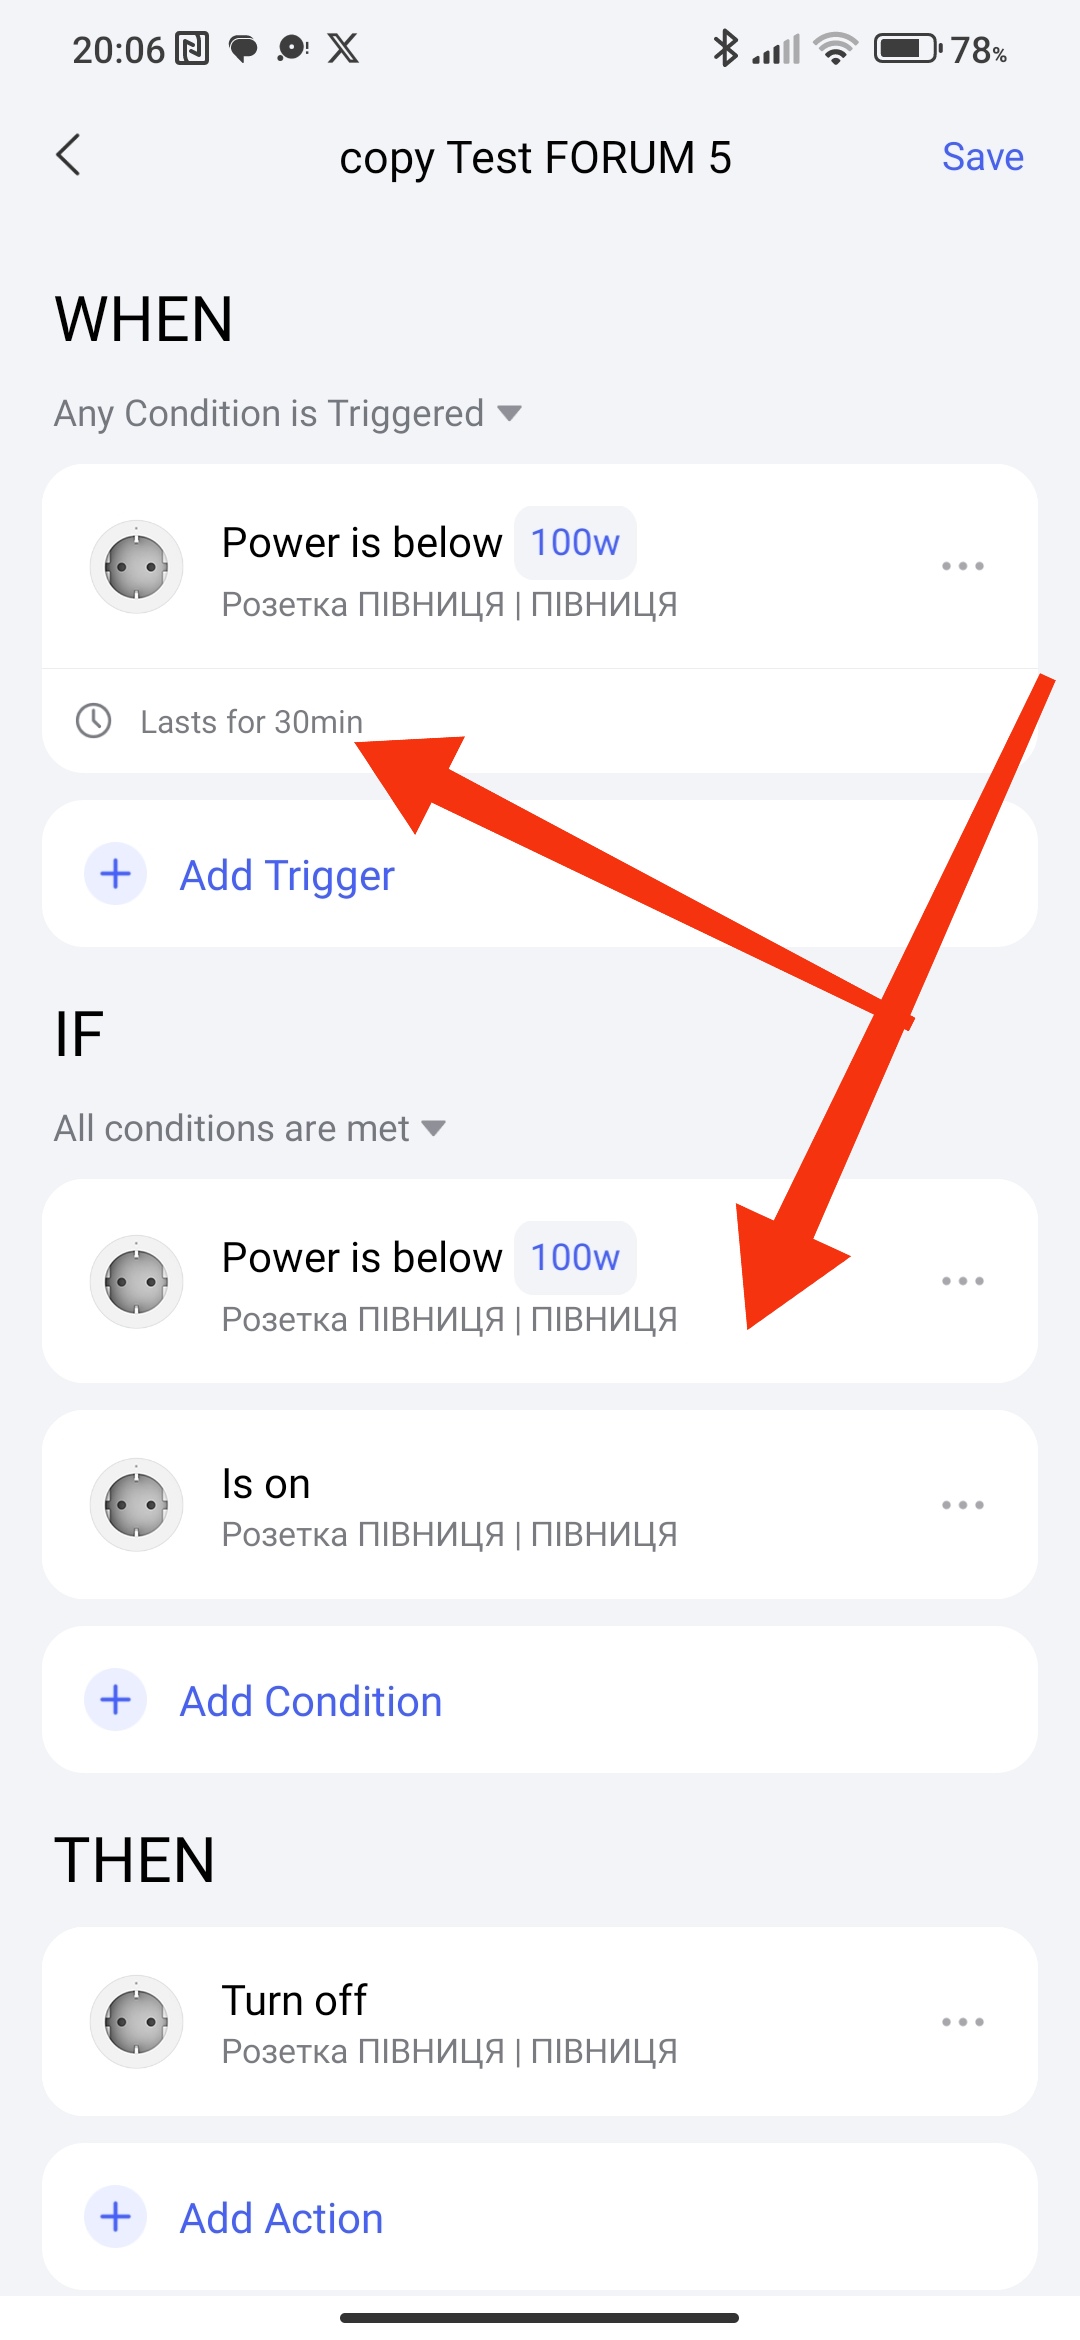
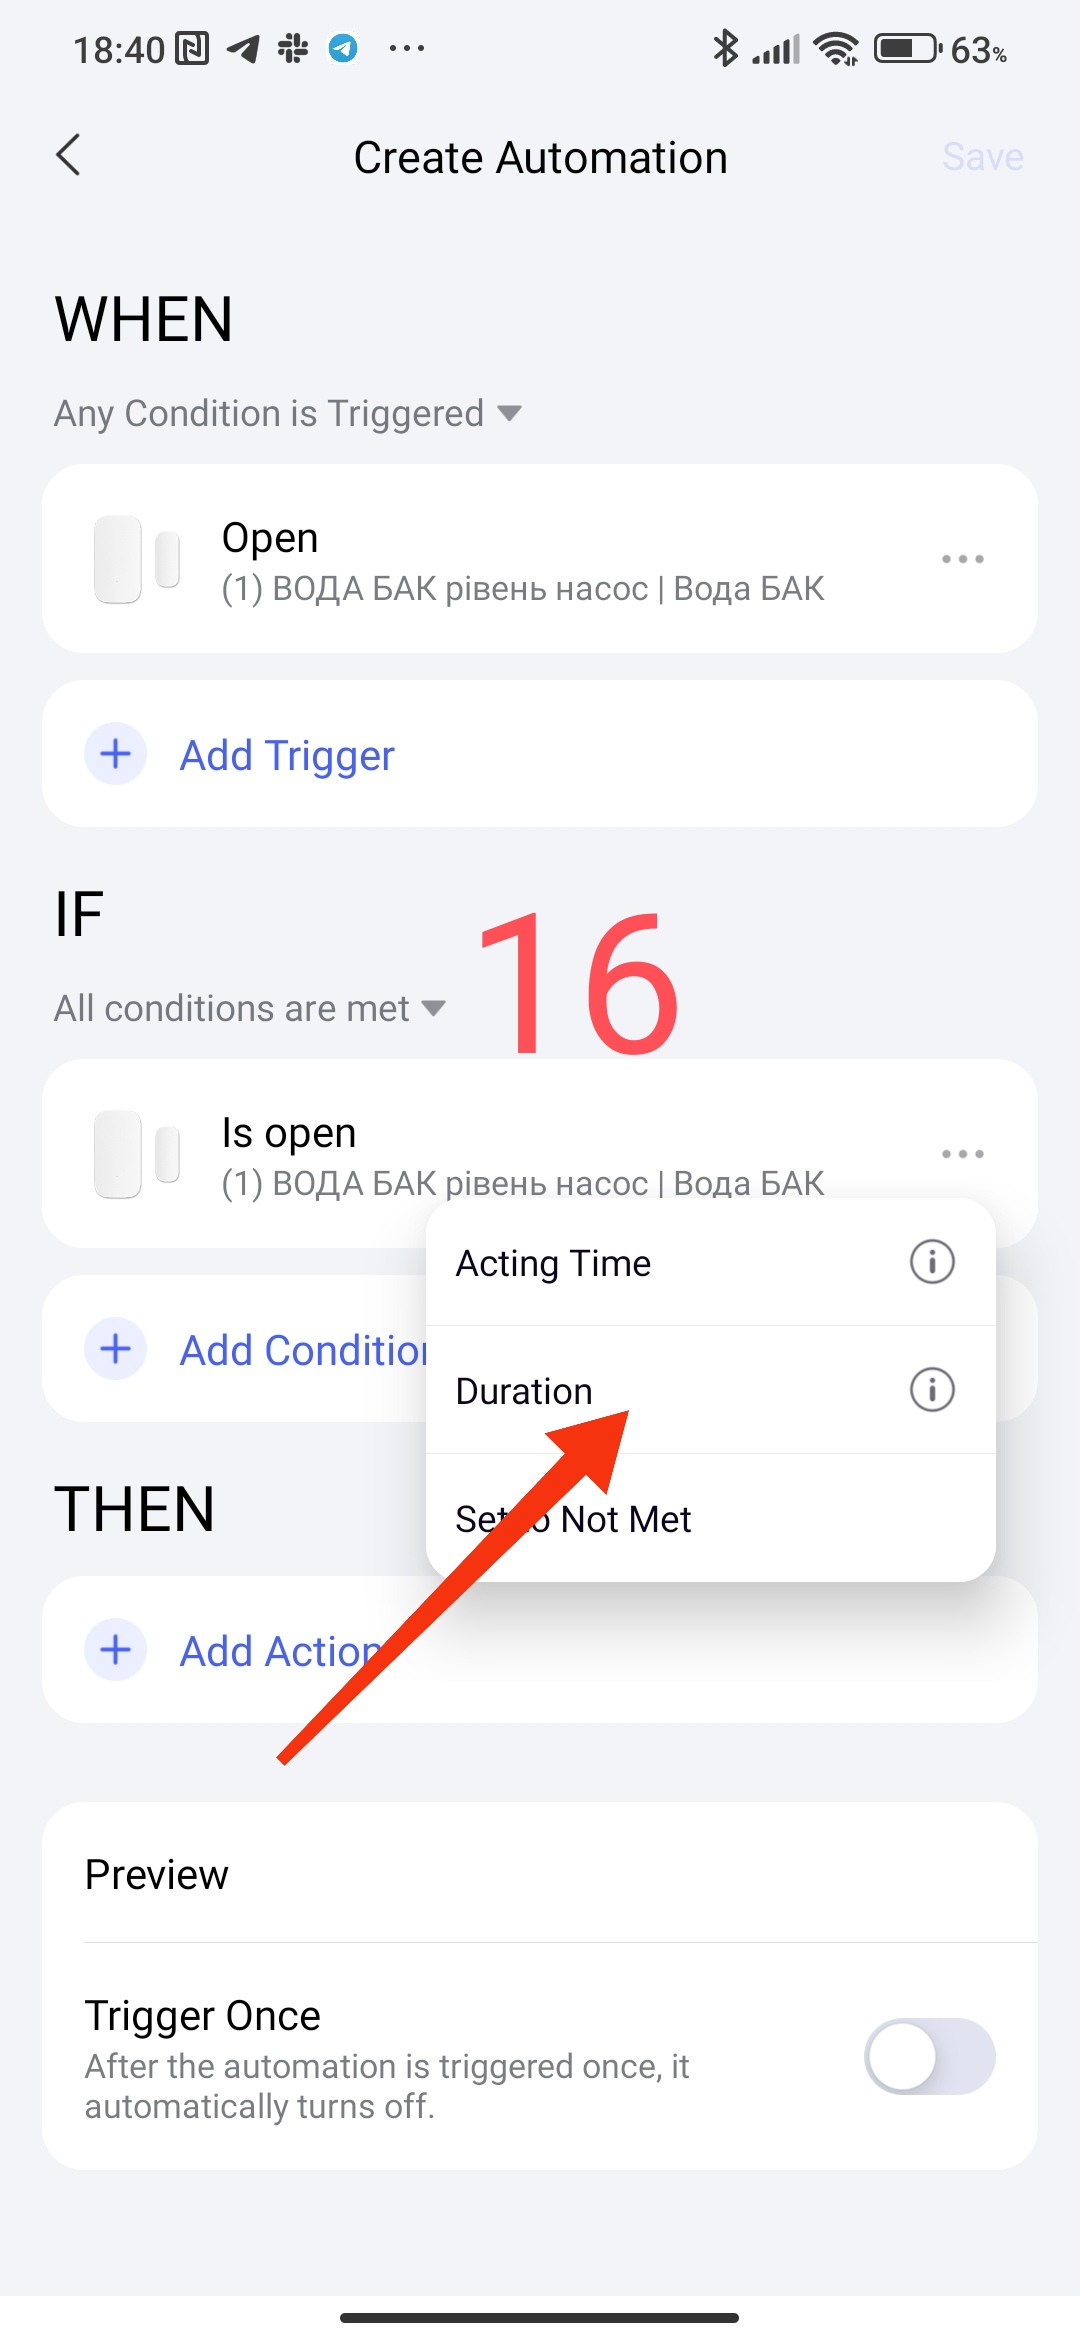
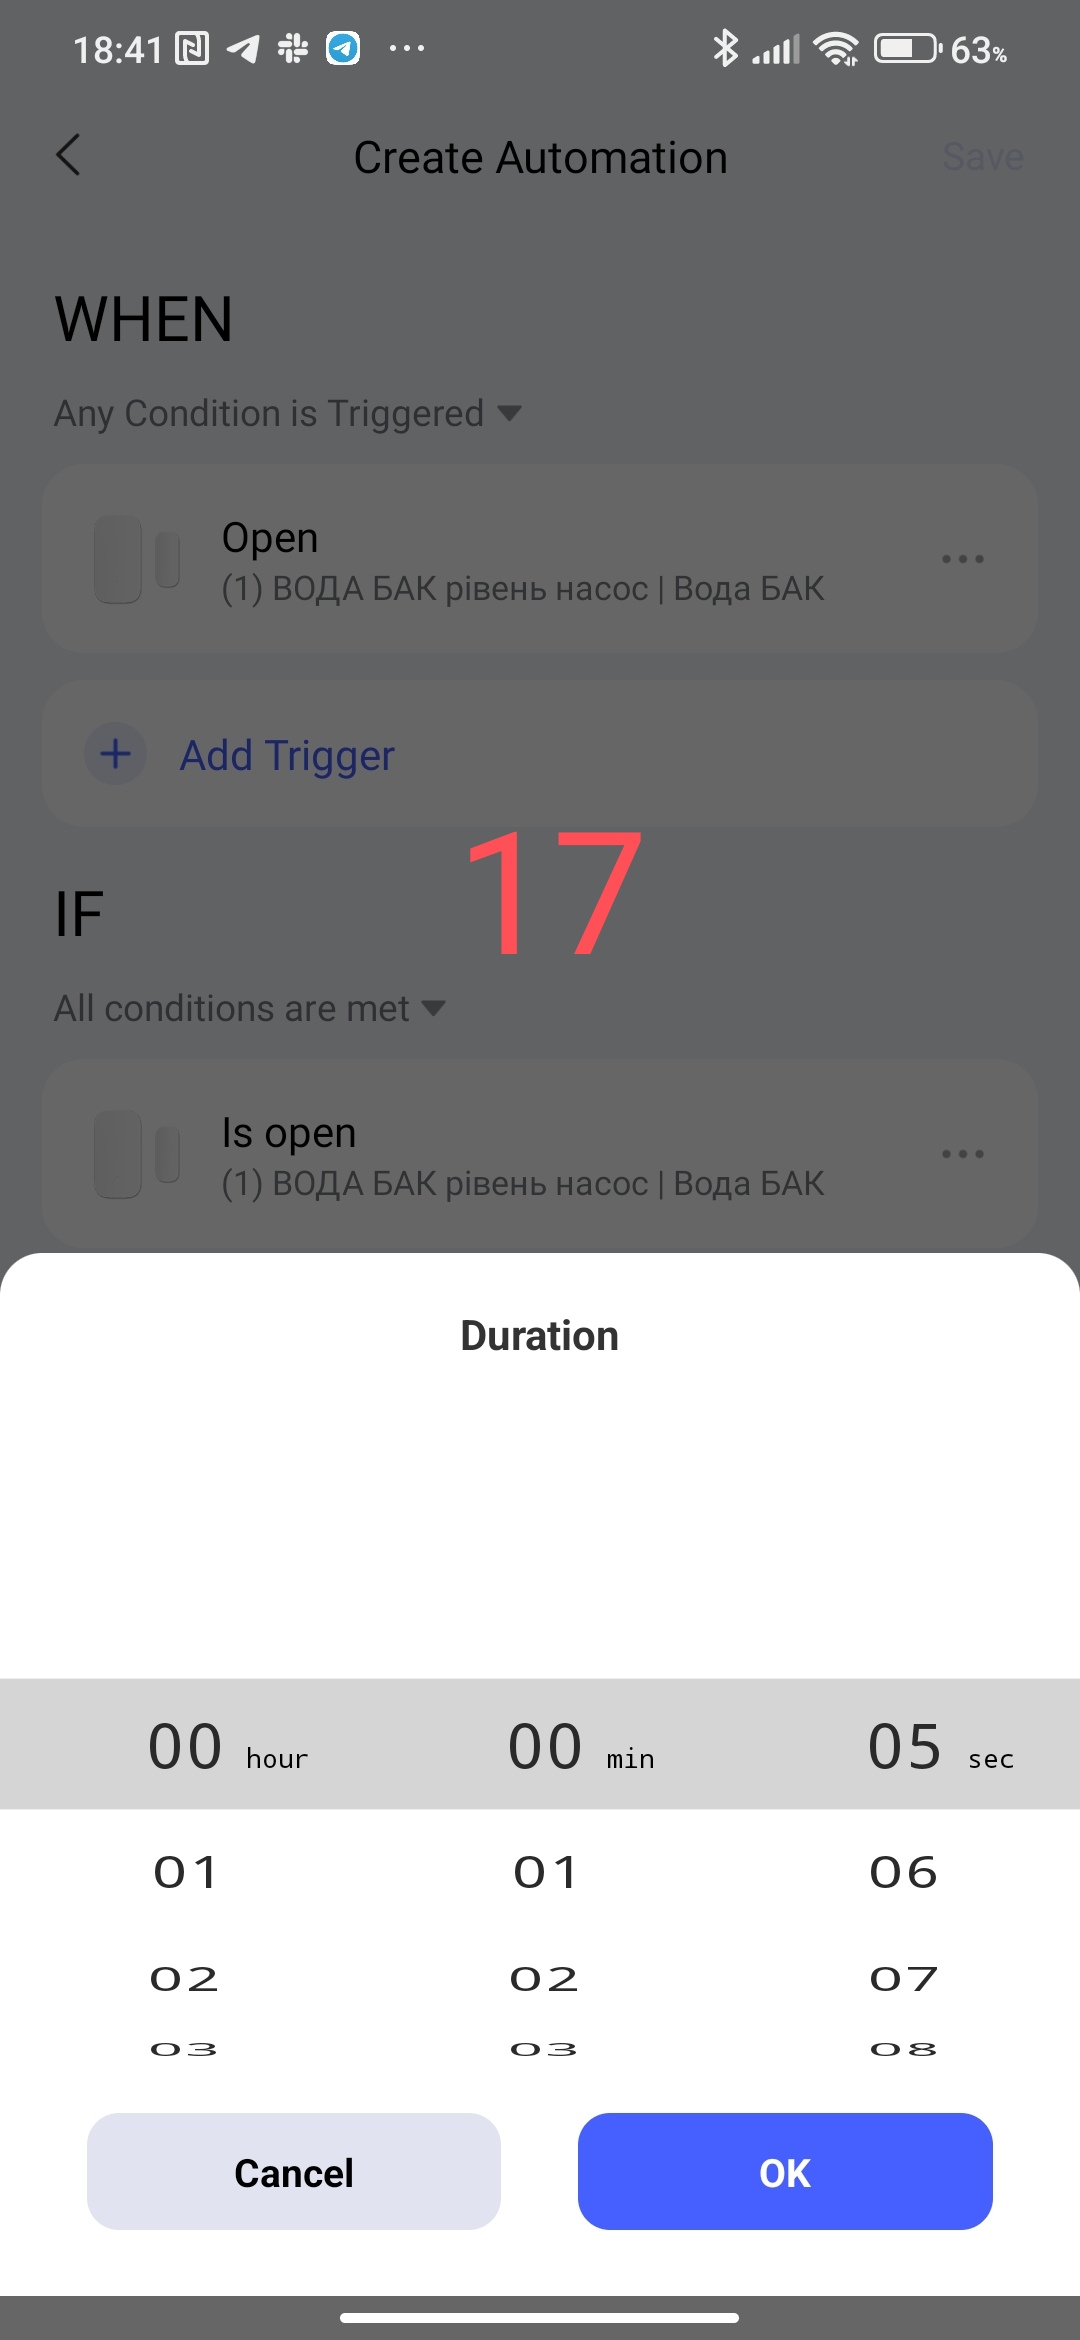
The “Duration” time delay conditions have a fundamentally different purpose.
This parameter sets the time period for the sensor or condition during which there will be no triggering. For example, the door is open (opening sensor), the time parameter is set to 5 seconds, this means that if the door is opened and closed for 5 seconds, the automation will not be triggered (the condition will trigger when it is more than 5 seconds). We will consider examples of this condition in other lessons.
Fig. 16, 17
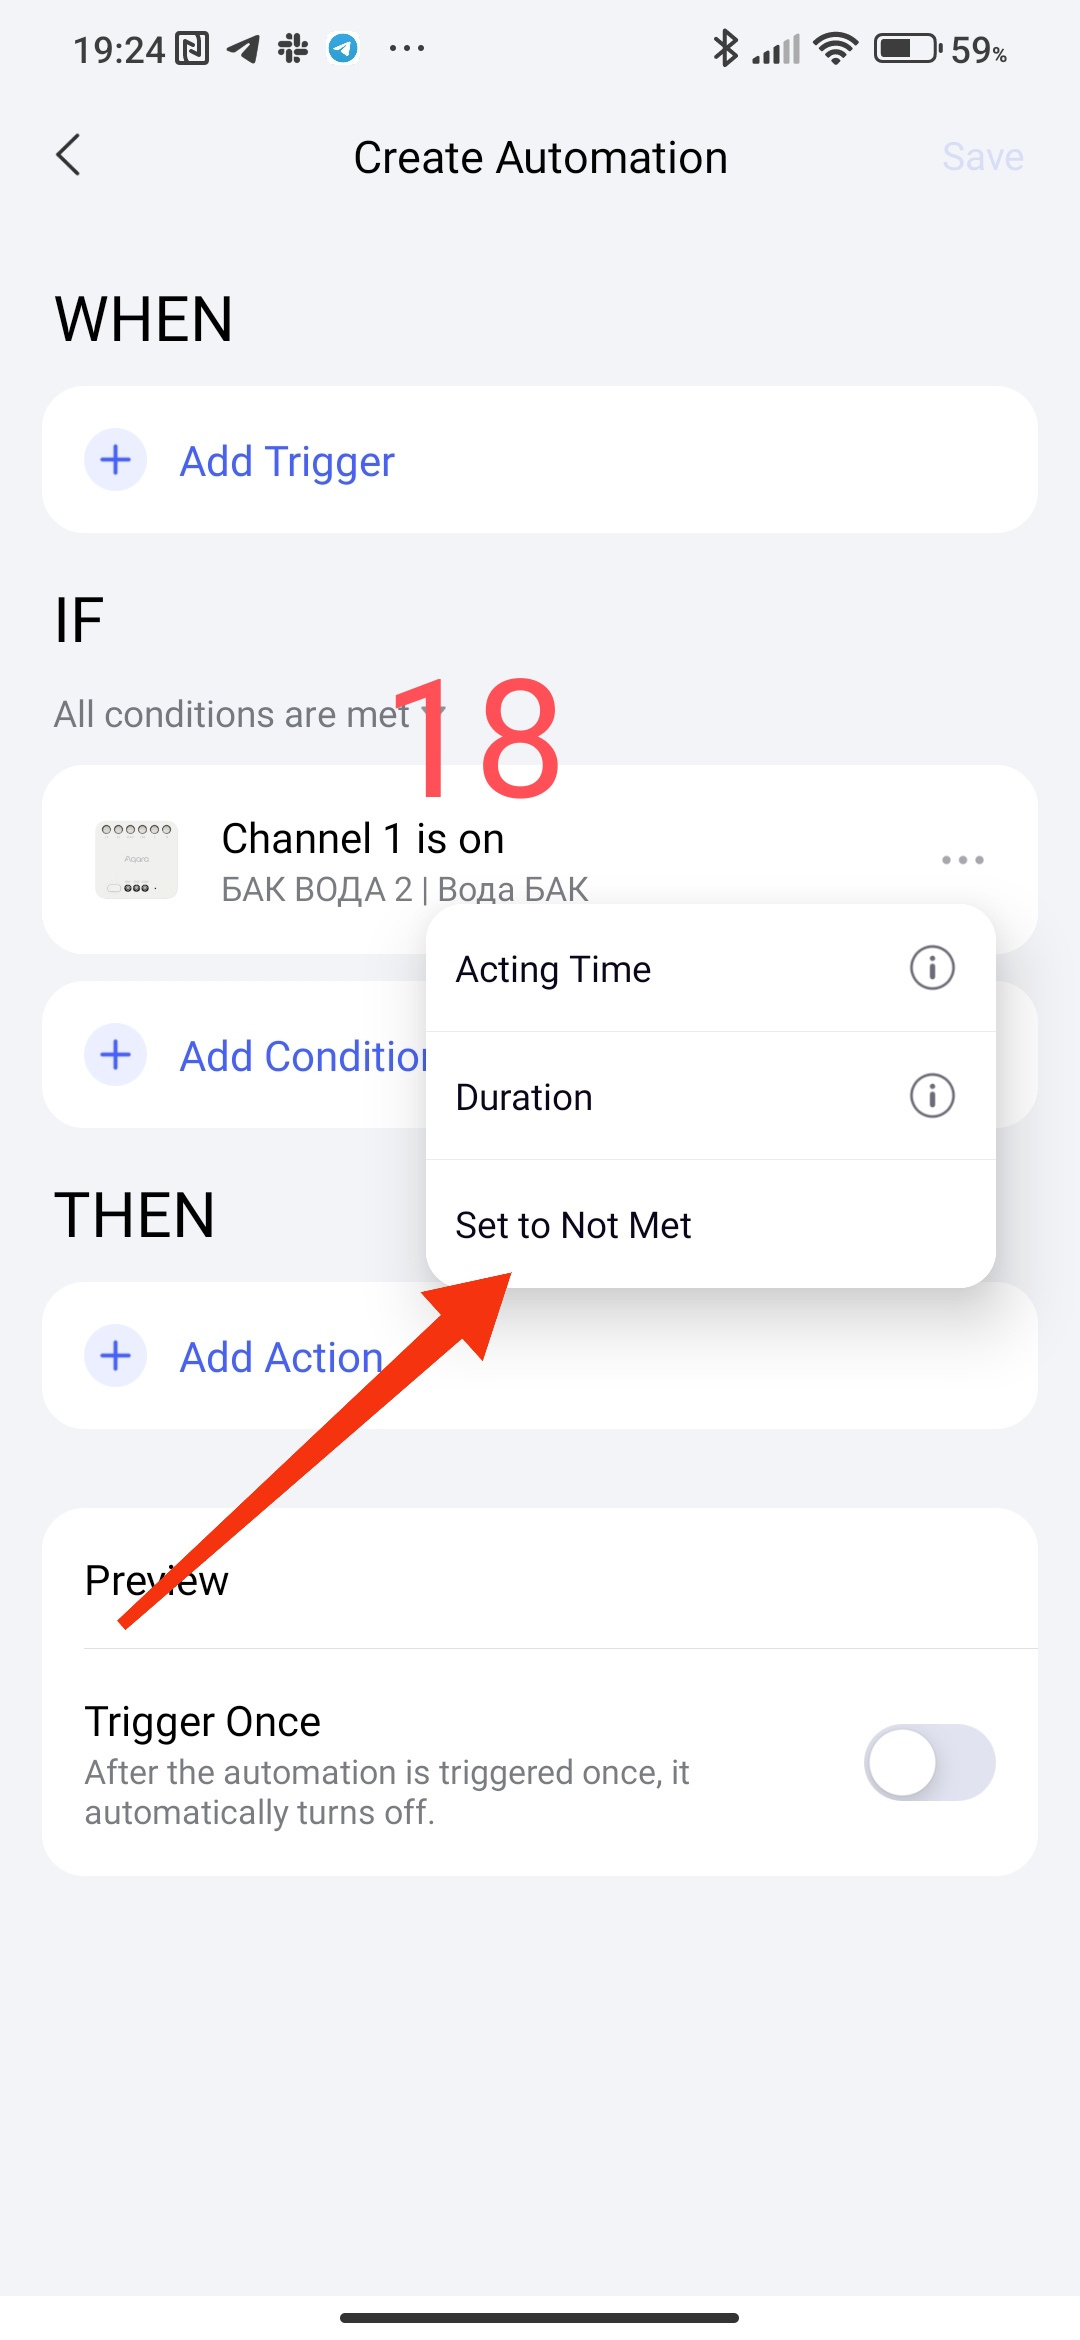
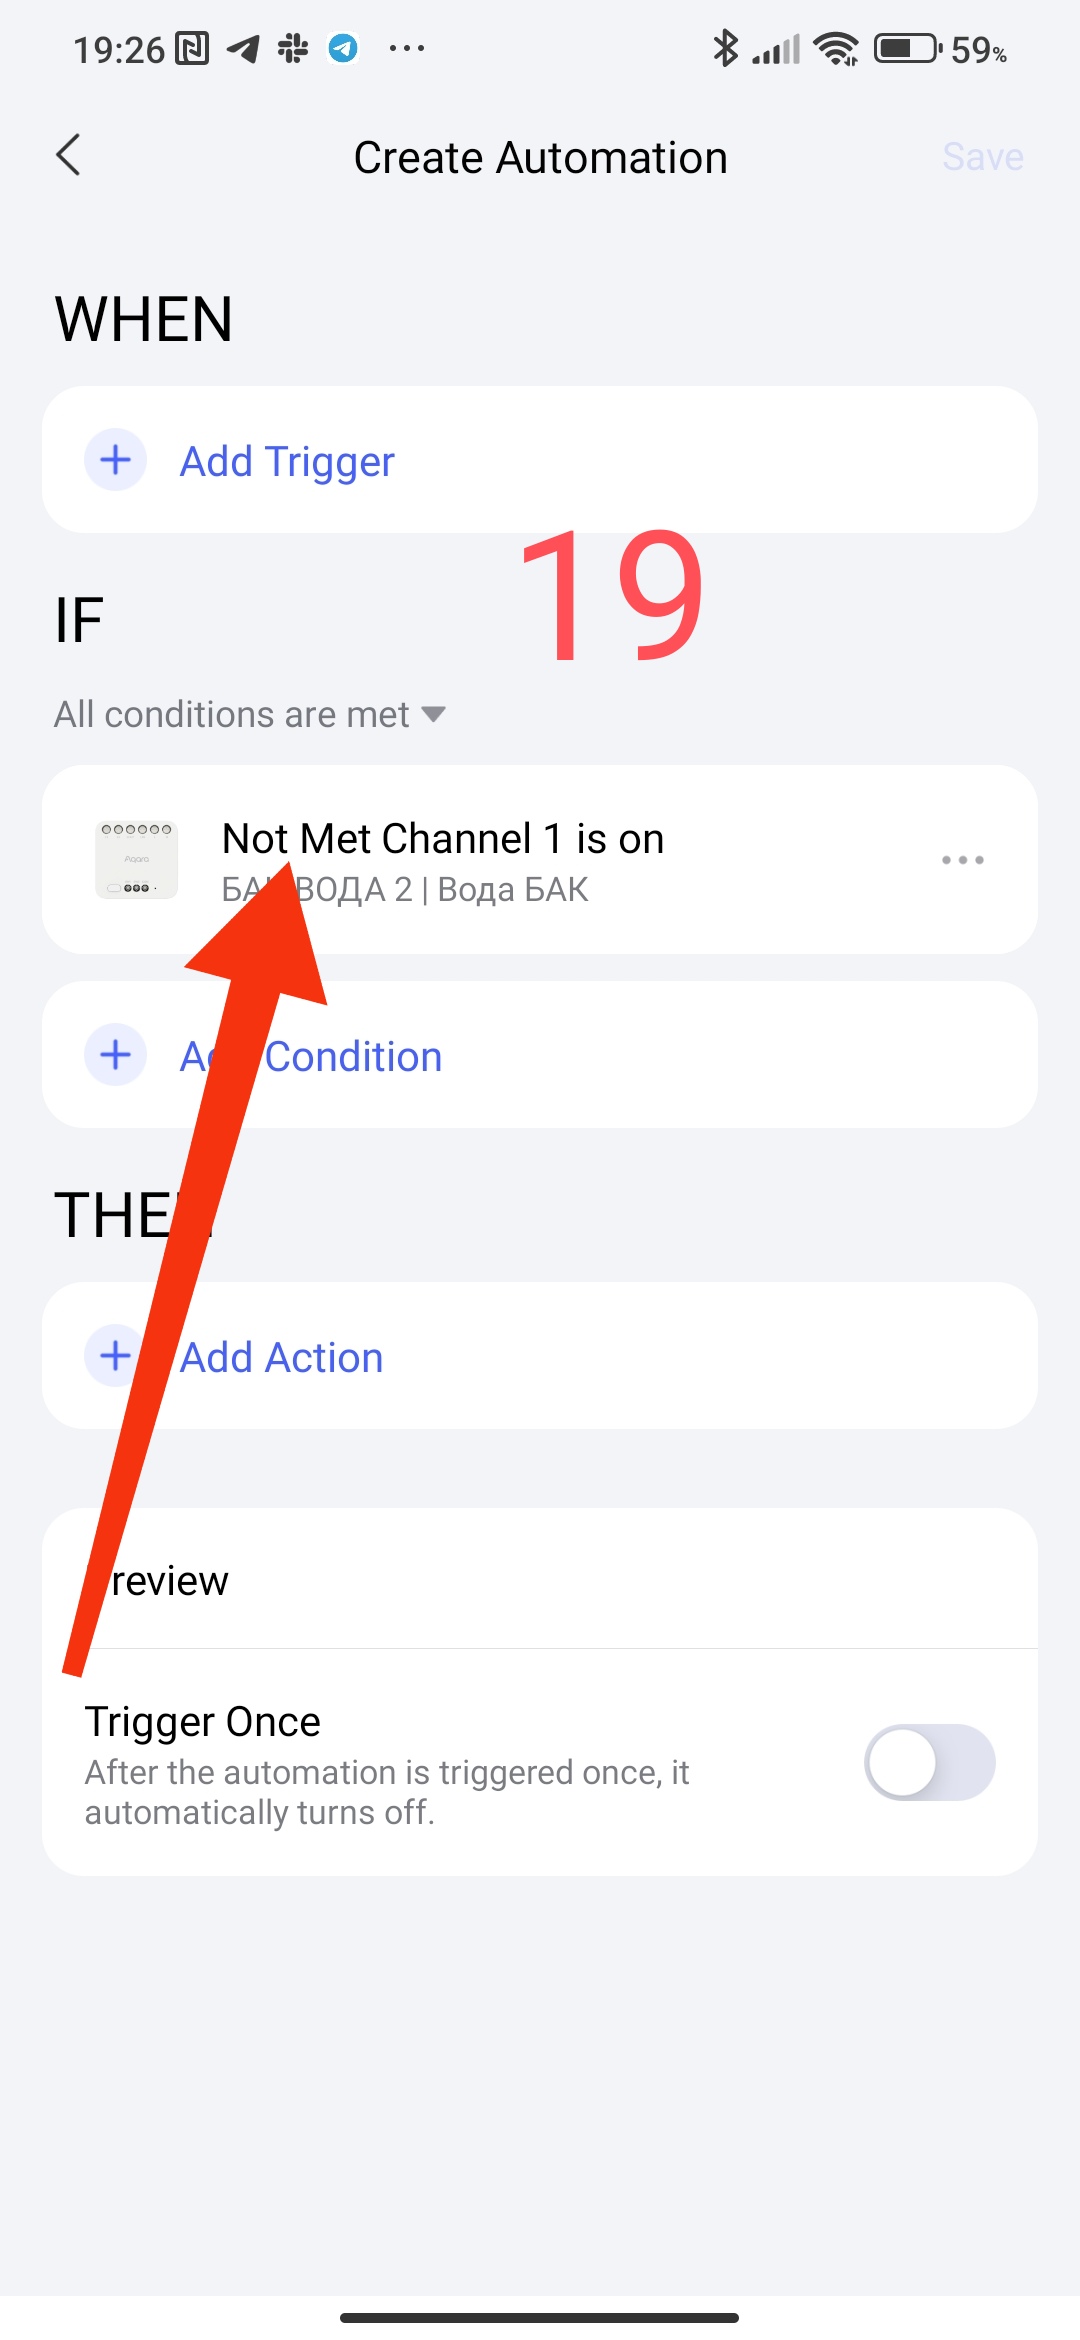
Another parameter “Cancel NOT Met” which changes the specified state of the condition to the opposite, I call this parameter “reverse” for myself. Example - I set the parameter sun (weather), after using reverse the weather will change to cloudy, or the switch on will turn into a switch off (note, the name “on” does not change, as well as “sun”, there is just a record with the condition (19) ).
Fig. 18, 19
This completes lesson 2.
To be continued, thank you for reading and sharing the topic (you can also on other platforms with a link to our forum).
See you soon!
Lesson 3 Automation 2.0. Lesson 3. Controlling lighting devices