Automation 2.0, lesson 6, bathroom automation on a working example . Good afternoon.
Let’s start a new topic, automating the switching on of lamps (T1M, regular Aqara) using switches. I want to warn you, I am making the description detailed for “dummies”, because advanced users think that everything is already clear, and I want to get down to the level of “dummies”.
Let’s consider the following sections.
- Turning on a smart lamp using a smart switch.
- Turning on a smart lamp using a wireless switch.
- Combined use of both switches (wired and wireless).
1.Turning on a smart lamp using a smart switch.
Often, users face the problem of connecting a smart lamp to a smart switch. This problem is that the smart lamp must be constantly under industrial voltage (for the operation of the created automations) for correct operation. By the way, I also had this problem when I mounted the T1M lamp.
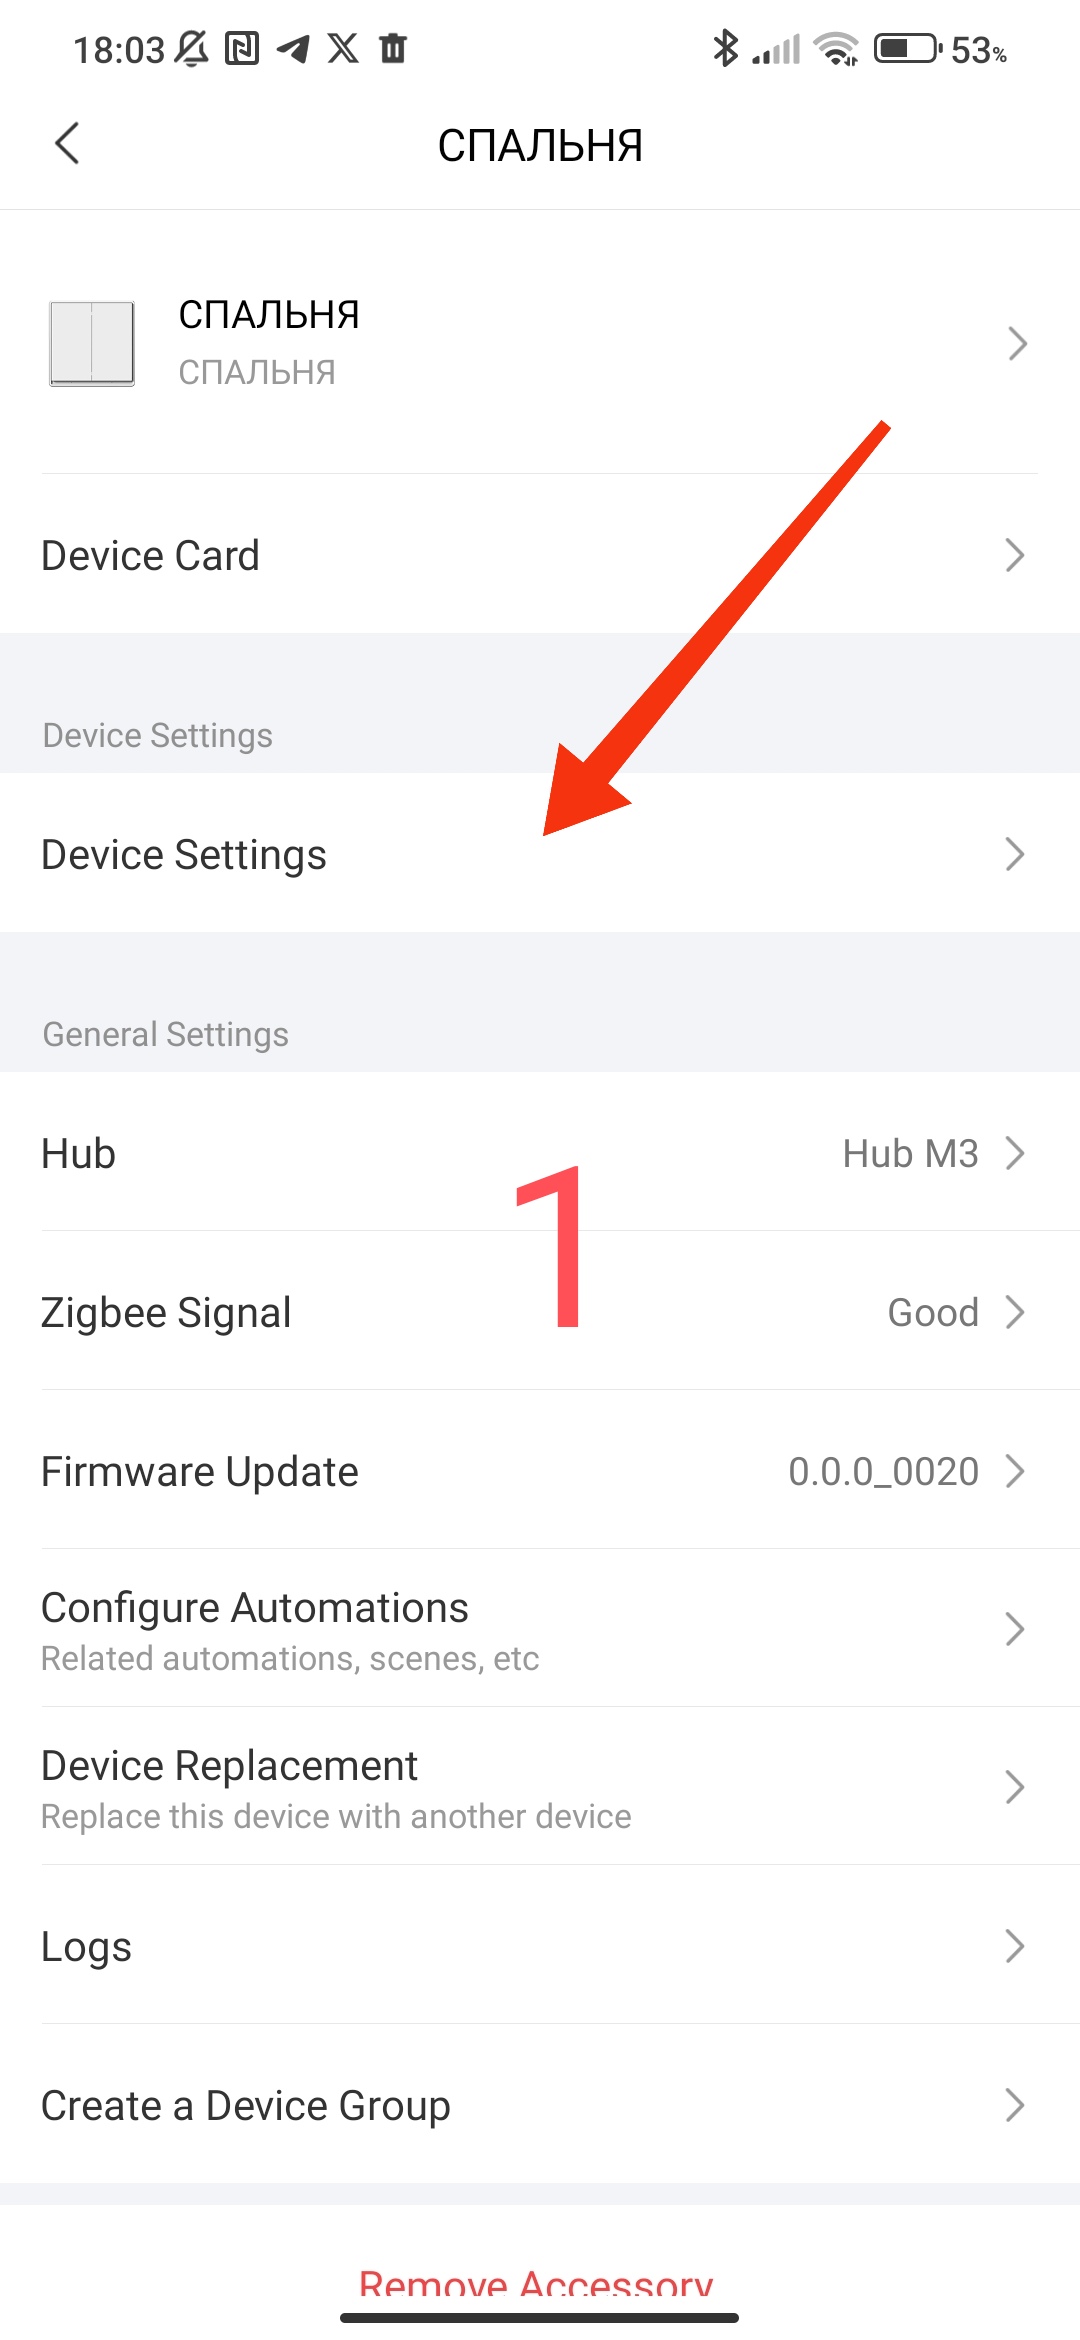
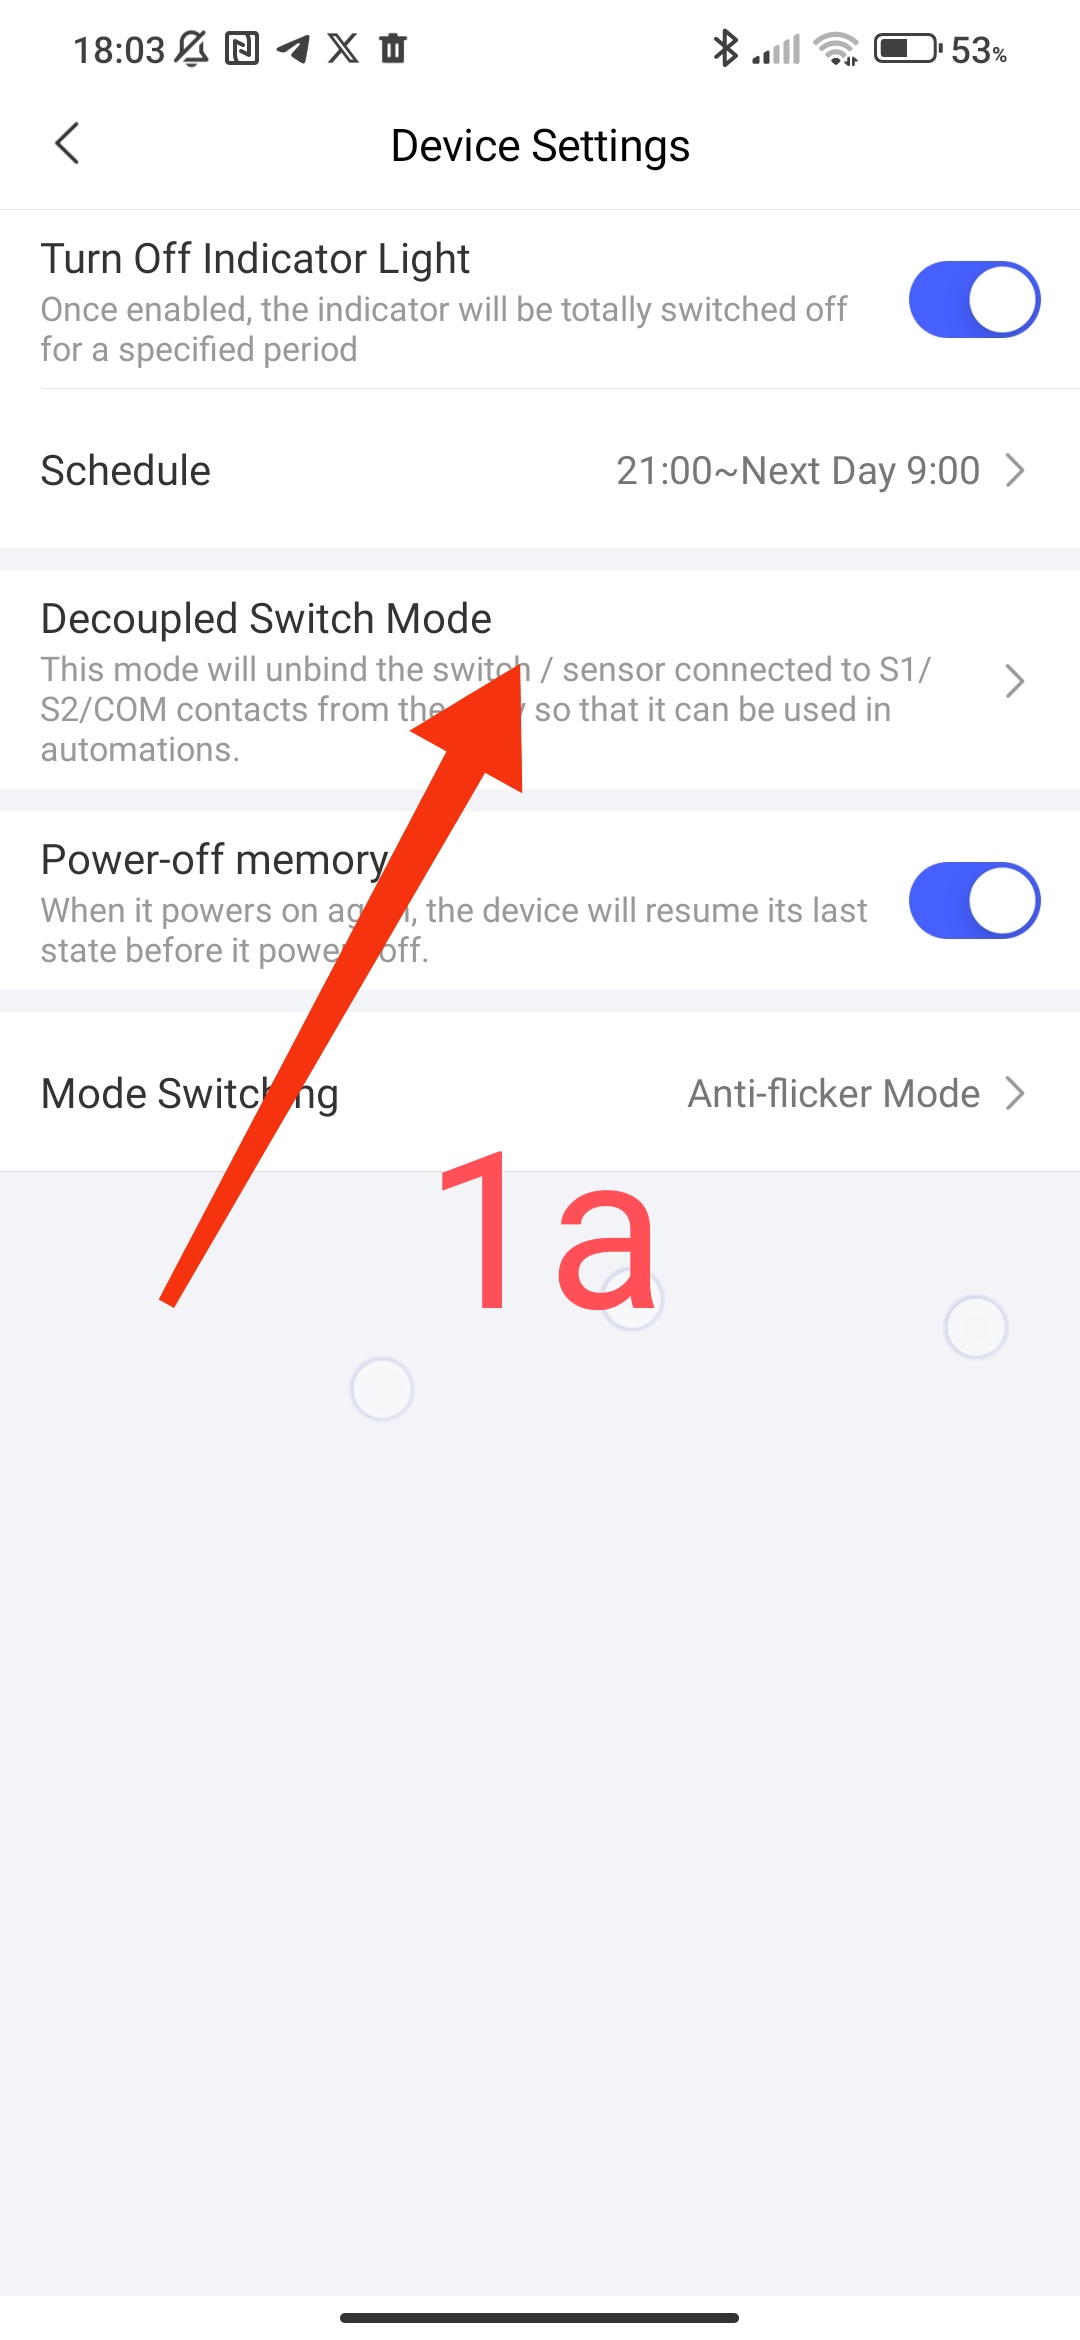
We will start the setup by creating conditions so that the smart switch does not turn the lamp “Off” from the physical button. To do this, go to the switch settings (I have E1) select the “settings” → “logical mode” section and turn it on.
Help, in this mode the switch stops responding to direct “On/Off”, it turns into a wireless button.
Fig. 1.
[/grid]
[/grid]
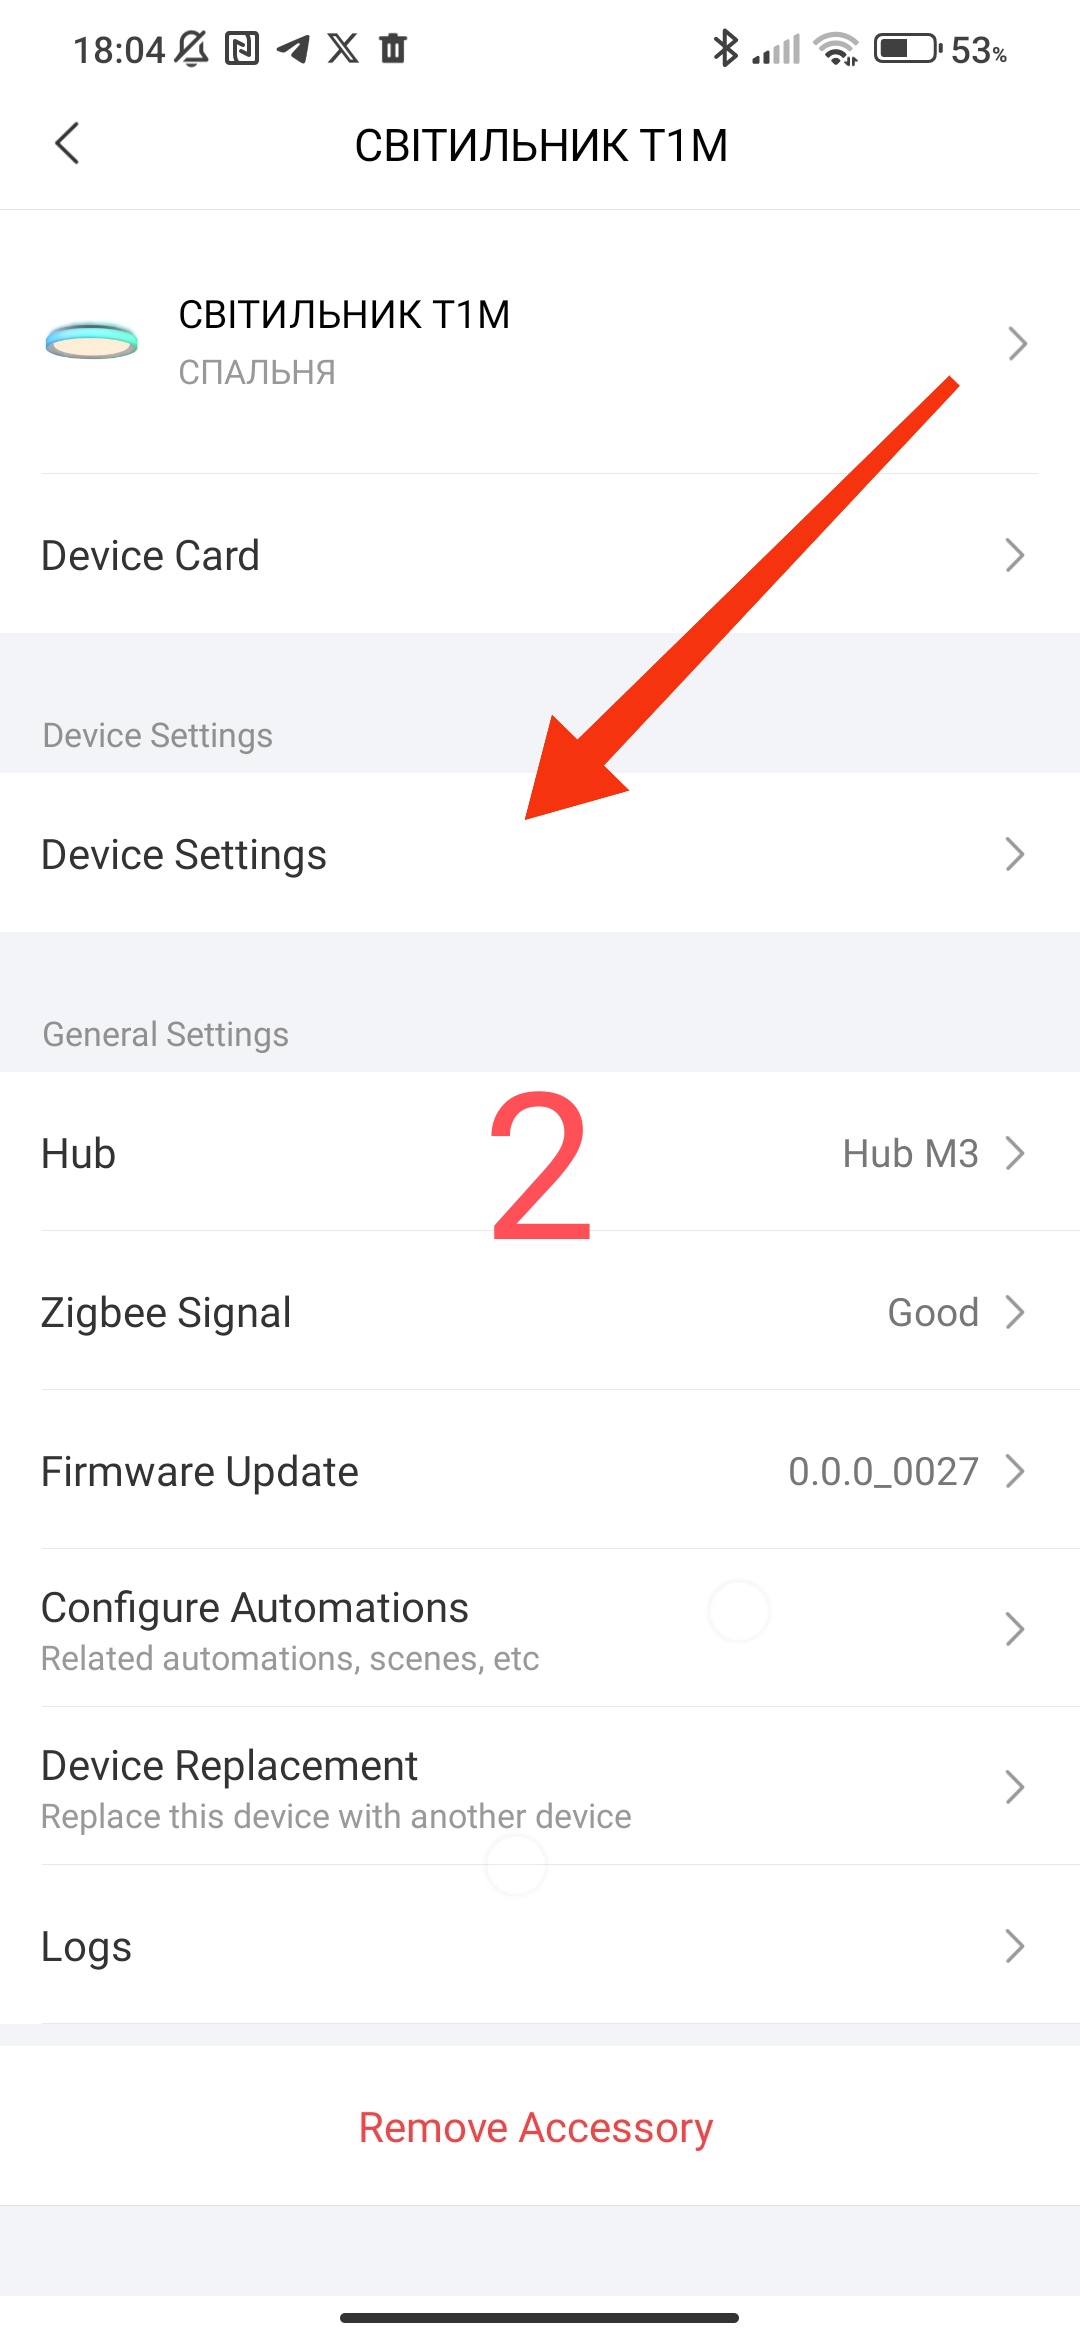
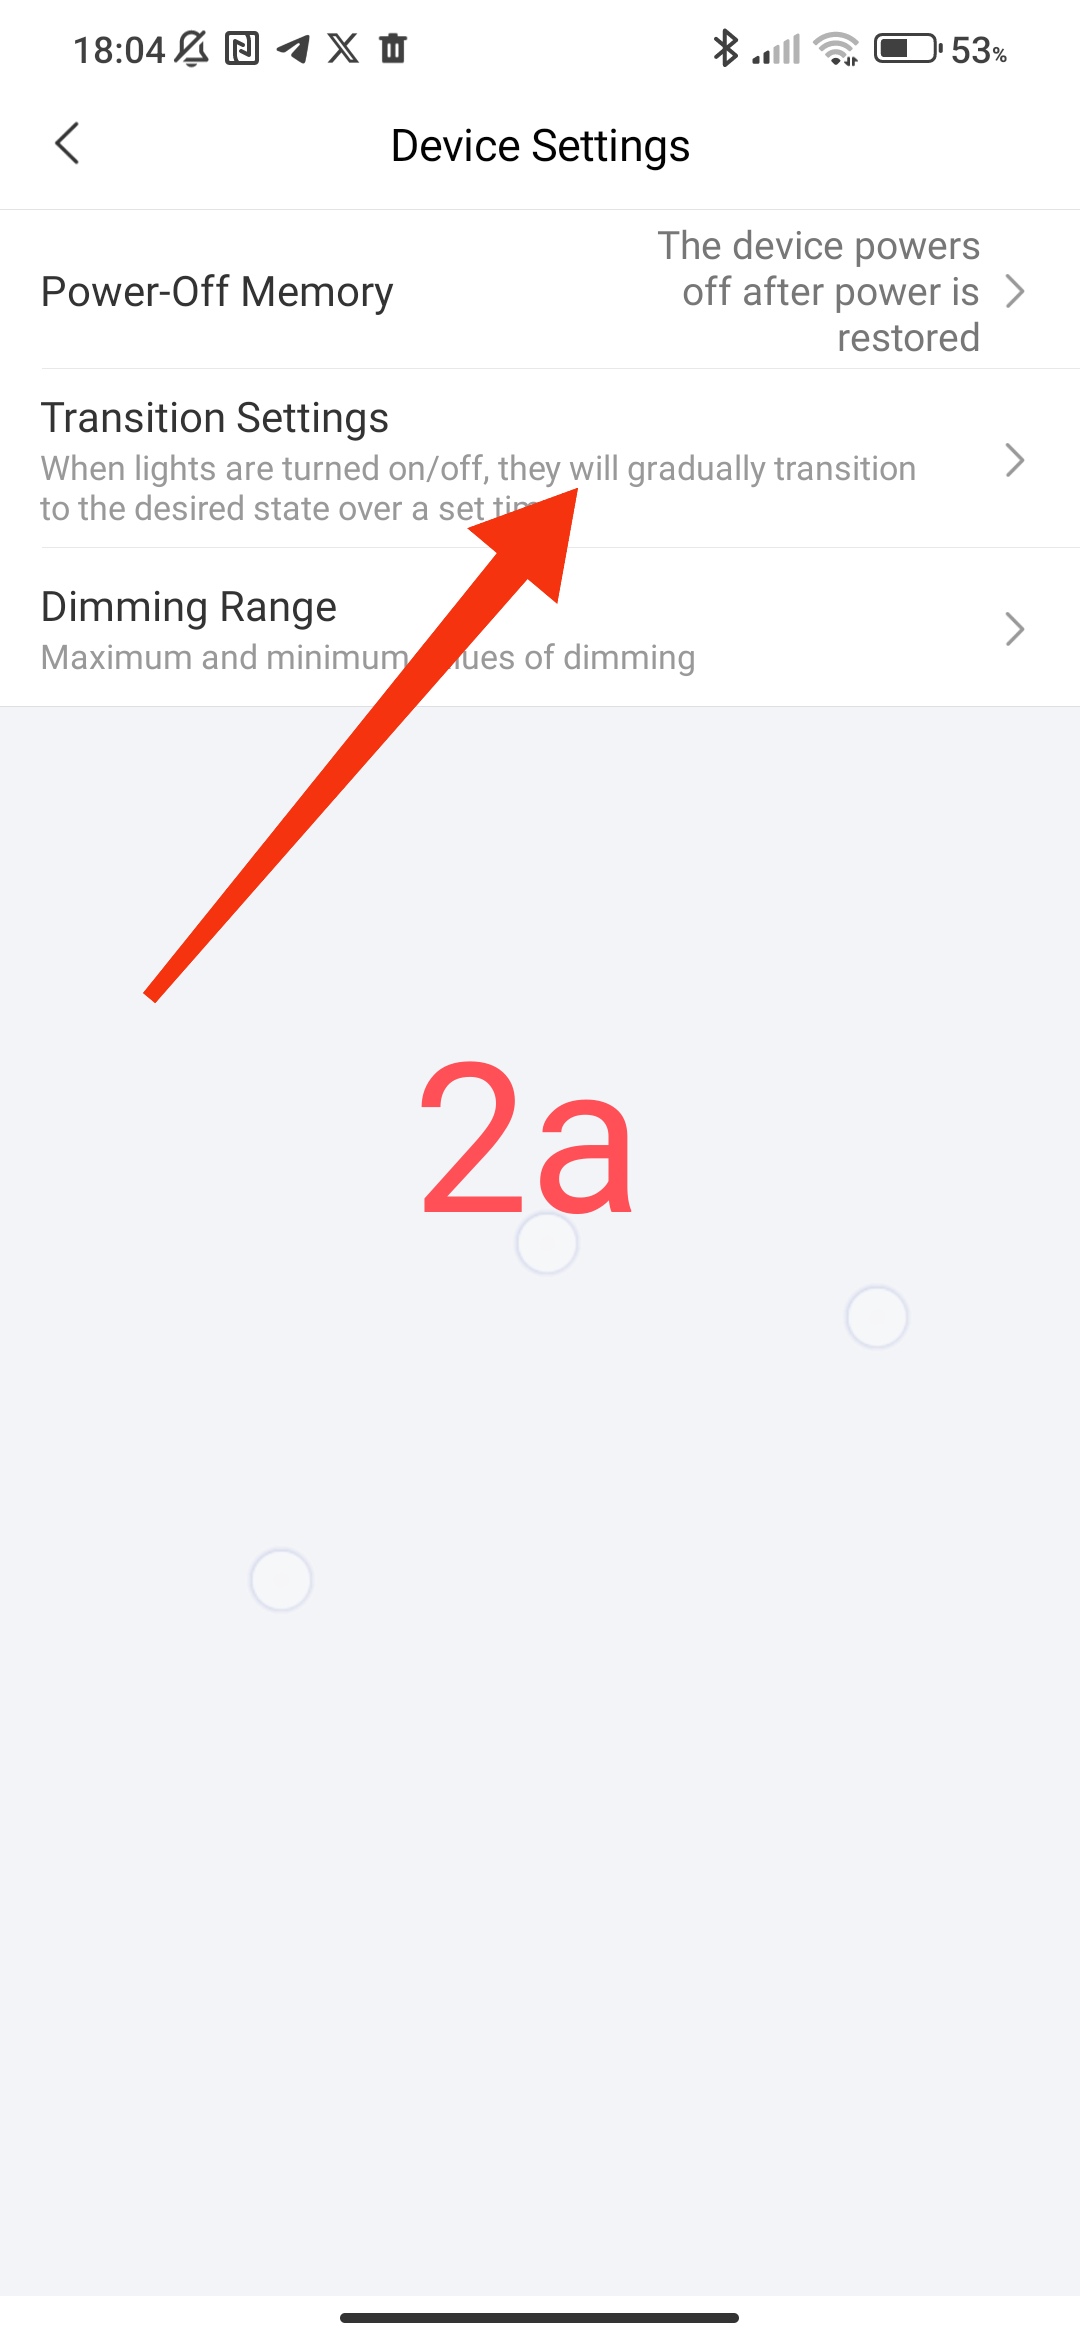
The second step will be to create the on/off speed of the T1M (T2) smart lamp, different users say that the lamp turns on for a long time, I pressed “On” and it turns on with a delay. I’m talking about the turn-on speed, which depends only on the settings of the paw and not on the passage of the Zigbee signal. We go into the lamp settings “settings”->“On/Off transition settings”. I personally like 0 seconds for switching on.
Fig2.
[/grid]
[/grid]
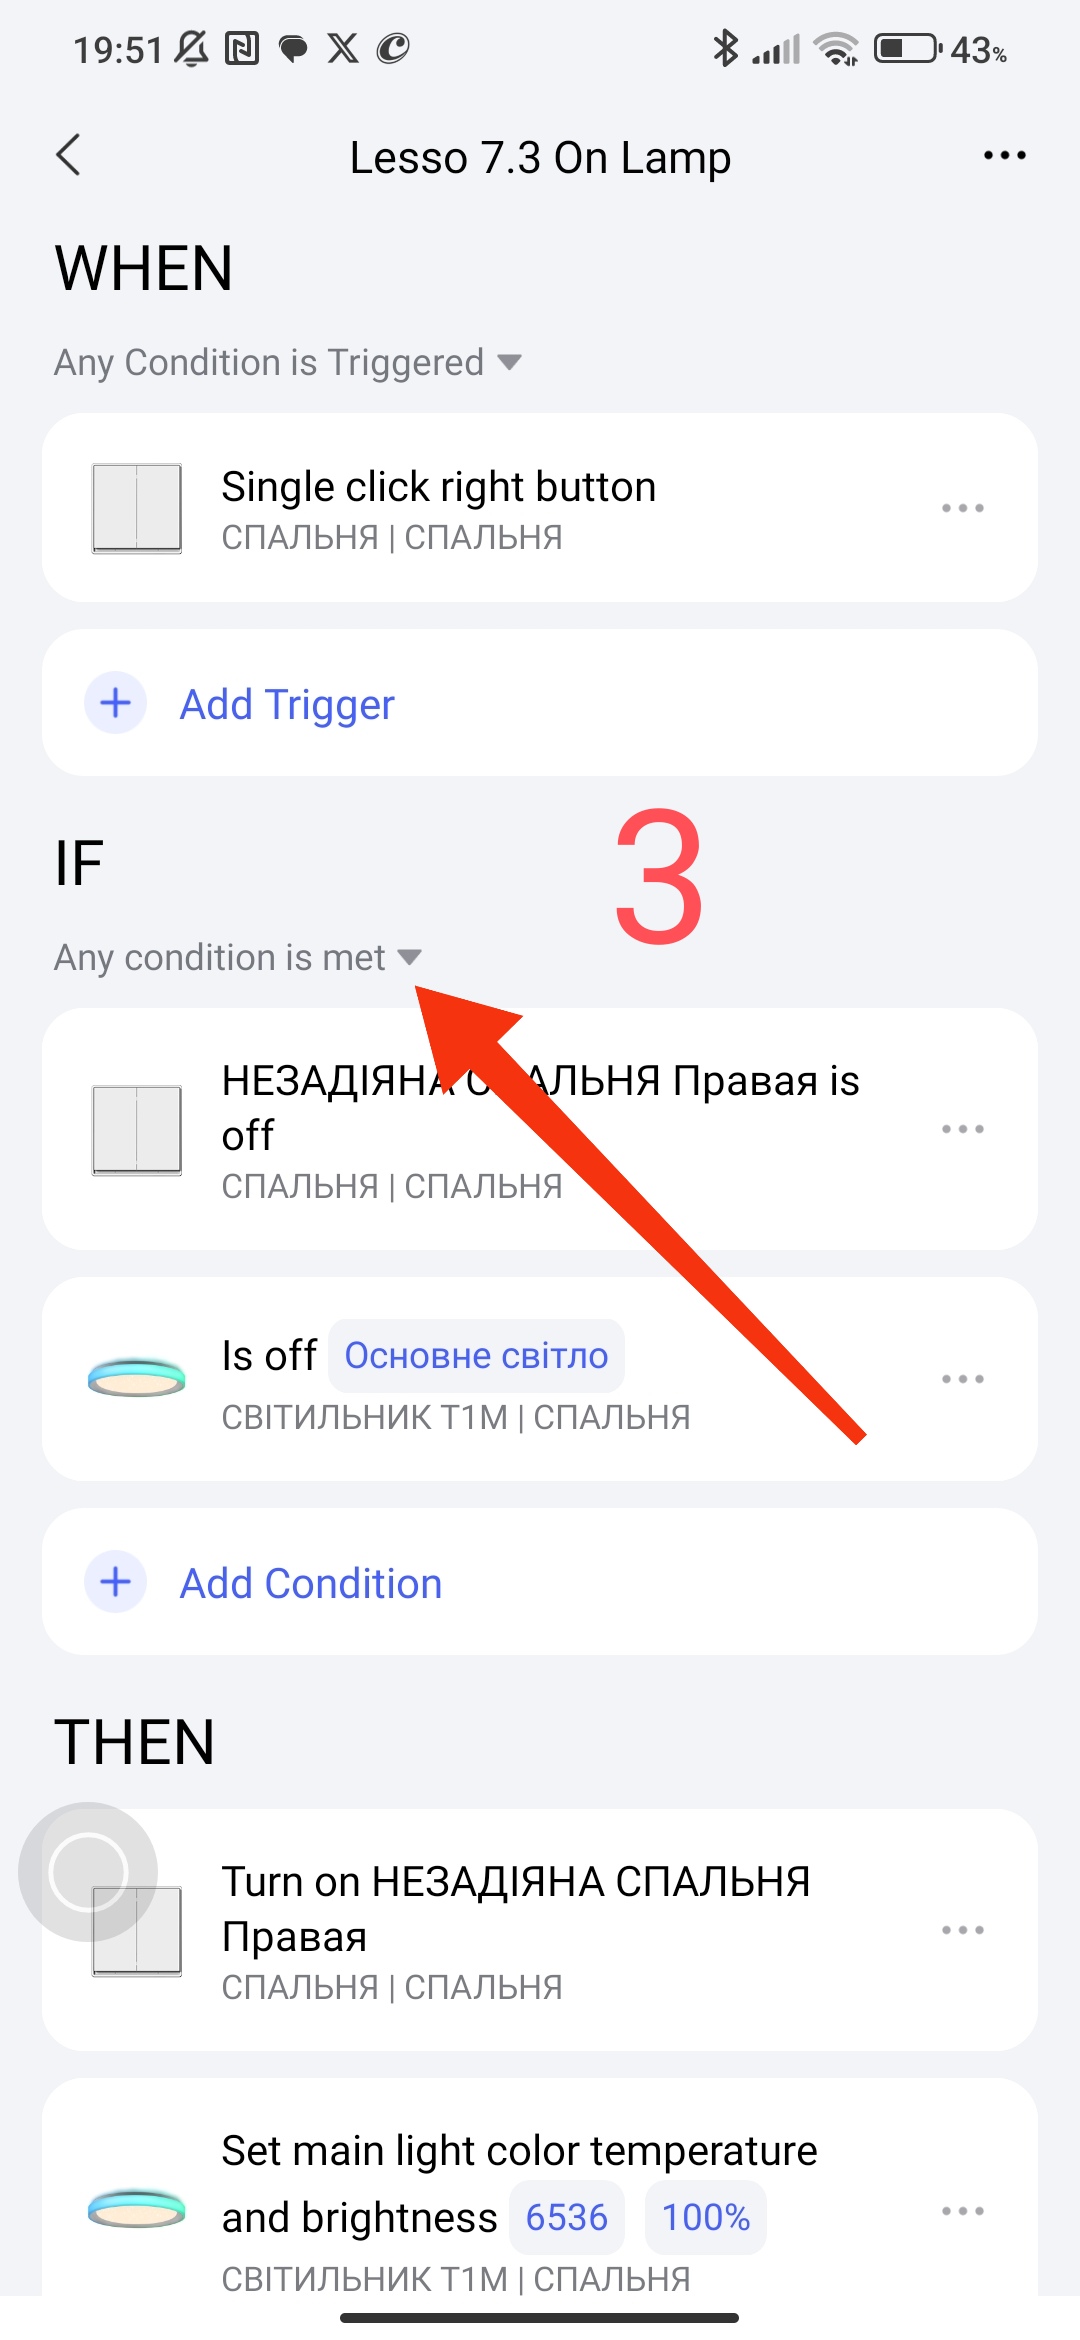
Now we make automation for turning on the lamp, in 1.0 we would have to create two automations, the first - turning on the lamp when the switch is off, the second - turning on the lamp when the switch is on.
Automation 2.0 makes it possible to combine these two conditions. Please note that in the “IF” condition you need to select “any condition”.
In the “IF” condition we set the two control states that I described above (Off-switches, Off-lamps). This automation provides for turning on the switch in the event that it is switched to the “Off” mode from the application, or after the industrial power disappears.
The automation looks like this
Fig3
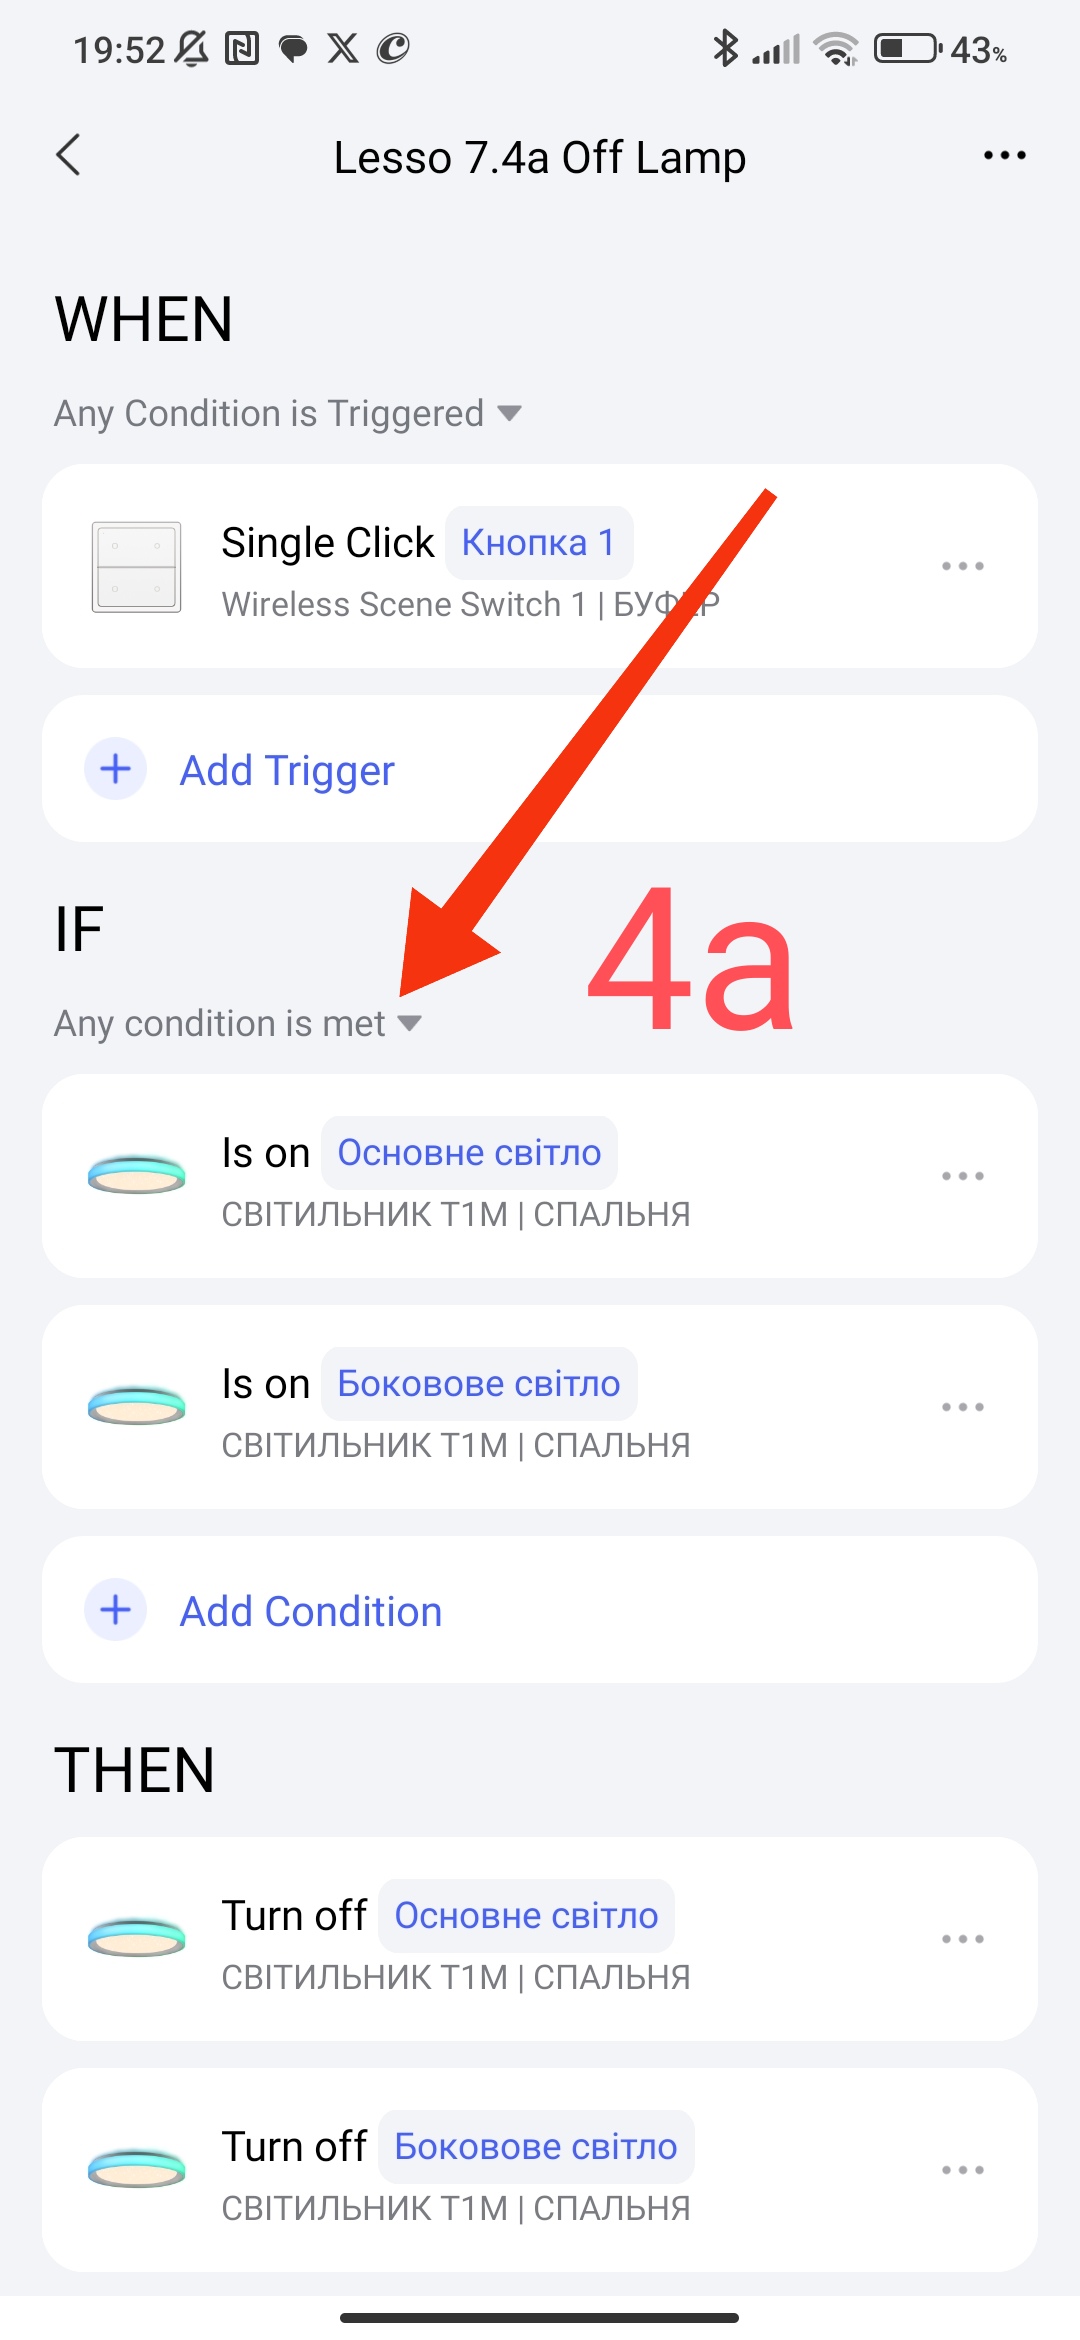
The second automation for turning off the lamps. In this automation, we do not use the switch off option (I emphasize, here we do not use Off for the switch, it must always be ON). In this automation, everything is without features.
Fig.4

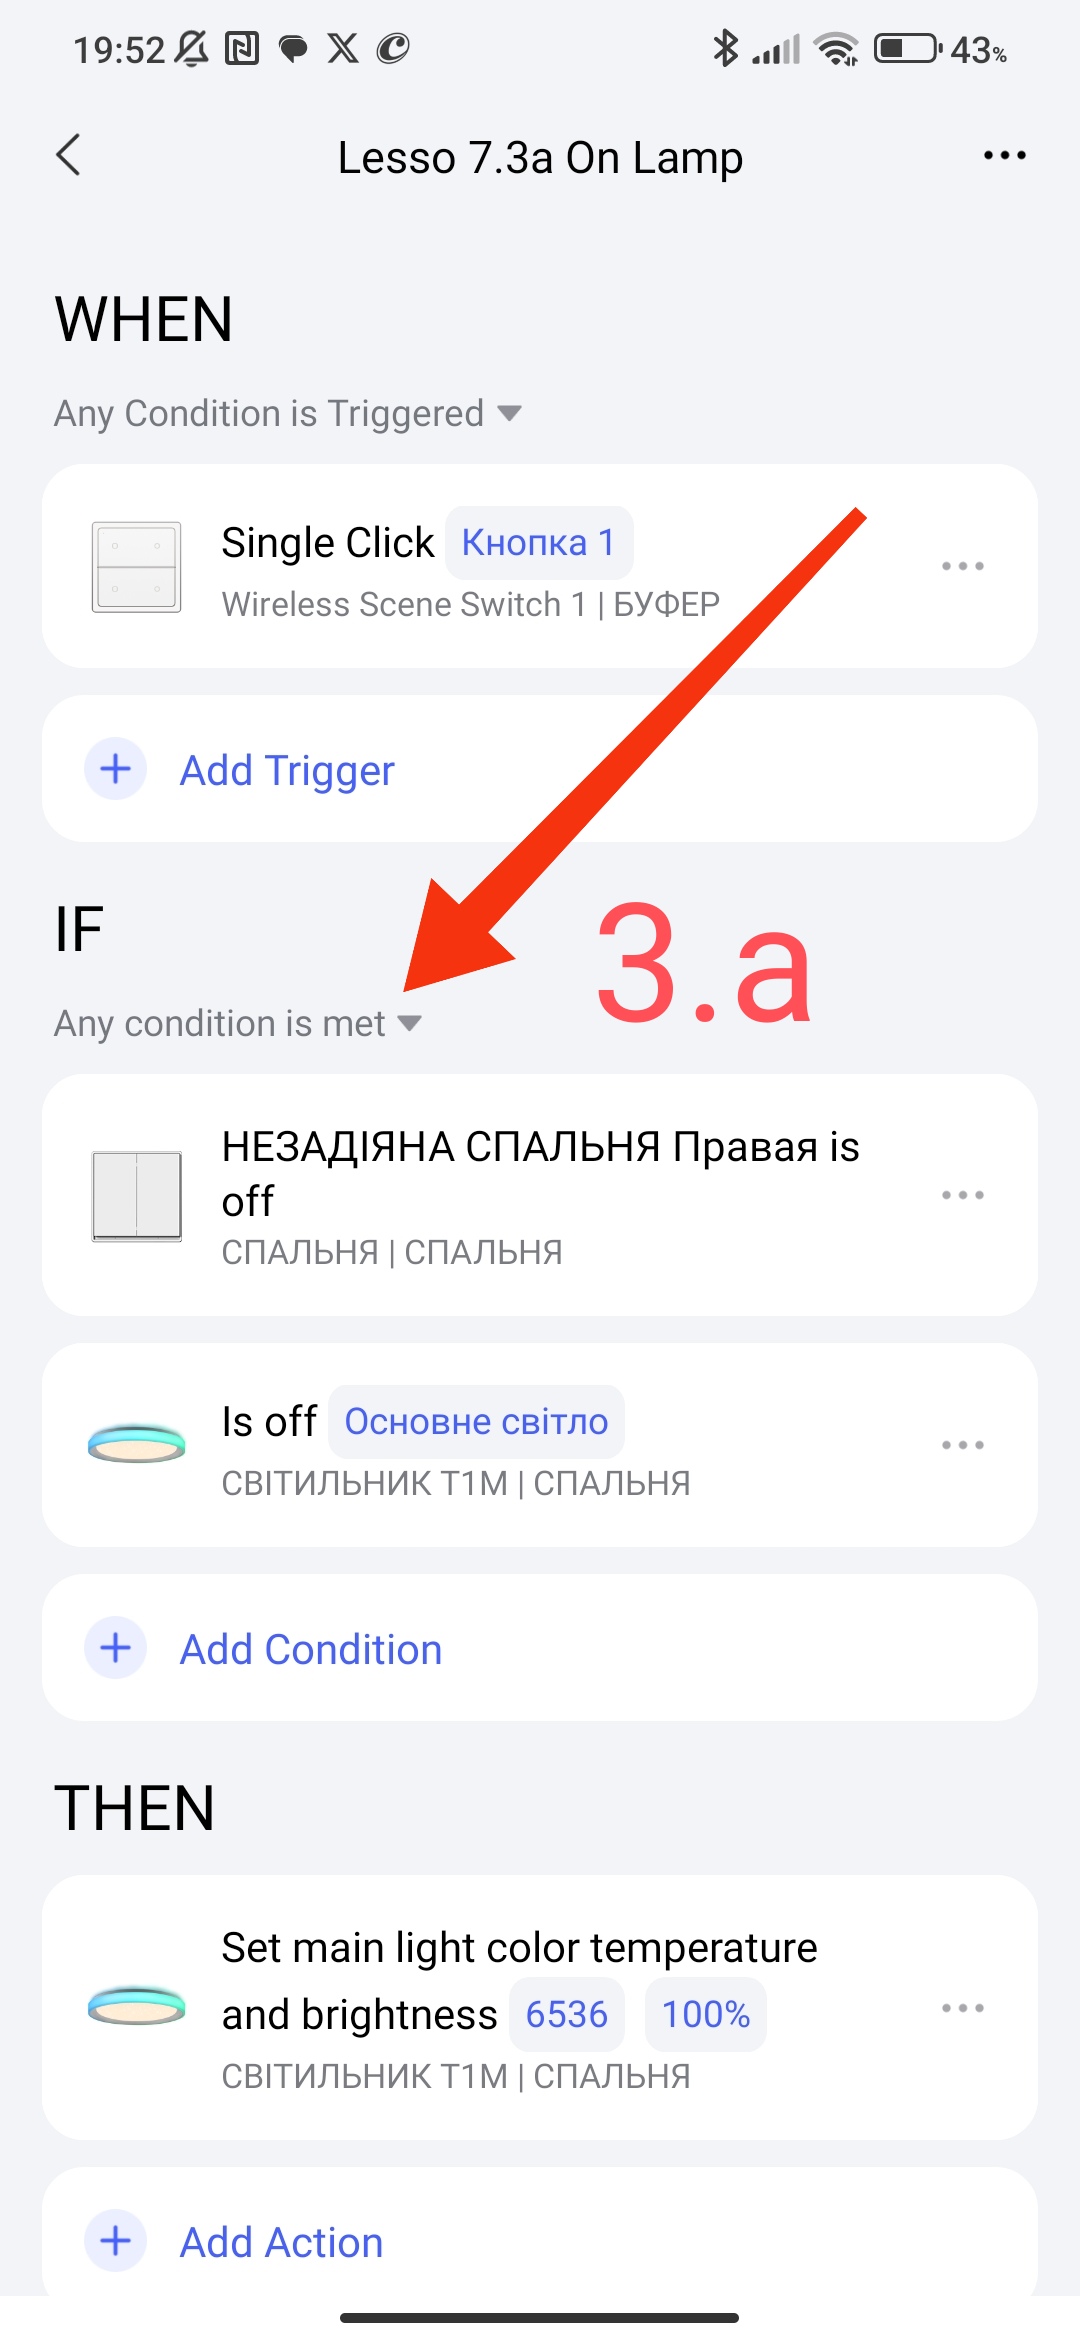
Section 2.
Now we will consider controlling lamps using wireless switches. The procedure for turning on and off is similar to that described above in Fig.3,4.
Fig.3a,4a.
Now I will tell you how to select the light intensity using different buttons (combinations) of the wireless switch.
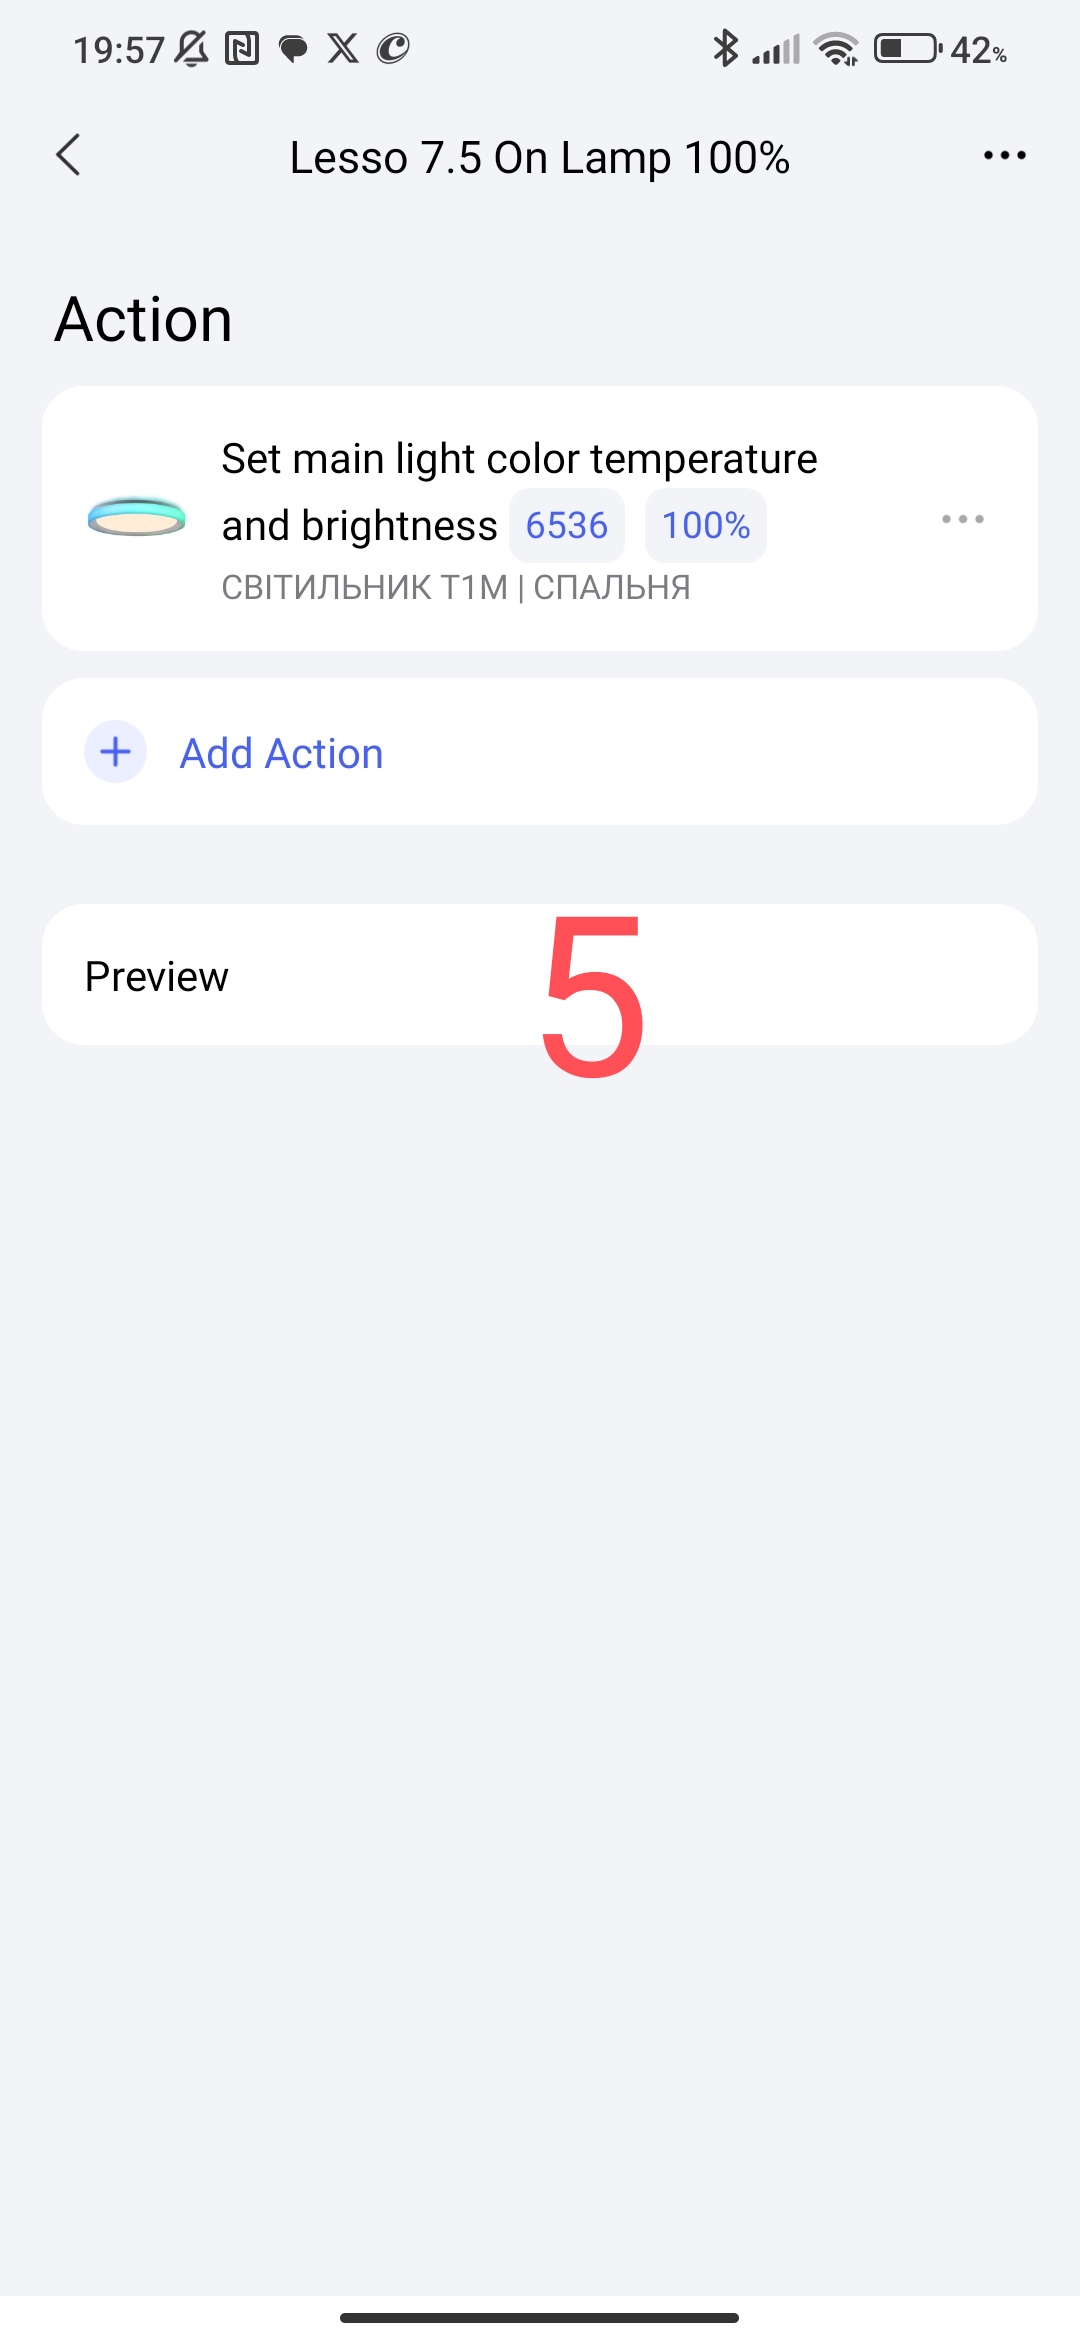
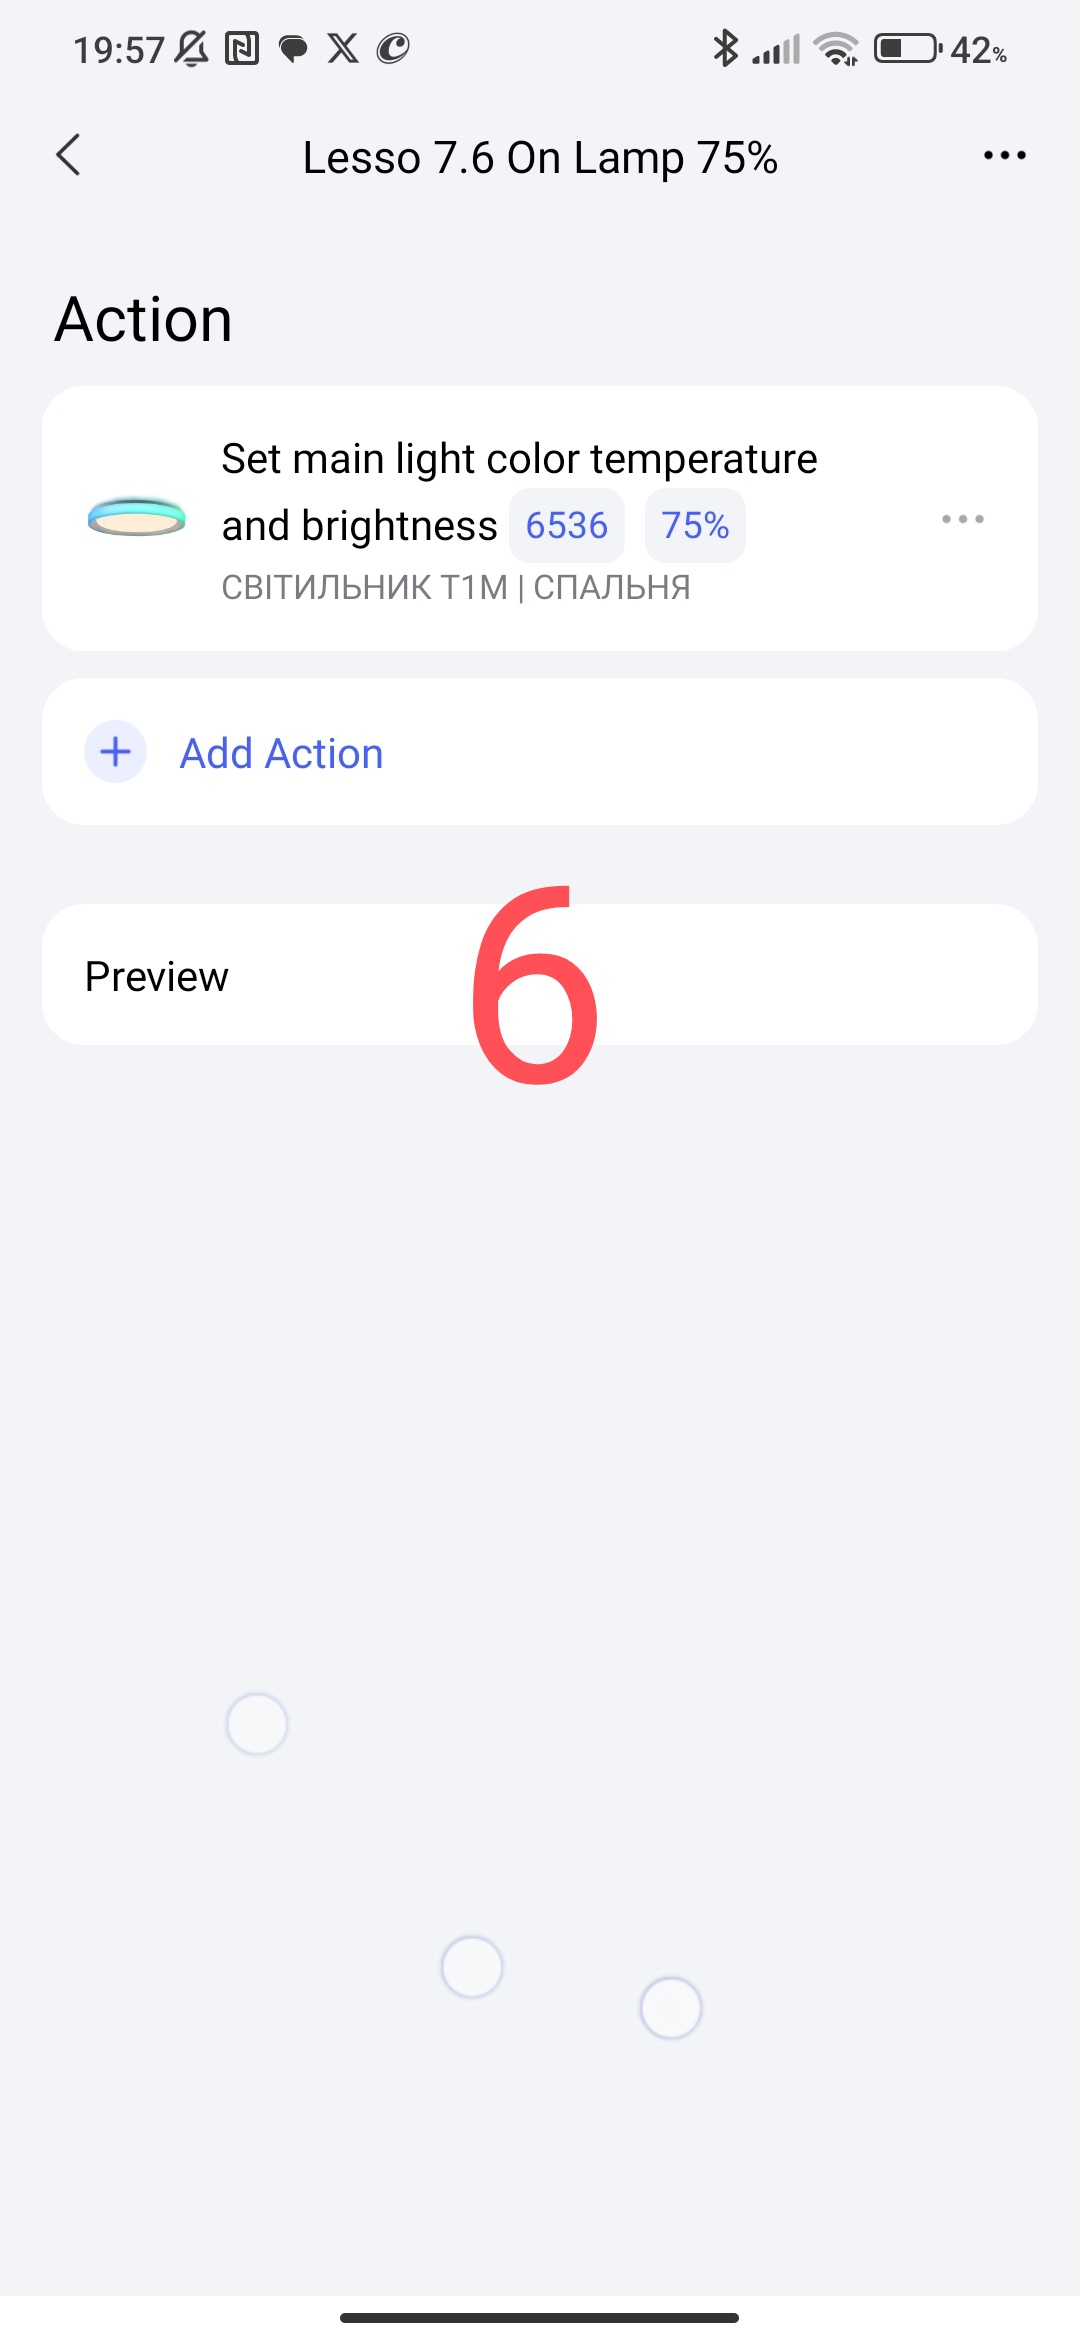
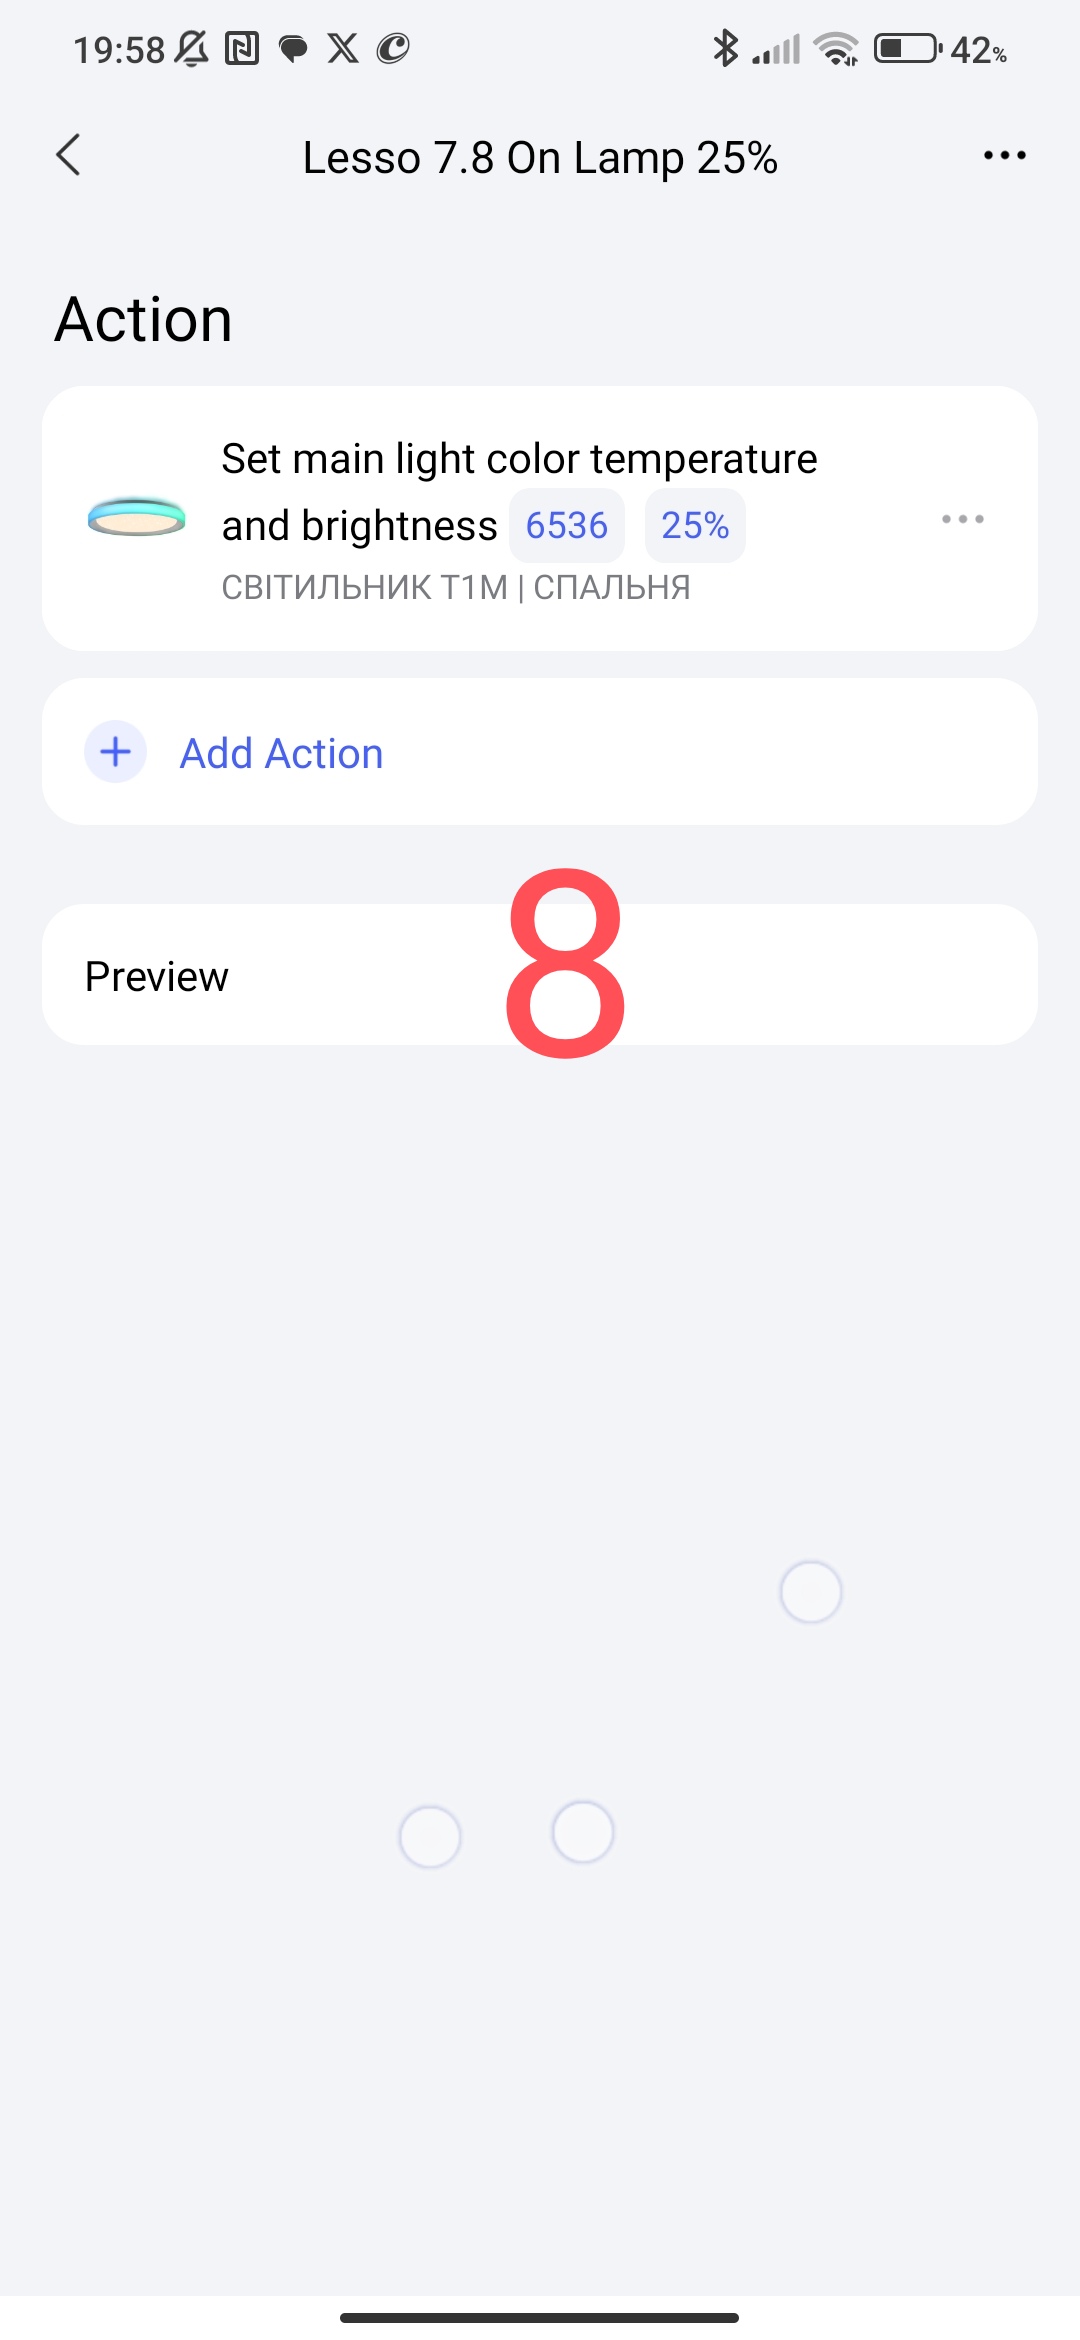
We create scenarios for turning on the light of different intensities (100%, 75%, 50%, 25% of the lamp brightness).
Fig.5,6,7,8
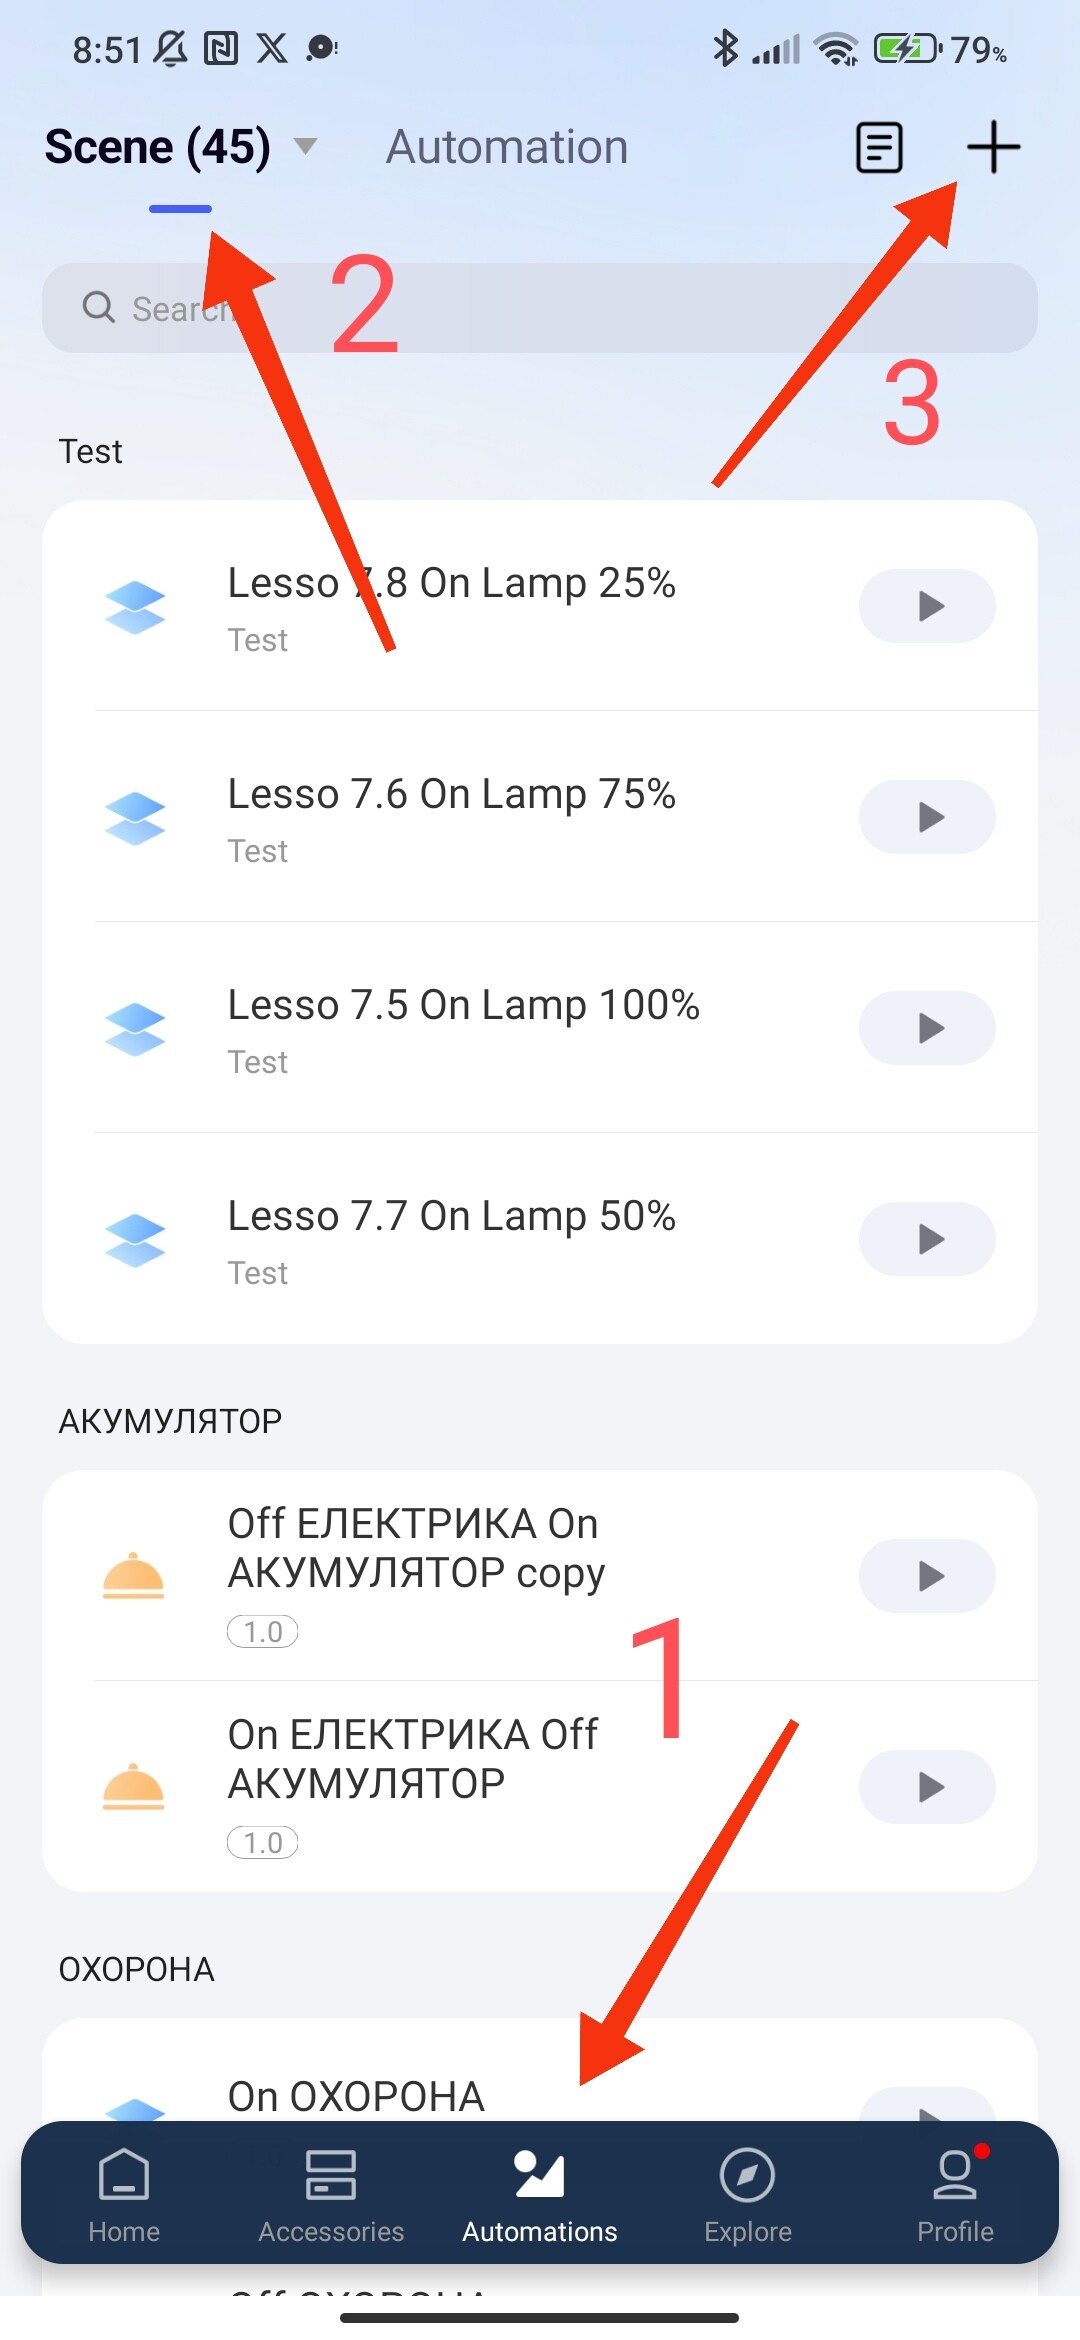


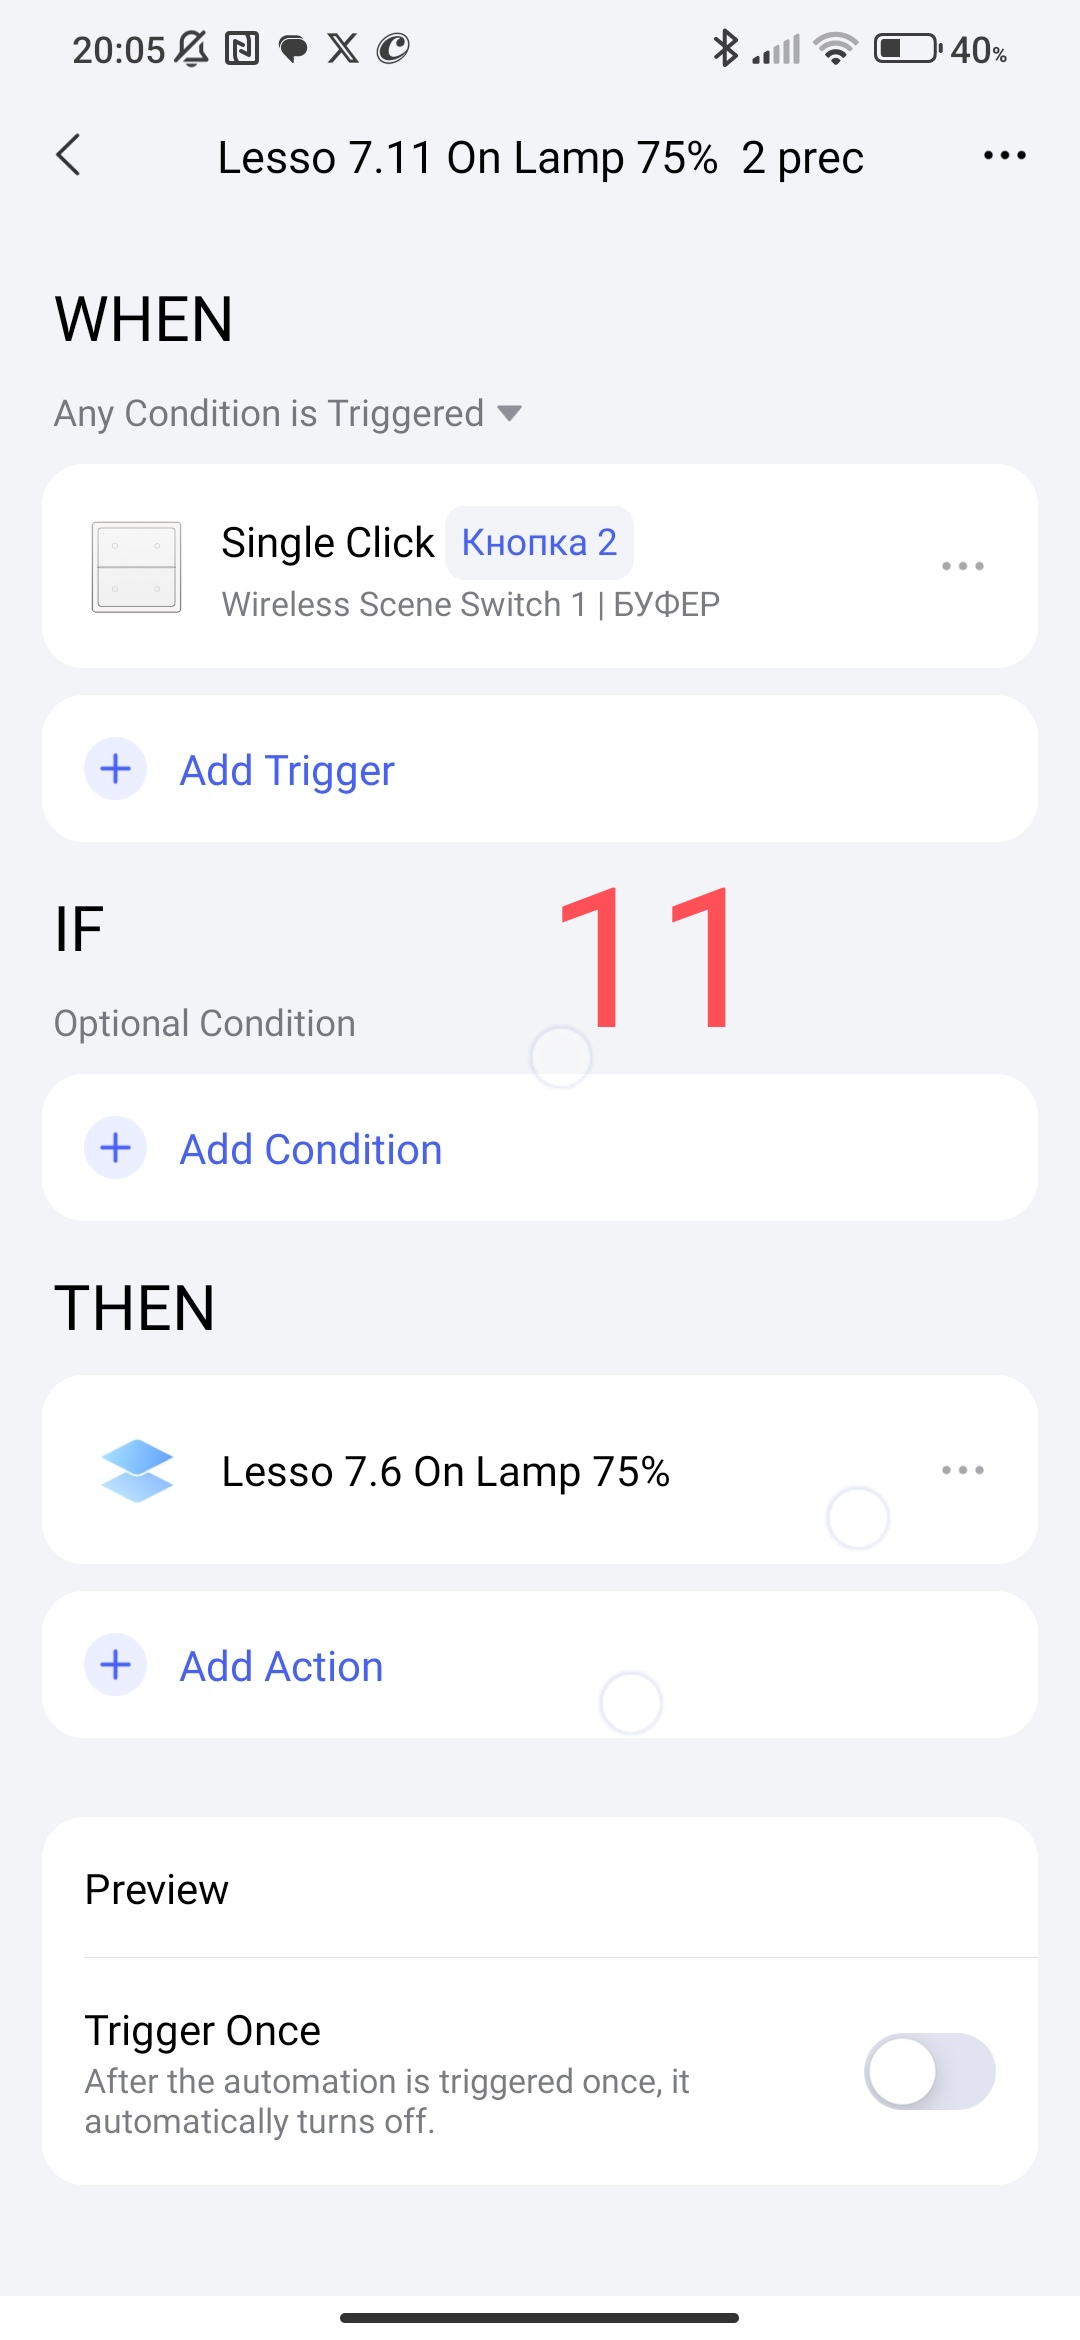
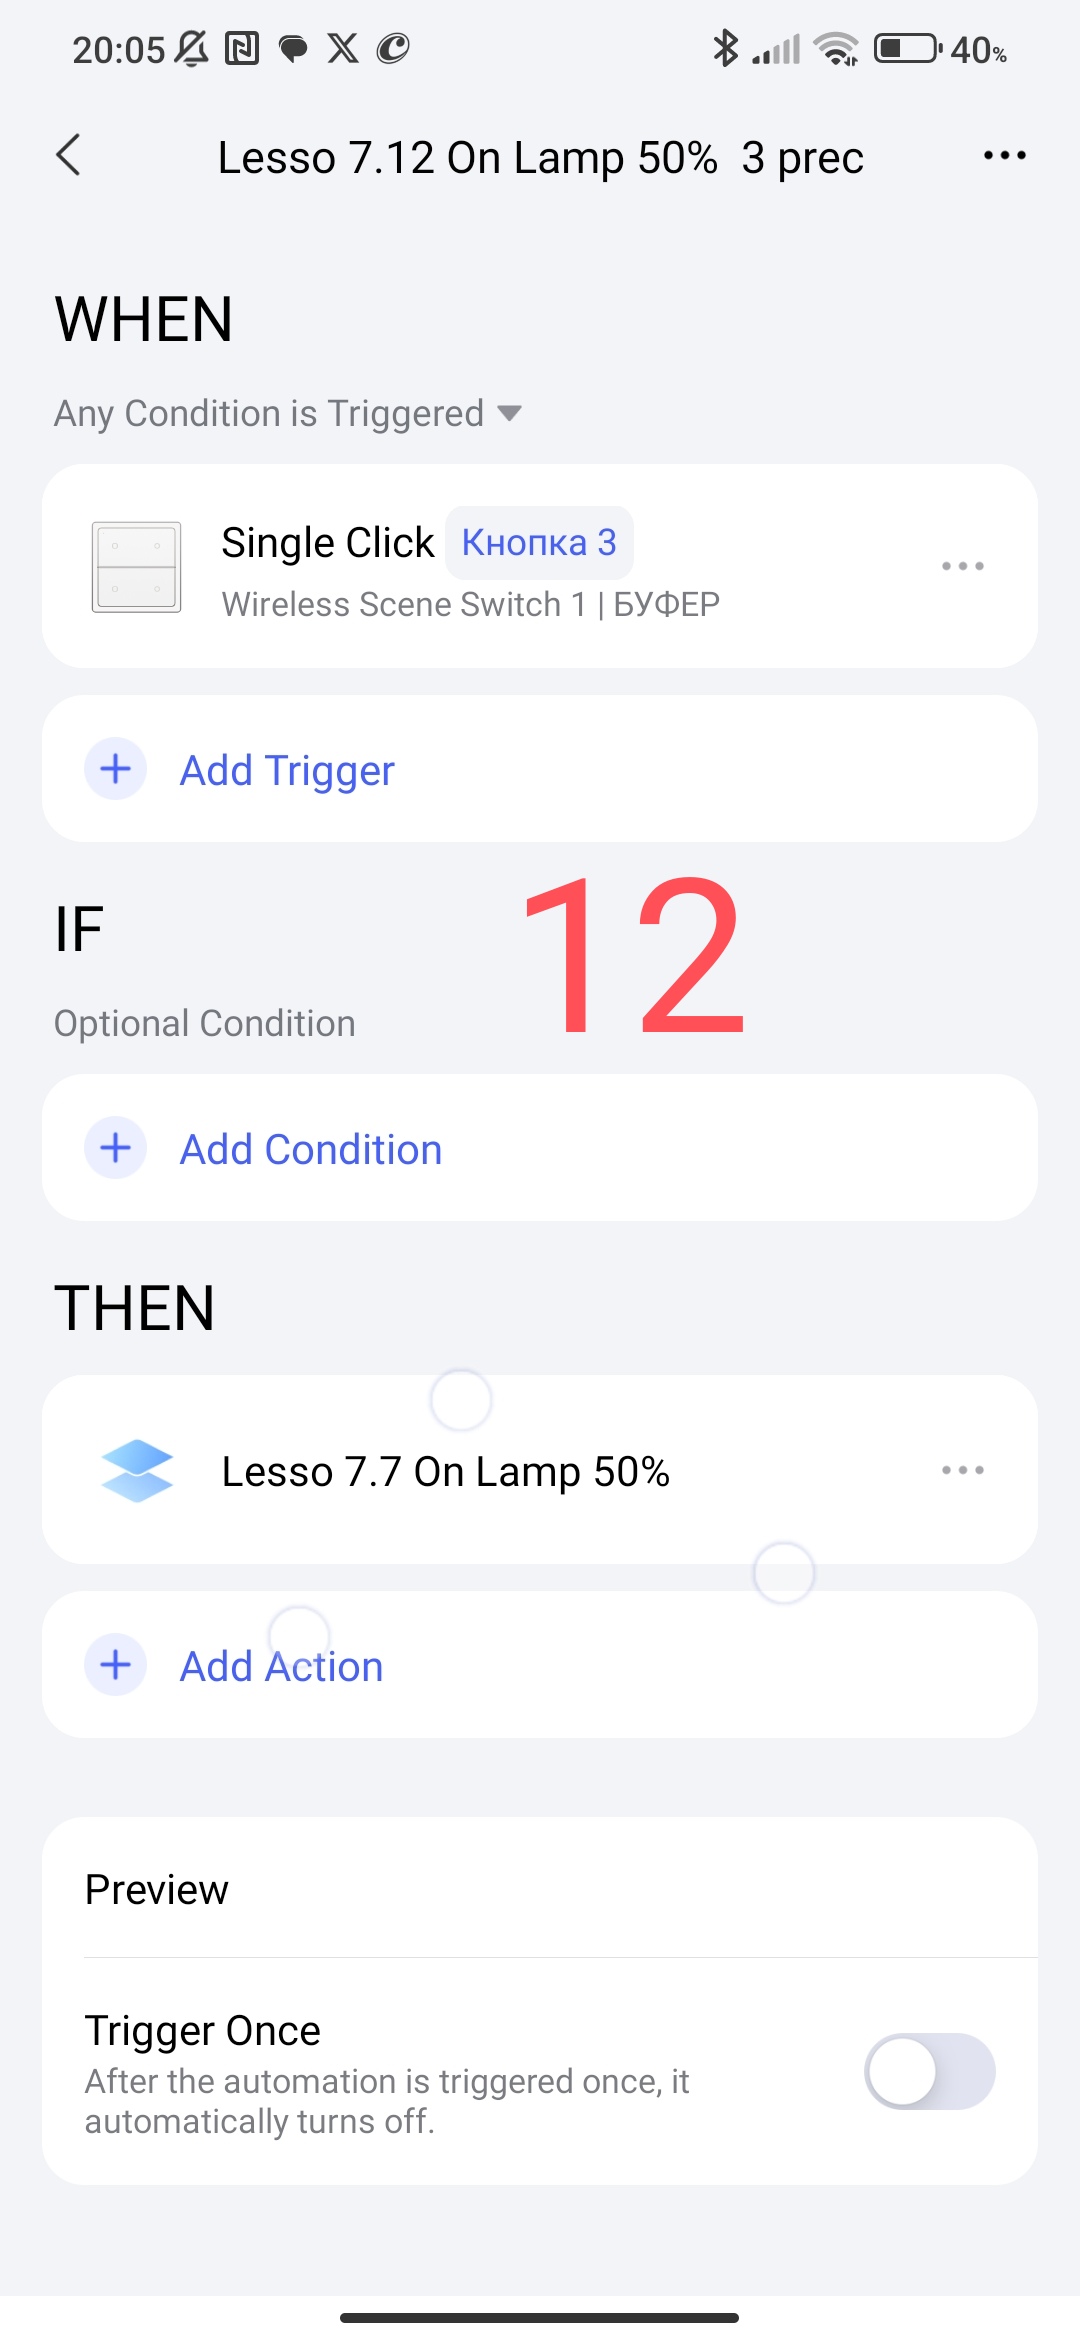
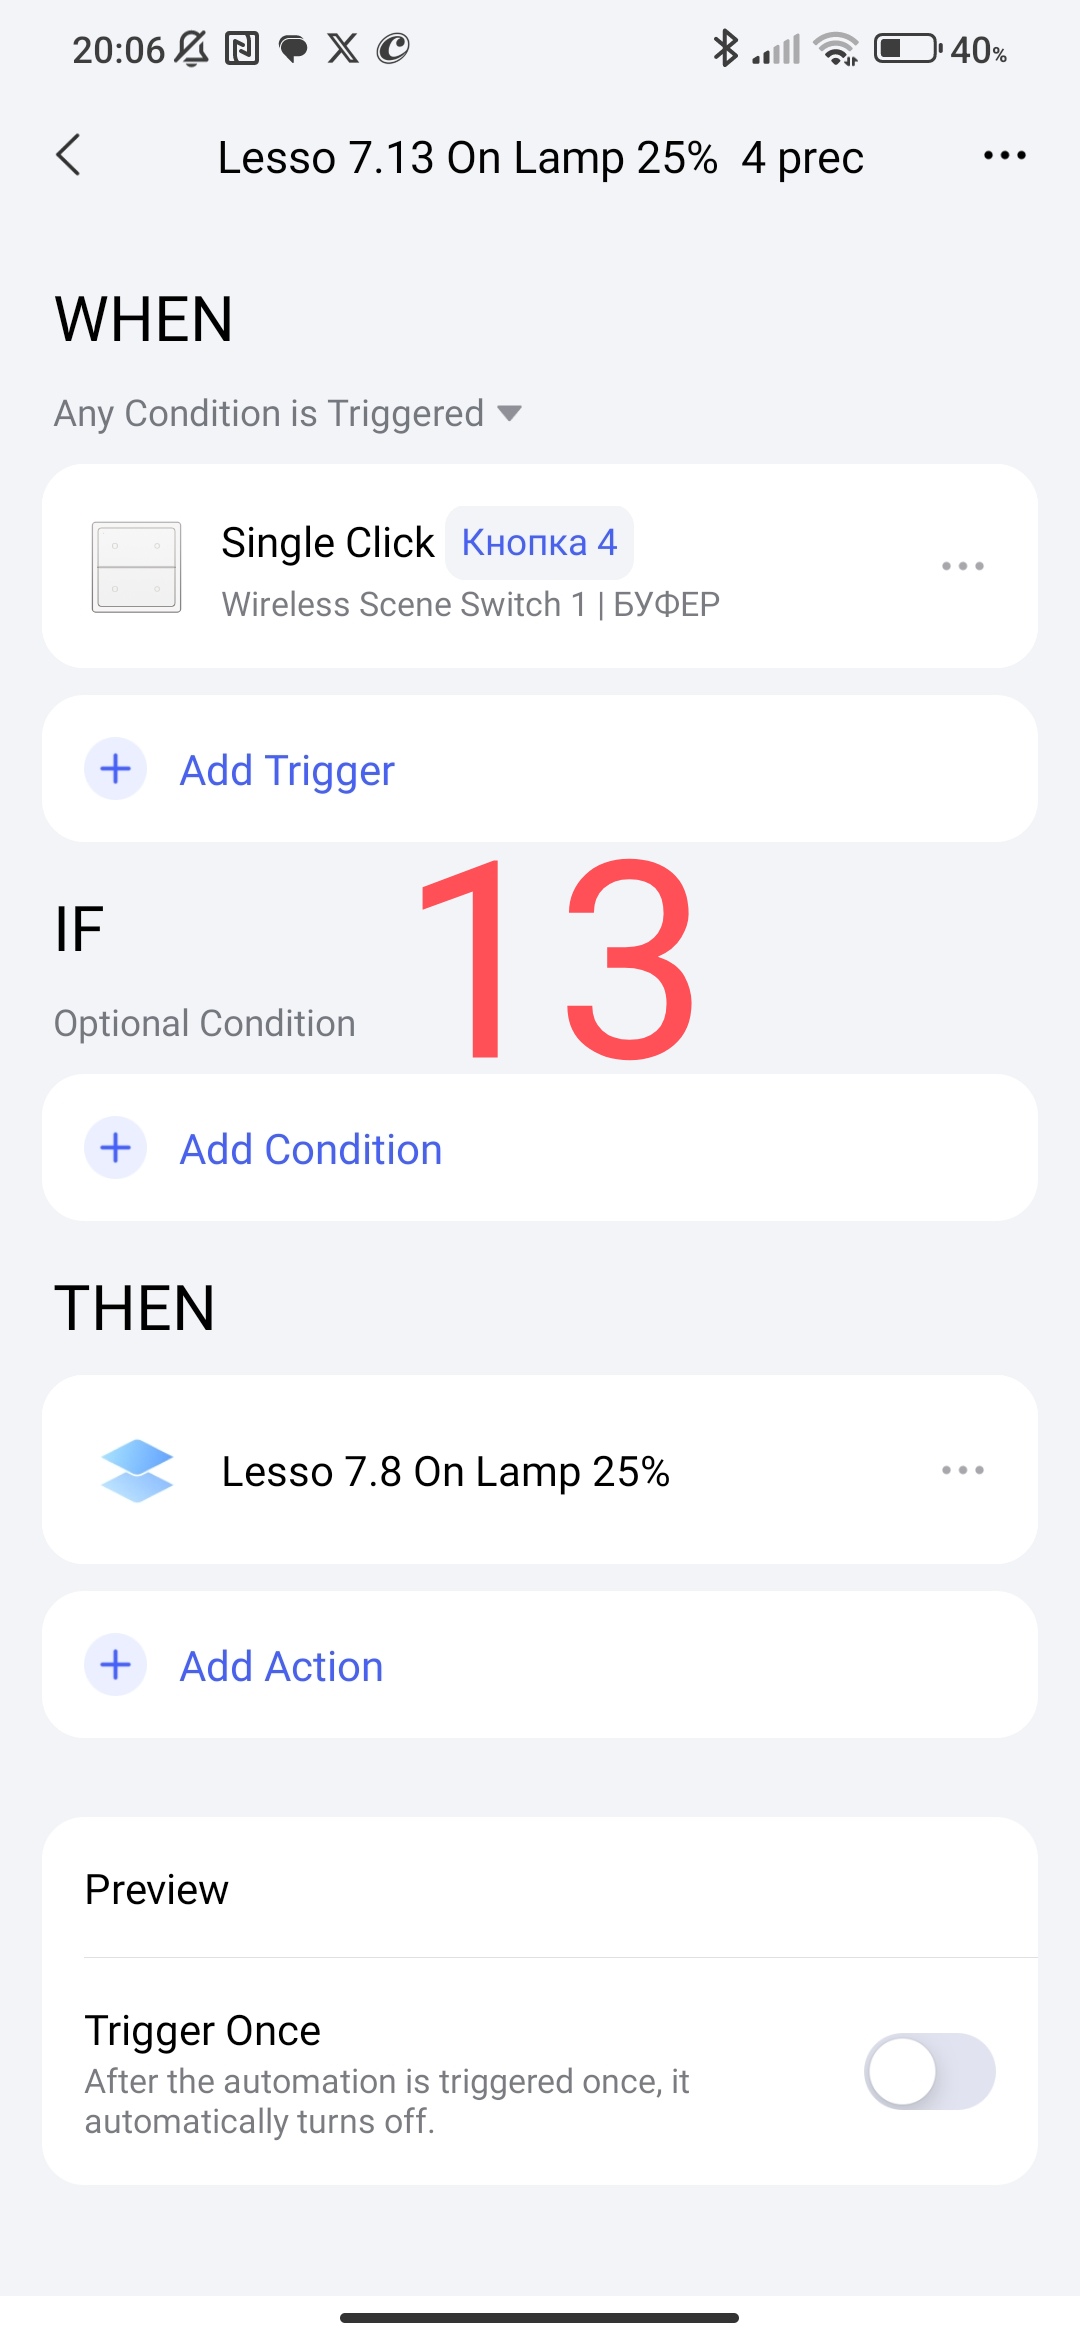
Now we create automations that will turn on the light of the corresponding brightness.
Fig.11,12,13
[grid]k
[/grid]
We got lamp control using a wireless switch (four-button old type).
Buttons - 2- 75%, 3-50%, 4-25%.
I did not forget about button 1 -100%, we will consider it in the next section.
Section 3.
In the house, it is often necessary to use different switches at the same time, a bedside table, a walk-through room … Let’s consider how to combine all these switches into one automation group so as not to create (clone) similar automations.
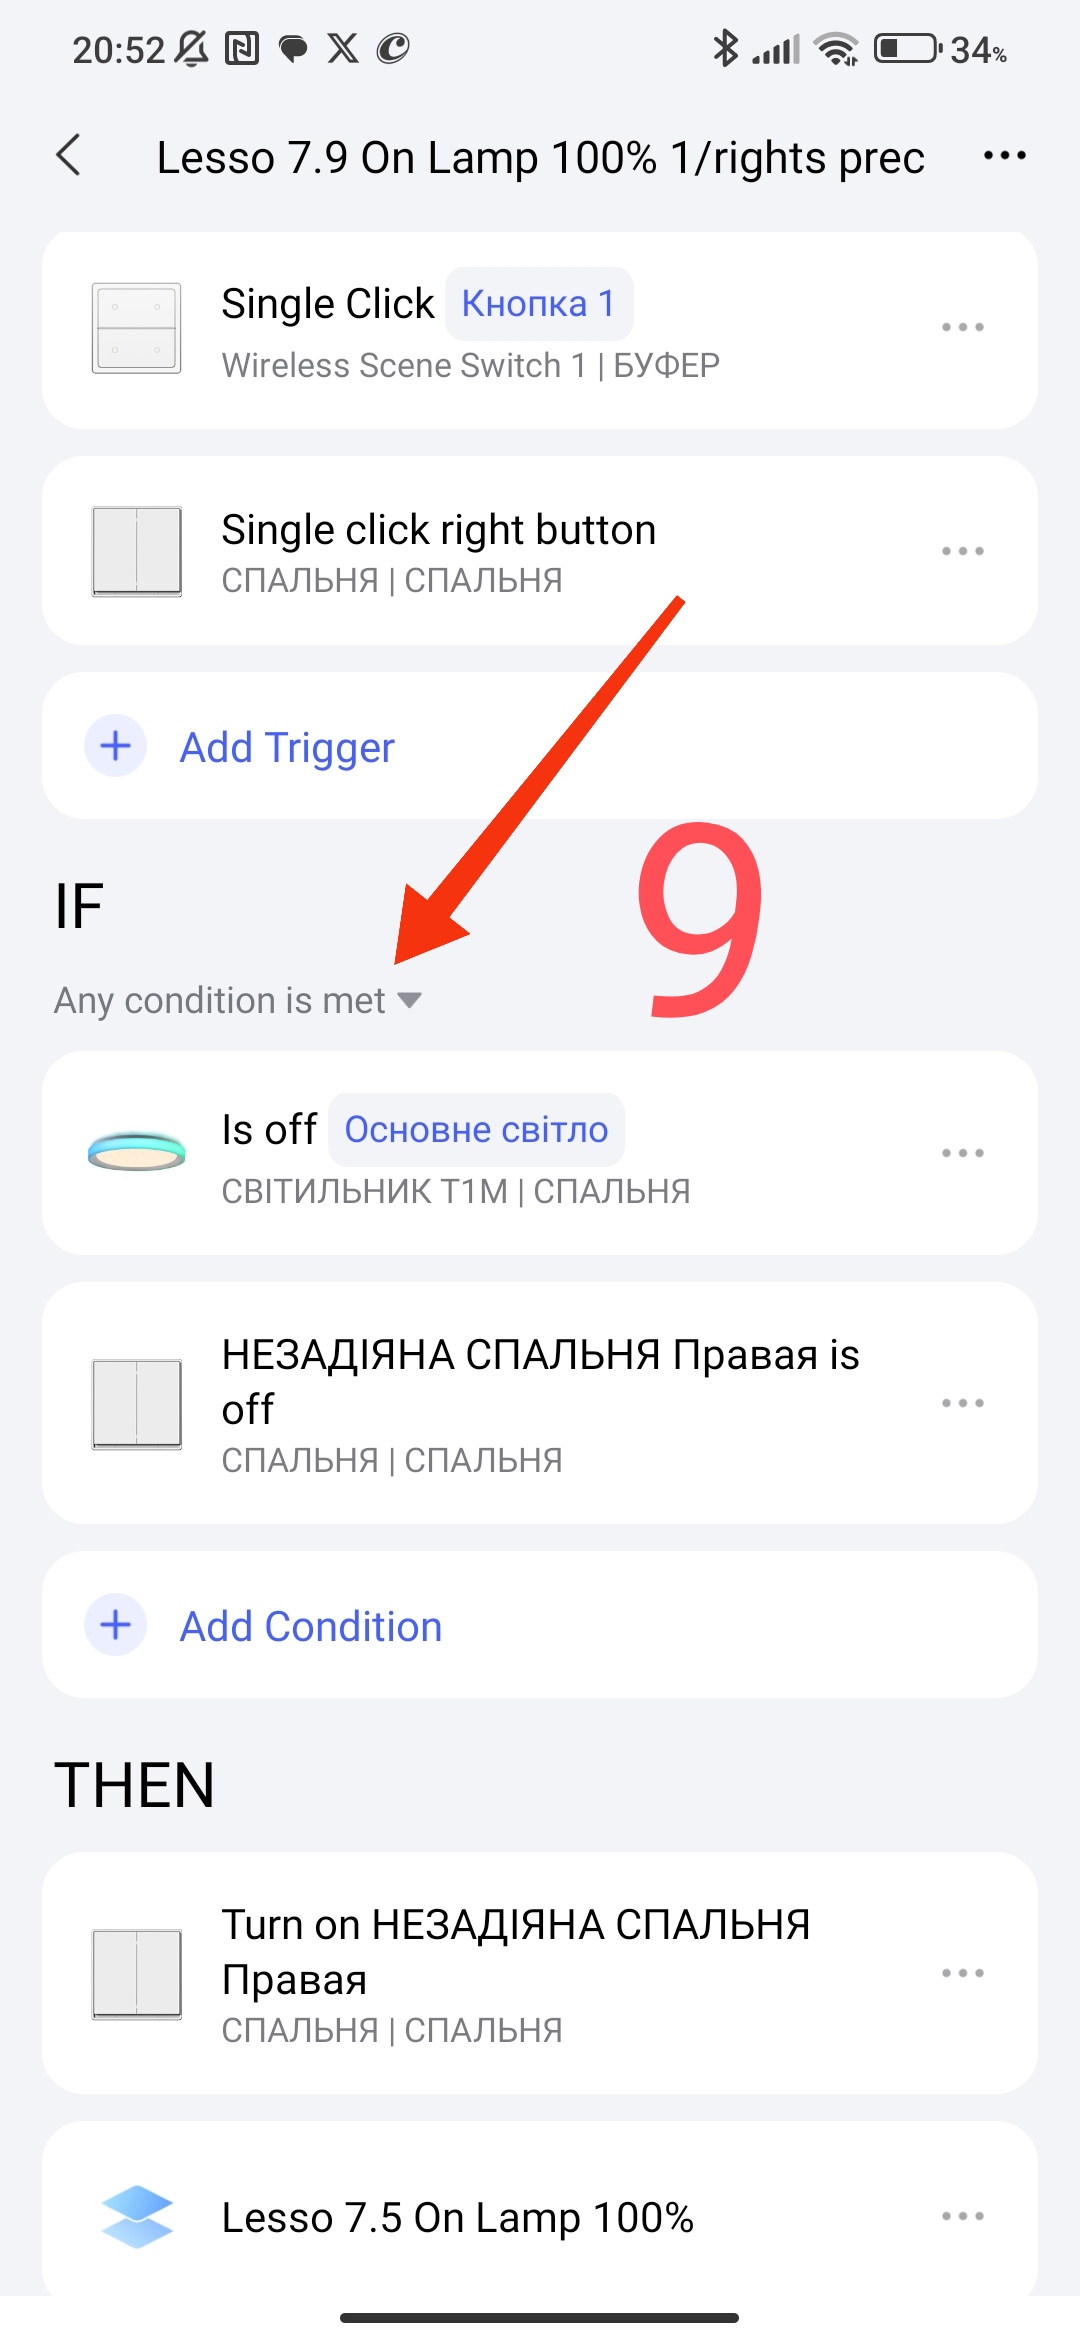
To turn on the lamp, combine section 1 and section 2 into one automation. We will get the following automations for the 1st button of the wireless switch and the right button of the switch E1.
The first automation is On lamp 100%
Fig.9
The second automation is Off lamp.
Fig.10
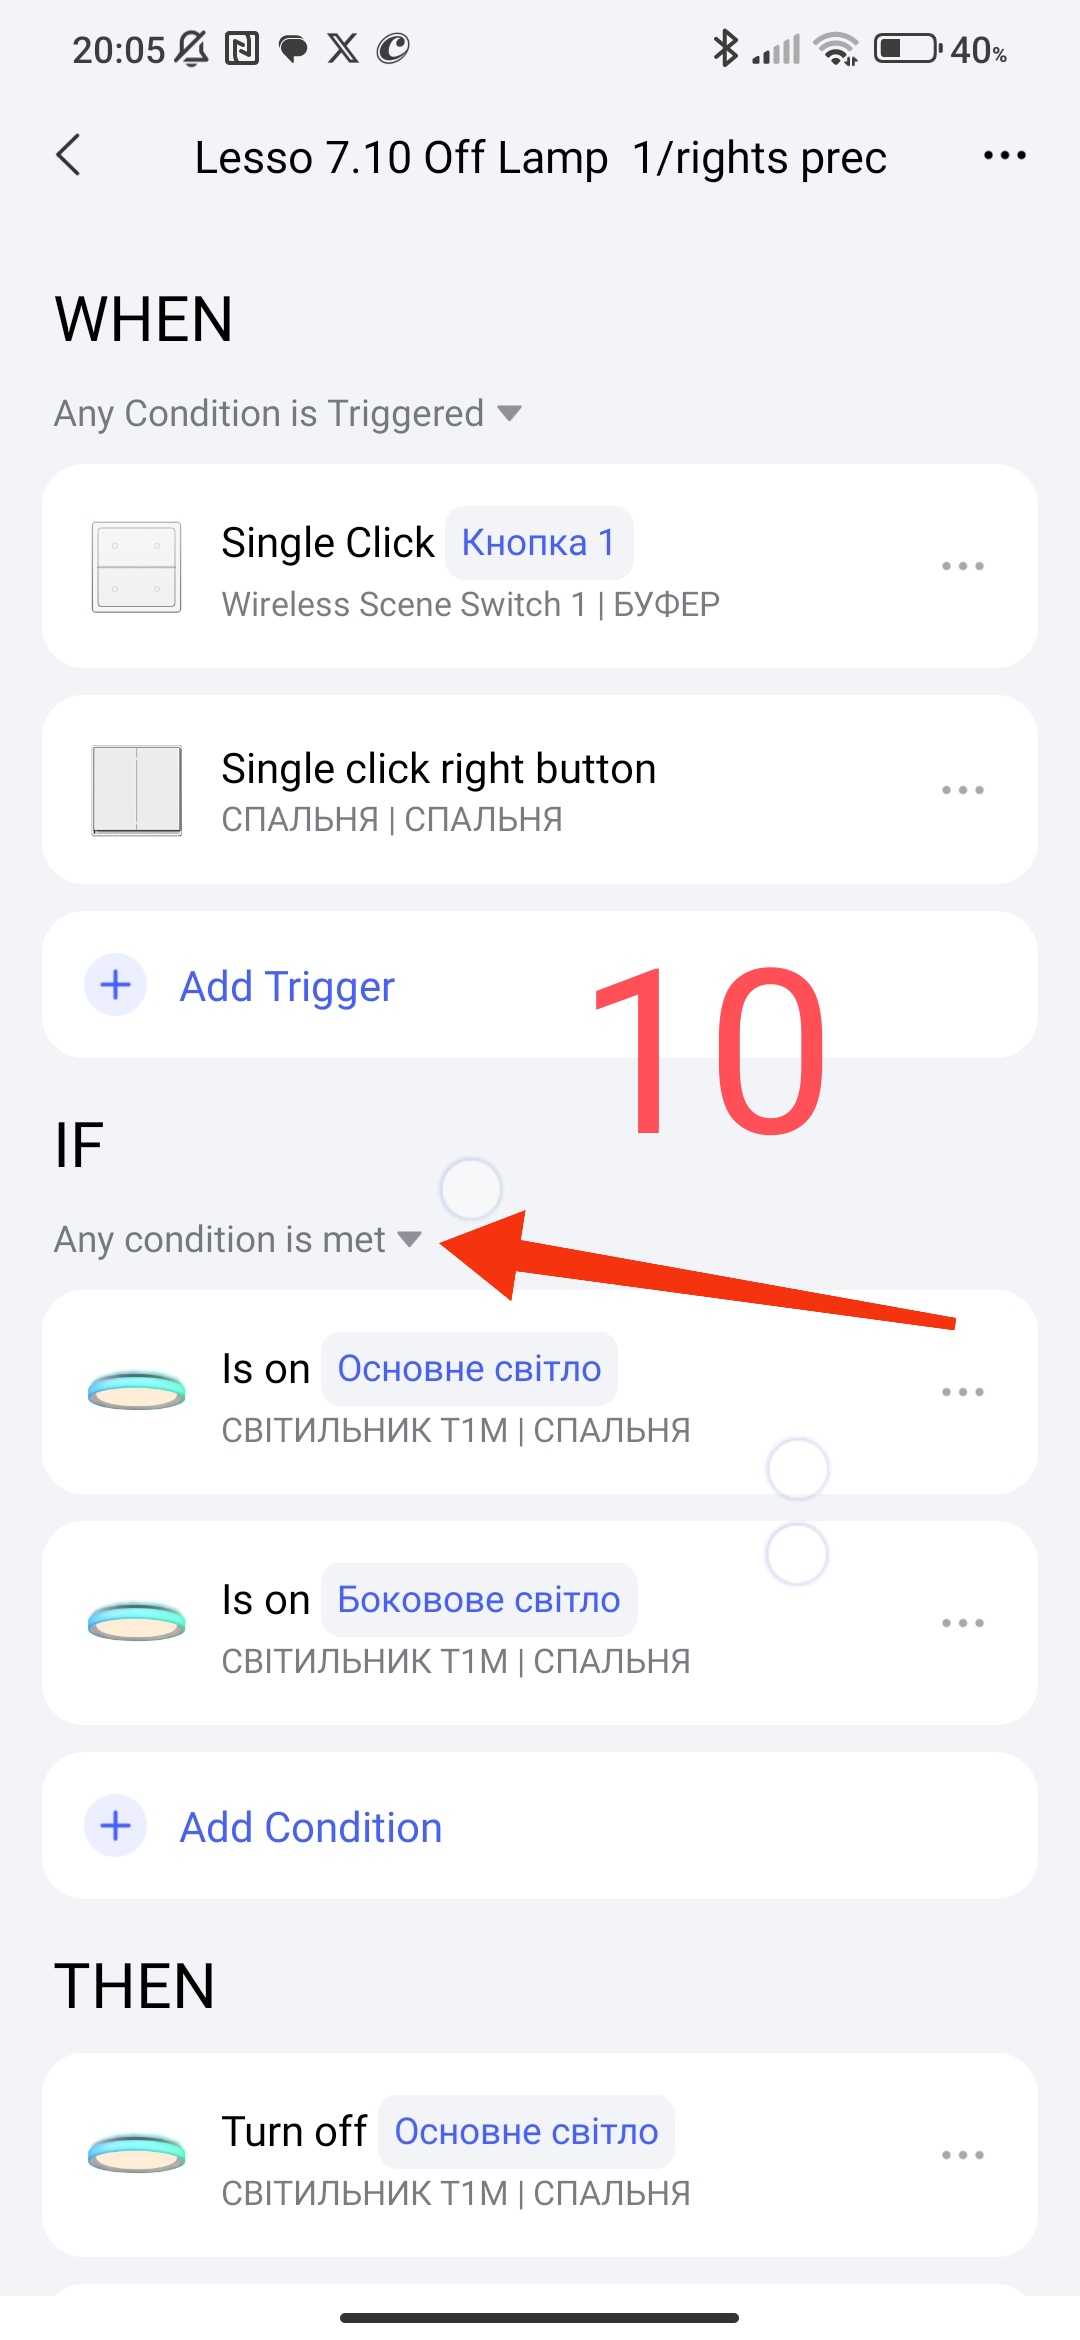
In my example, only button 1 (wireless) and the switch button (E1) are used to turn off the lamp.
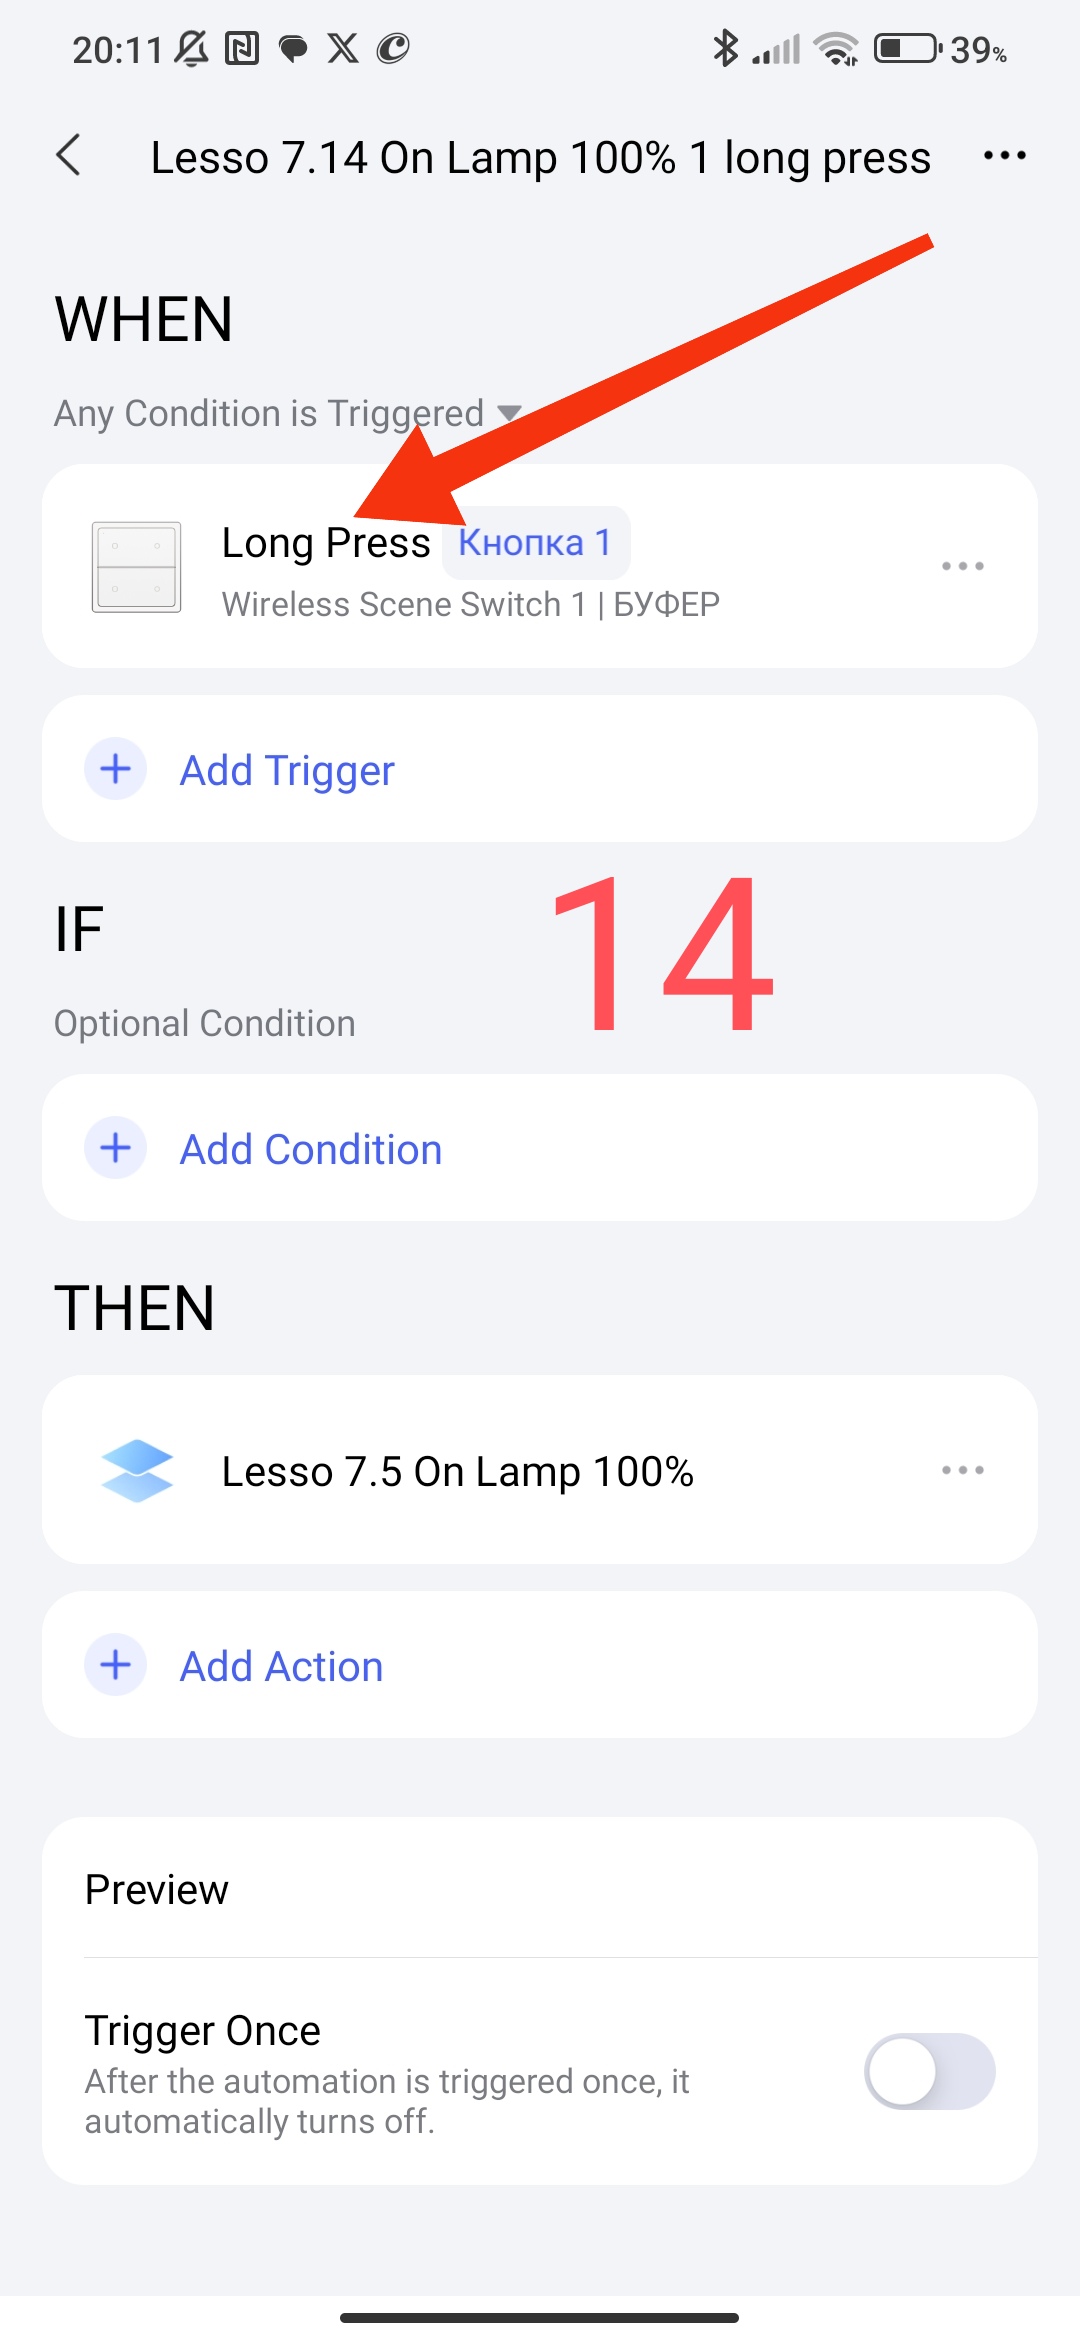
As an additional automation in case of need to turn on the light 100% when the light is already on (75,50,25%), I made a condition for a long press and On 100% for button 1 (wireless switch).
Figure 14
Also, in addition to controlling the lamp, I use the Aqara smart cube. I supplement the automation (Figure 9, 10) with the action of the cube (of your choice, tapping, turning …), in the WHEN condition add the action from the cube that you have chosen, I will not make an automation screen, everything is clear here.
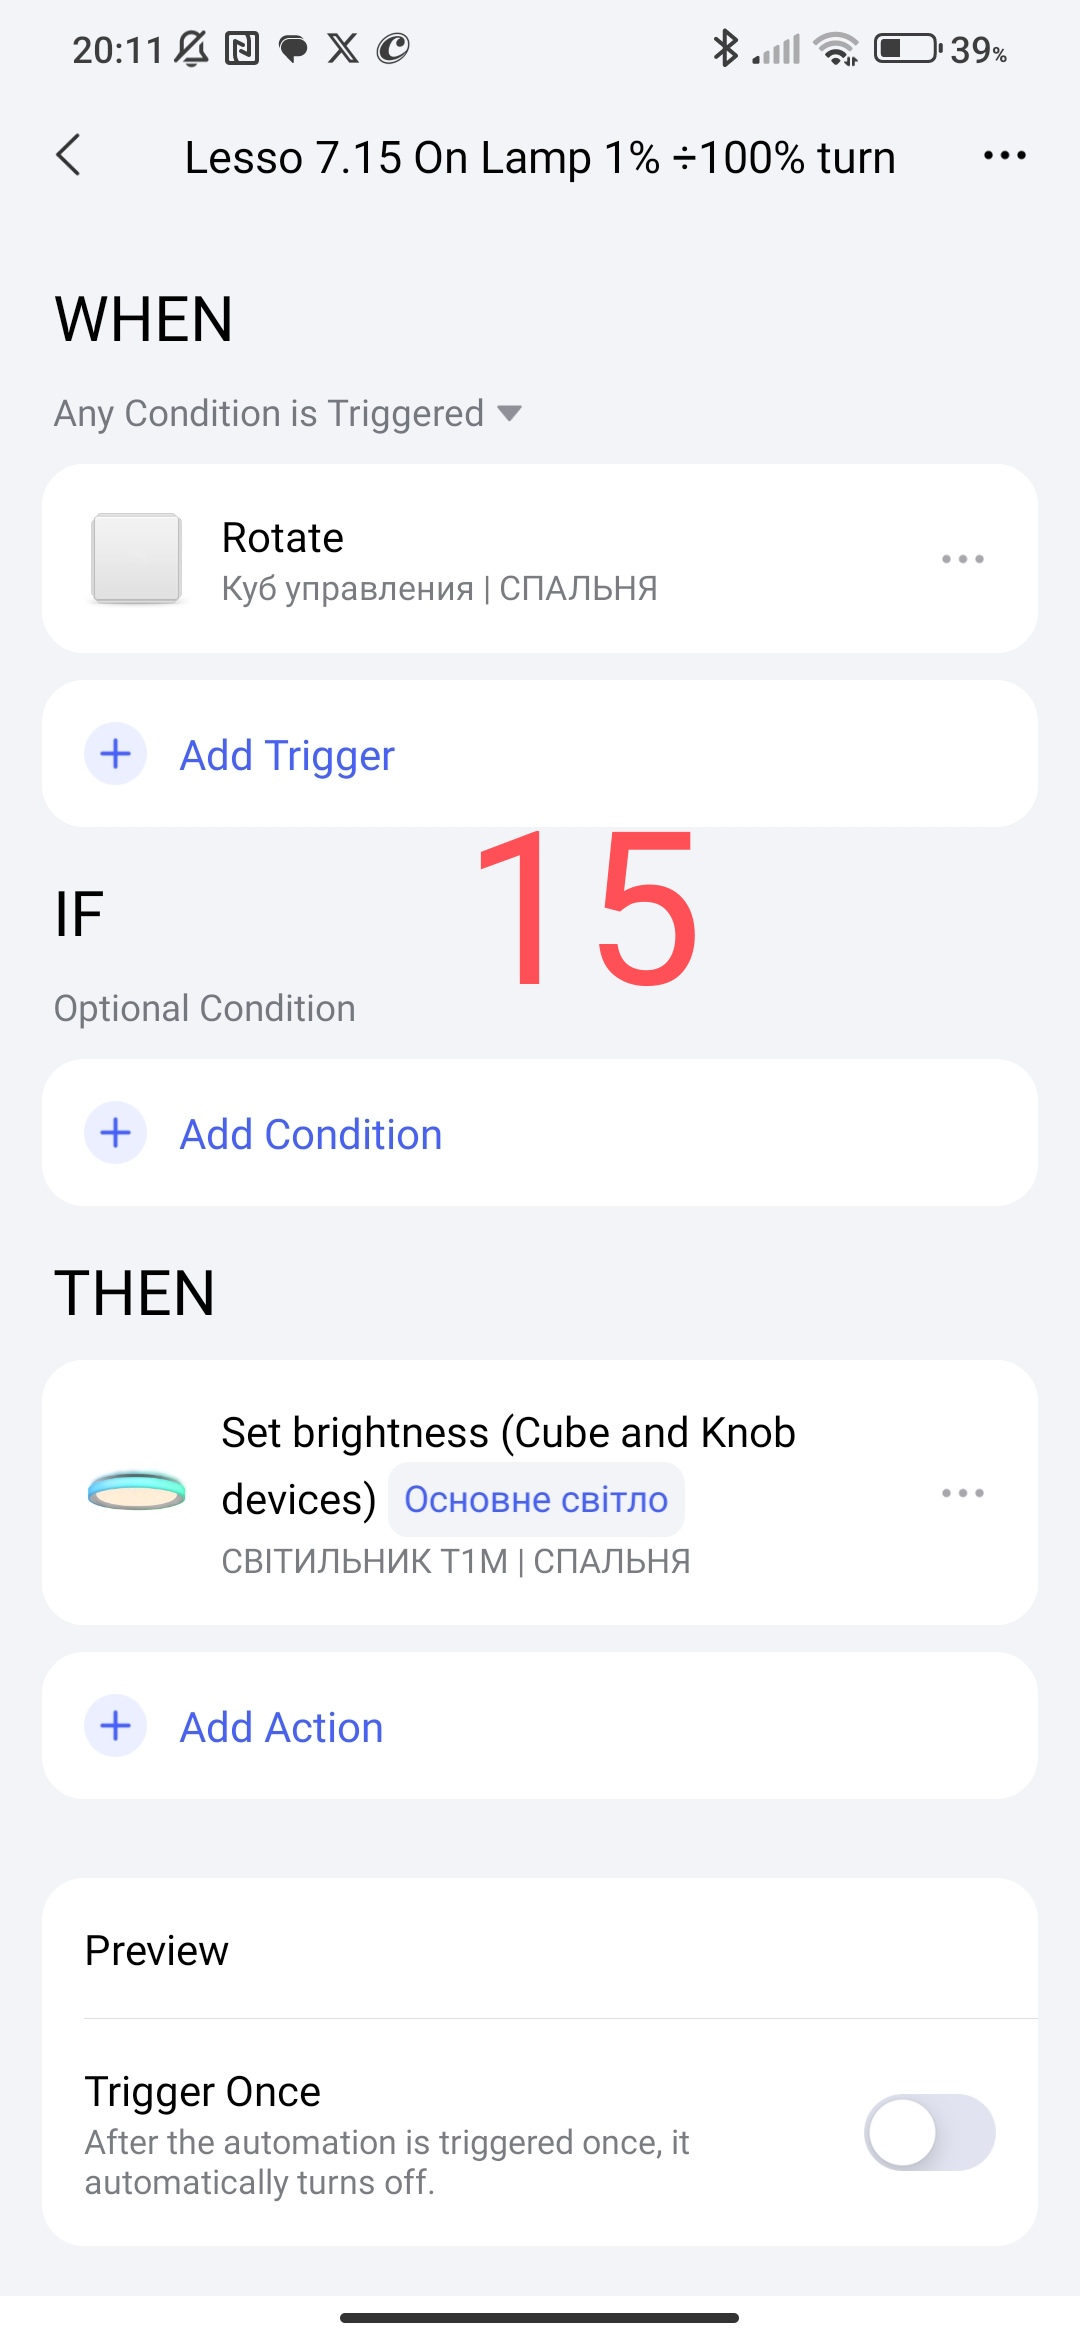
I also use the Aqara cube to adjust the brightness of the light.
Figure 15.
Please note that this example in my lesson can be used for the H2 switch with four keys.
My example is written for your understanding of the algorithm for building automations with lighting devices.
Now everything is in your hands and your creative mood. Good creative inspiration to you.
This is where I will end this story.
Thank you for reading and sharing the topic (you can also on other platforms with a link to our forum).
More to come…
Lesson 8 Automation 2.0, lesson 8, using group lamp control using scene's