Automation 2.0, lesson 7. Controlling Aqara smart lamps using switches (wired and wireless).
Good afternoon, today I want to conduct training on creating group control of lamps. Many new users (dummies) think that this is a very difficult task, in fact there is nothing complicated here. The main thing is to delve into the algorithm for creating and managing group devices. This lesson is suitable not only for controlling lamps, it is also relevant for all equipment that allows you to create groups (this is a mini-template lesson). As always, I will try to describe the process in detail, so I ask advanced users not to be surprised by the obvious.
The sections that we will now consider:
1_creating groups of lamps;
2_creating scenes for groups of lamps;
3_creating On/Off automations of lamps.
The devices that we will use: Aqara smart lamps, Aqara wireless switch (or wired).
1_CREATING GROUPS OF LAMPS.
For the example, I will use three Aqara lamps (I specially minimized the lamps so as not to upload screenshots).
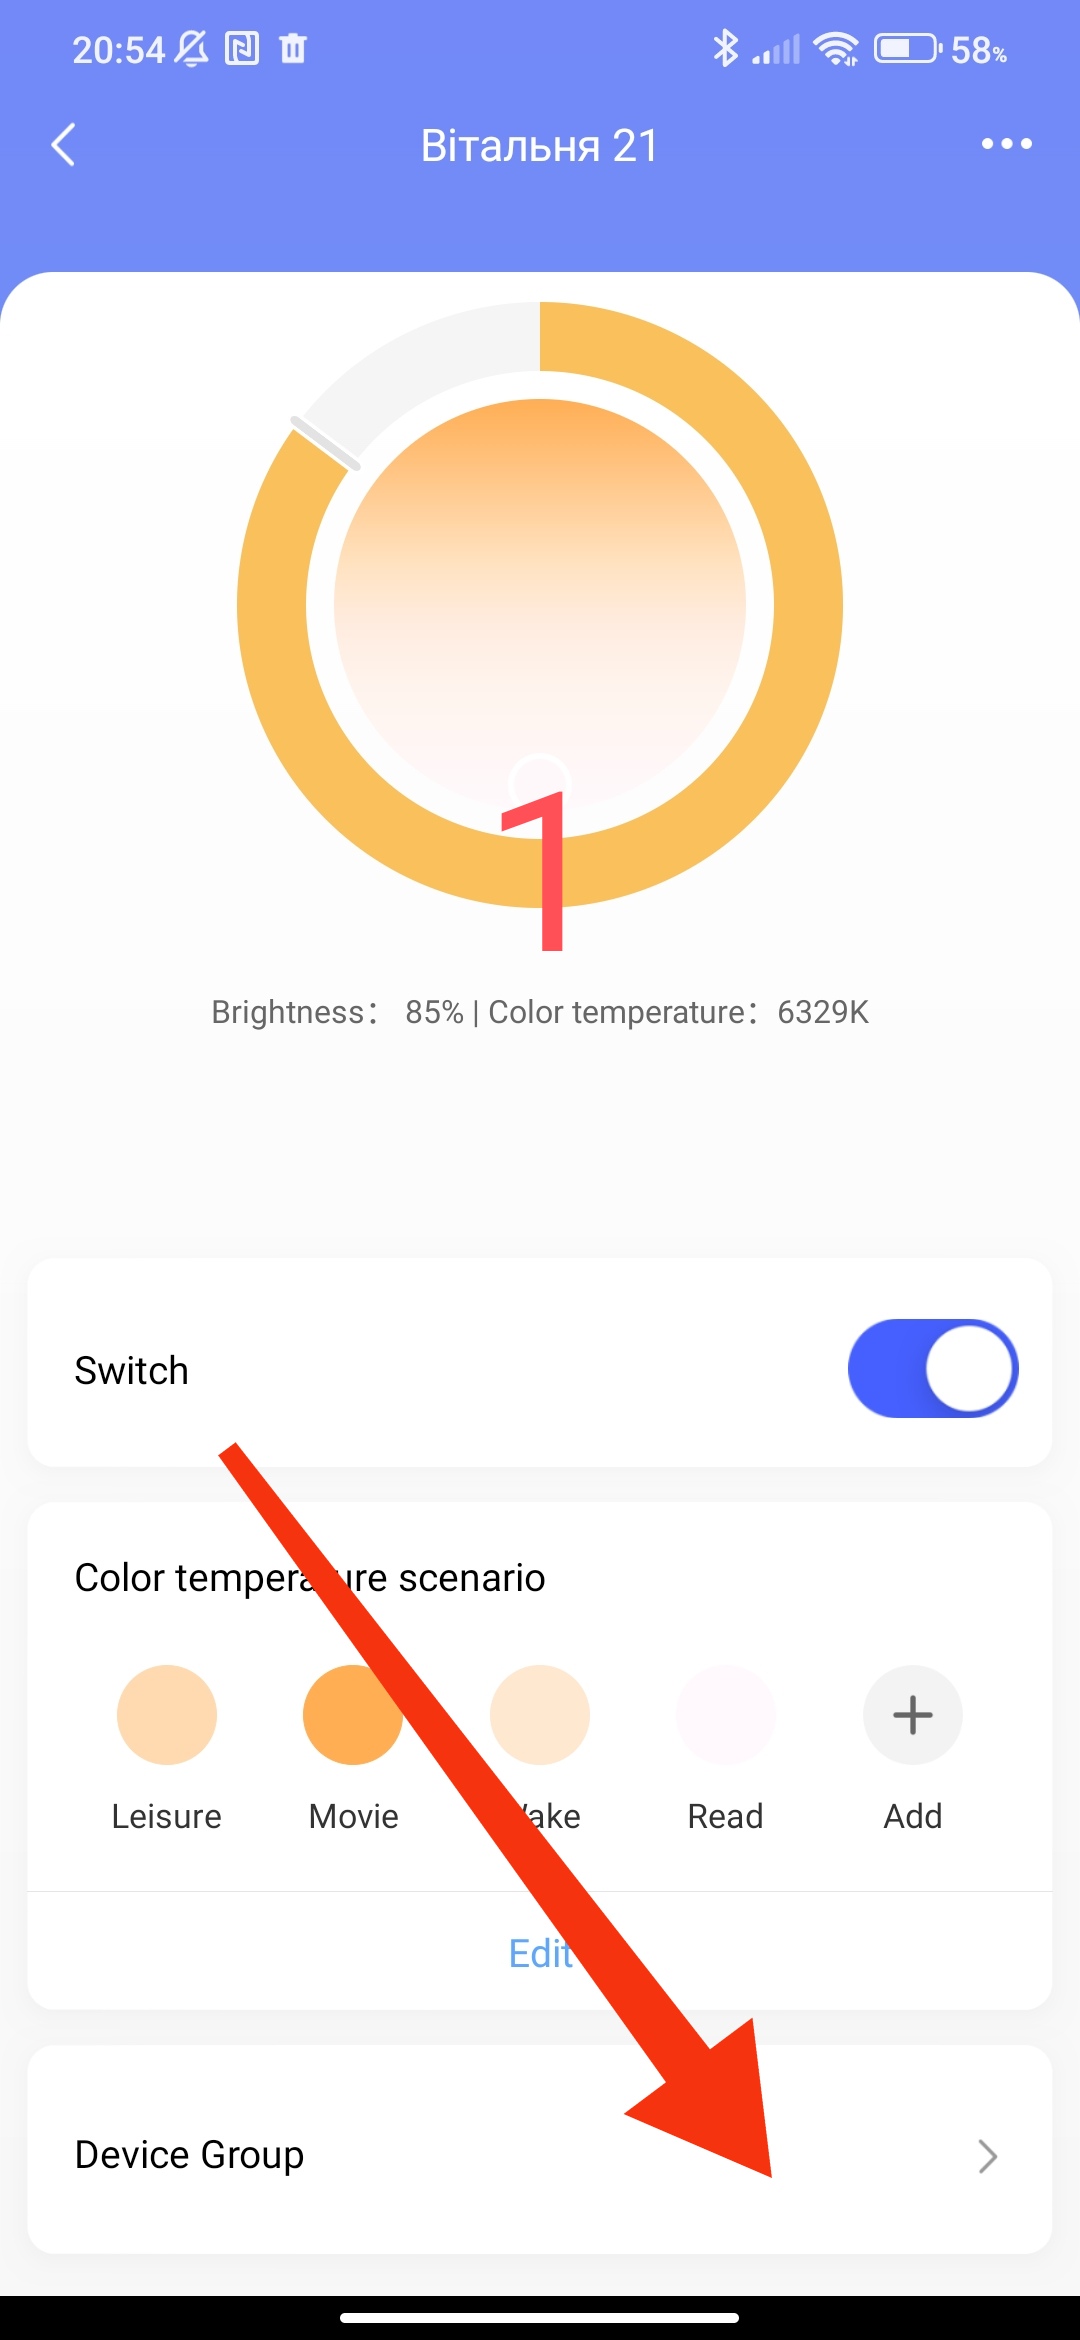
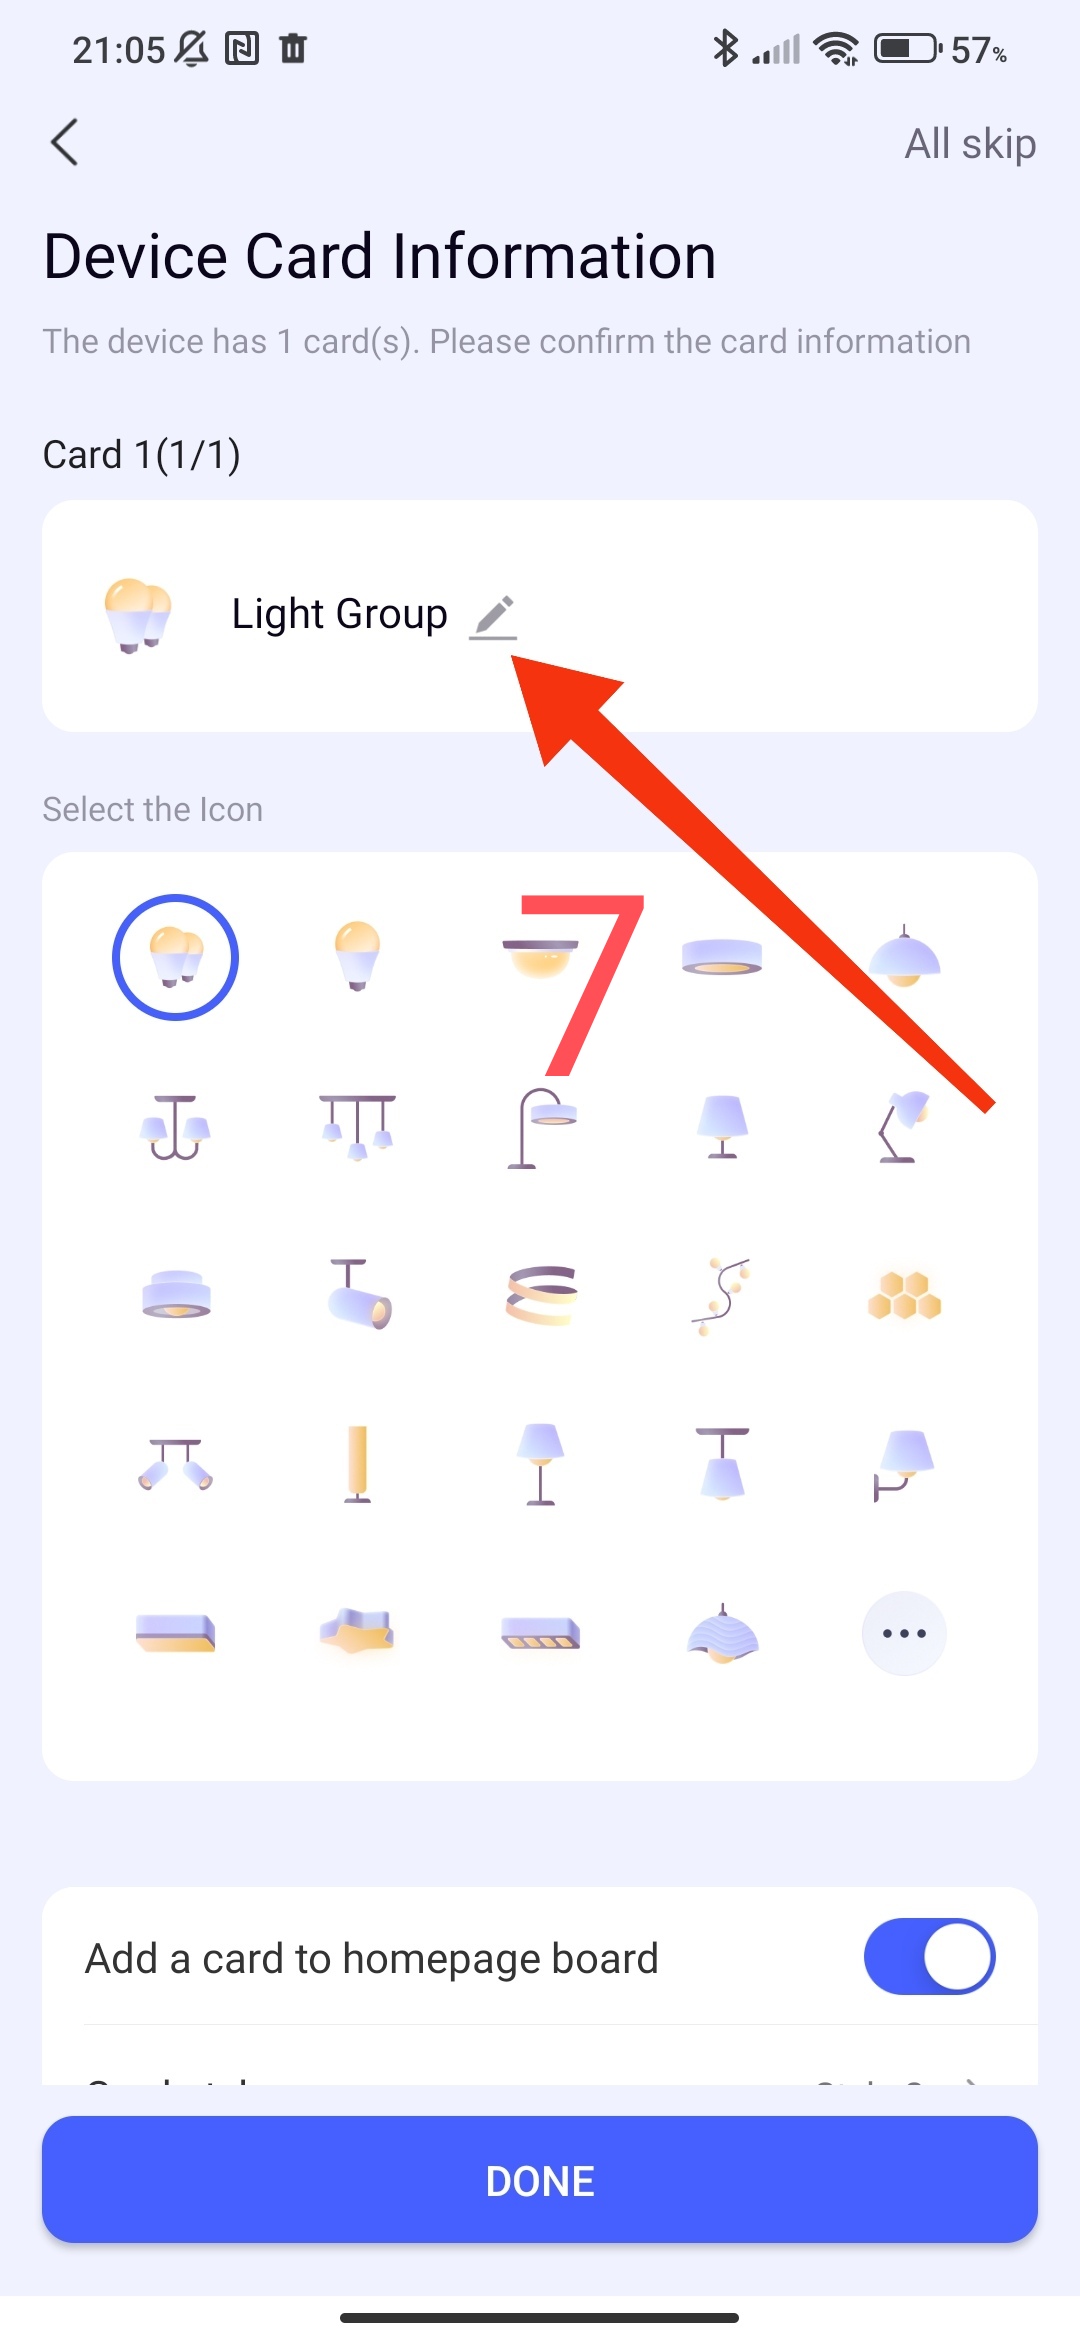
We go to Aqara Home and open the lamp that we plan to add to the group and select the splash screen at the bottom to create a group and add “+”
Fig1,2

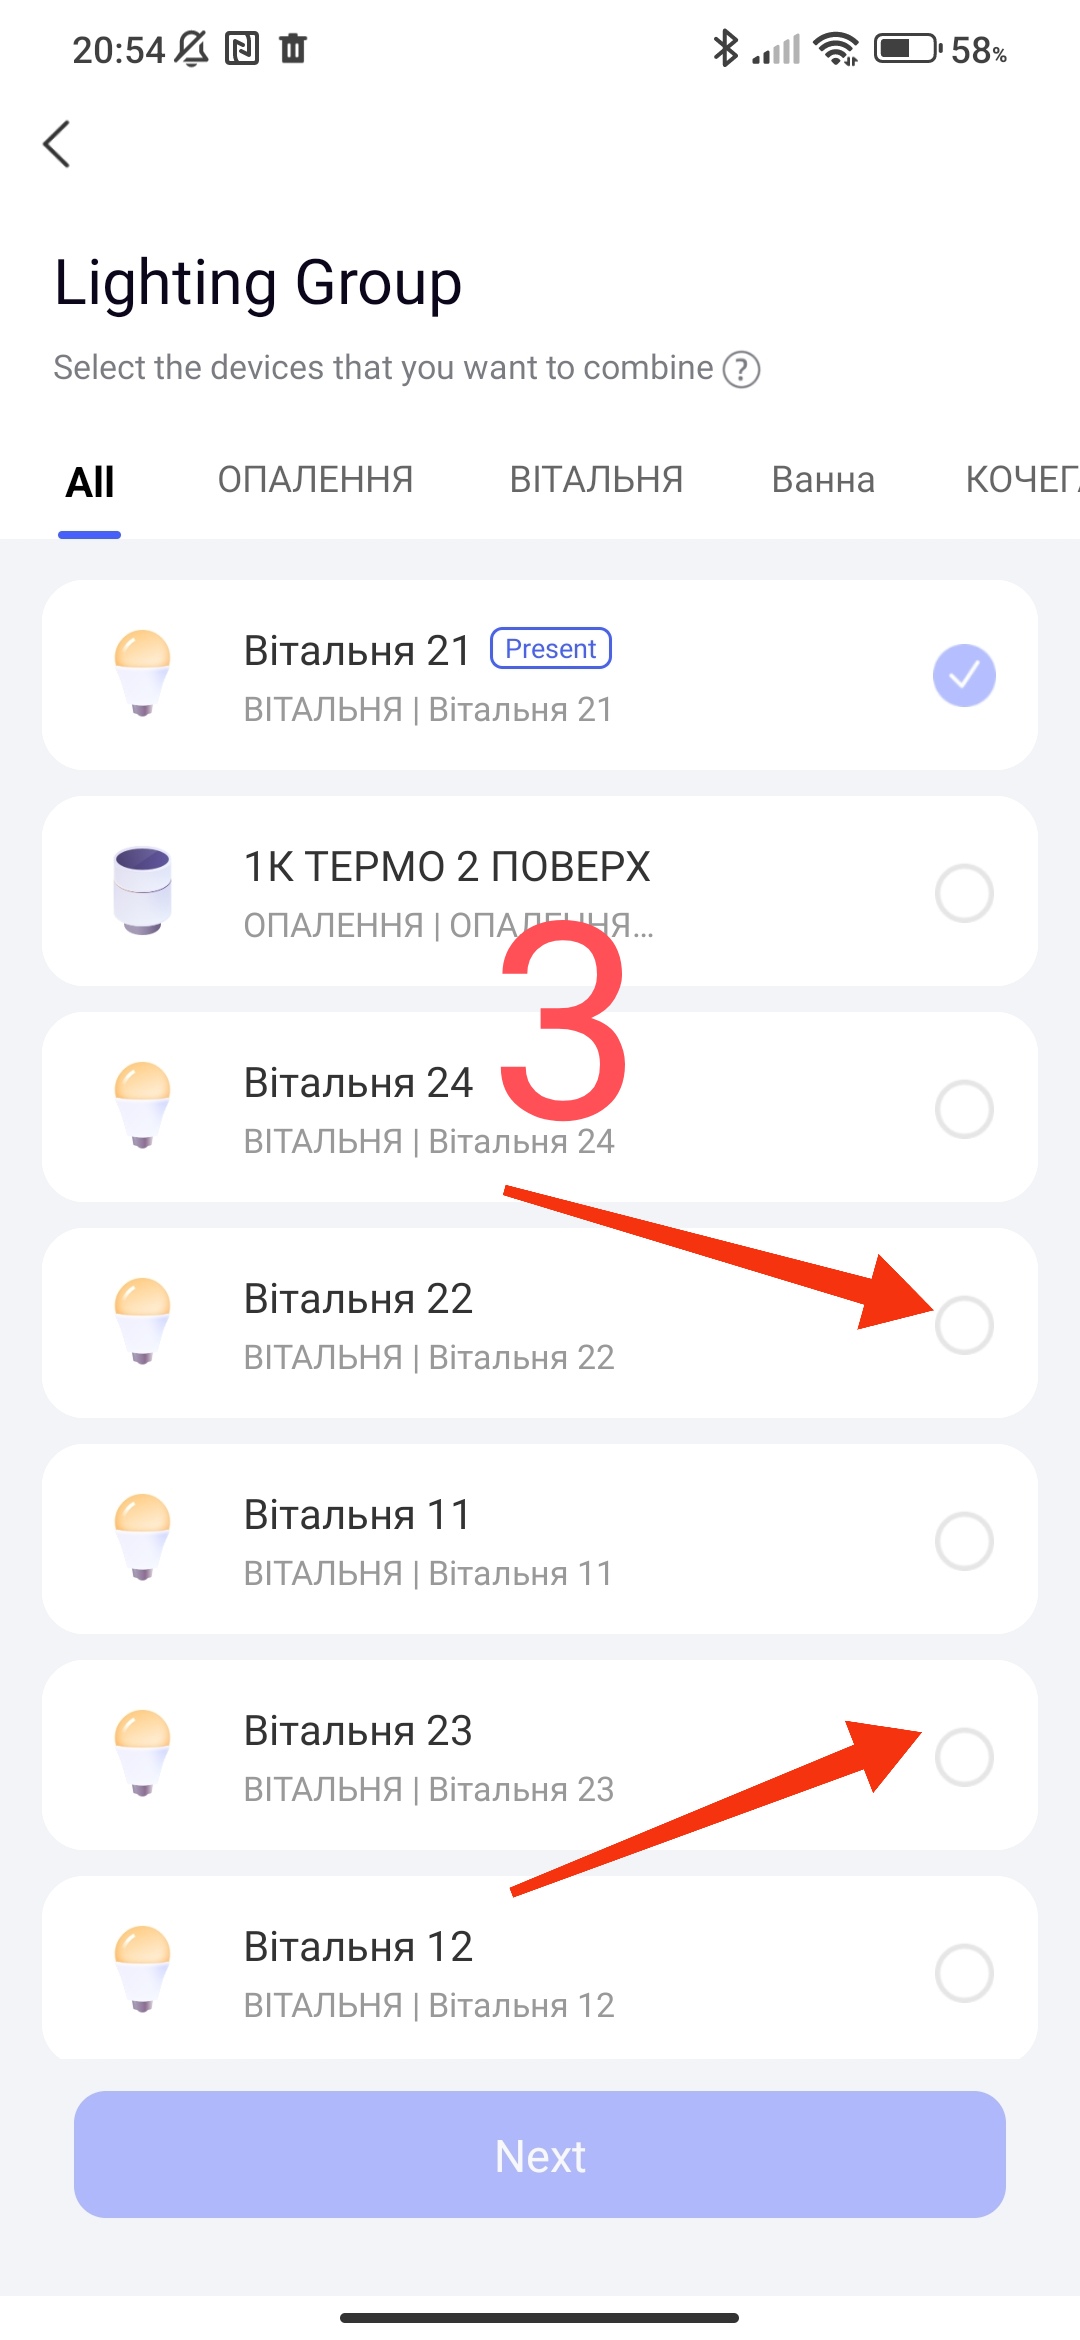
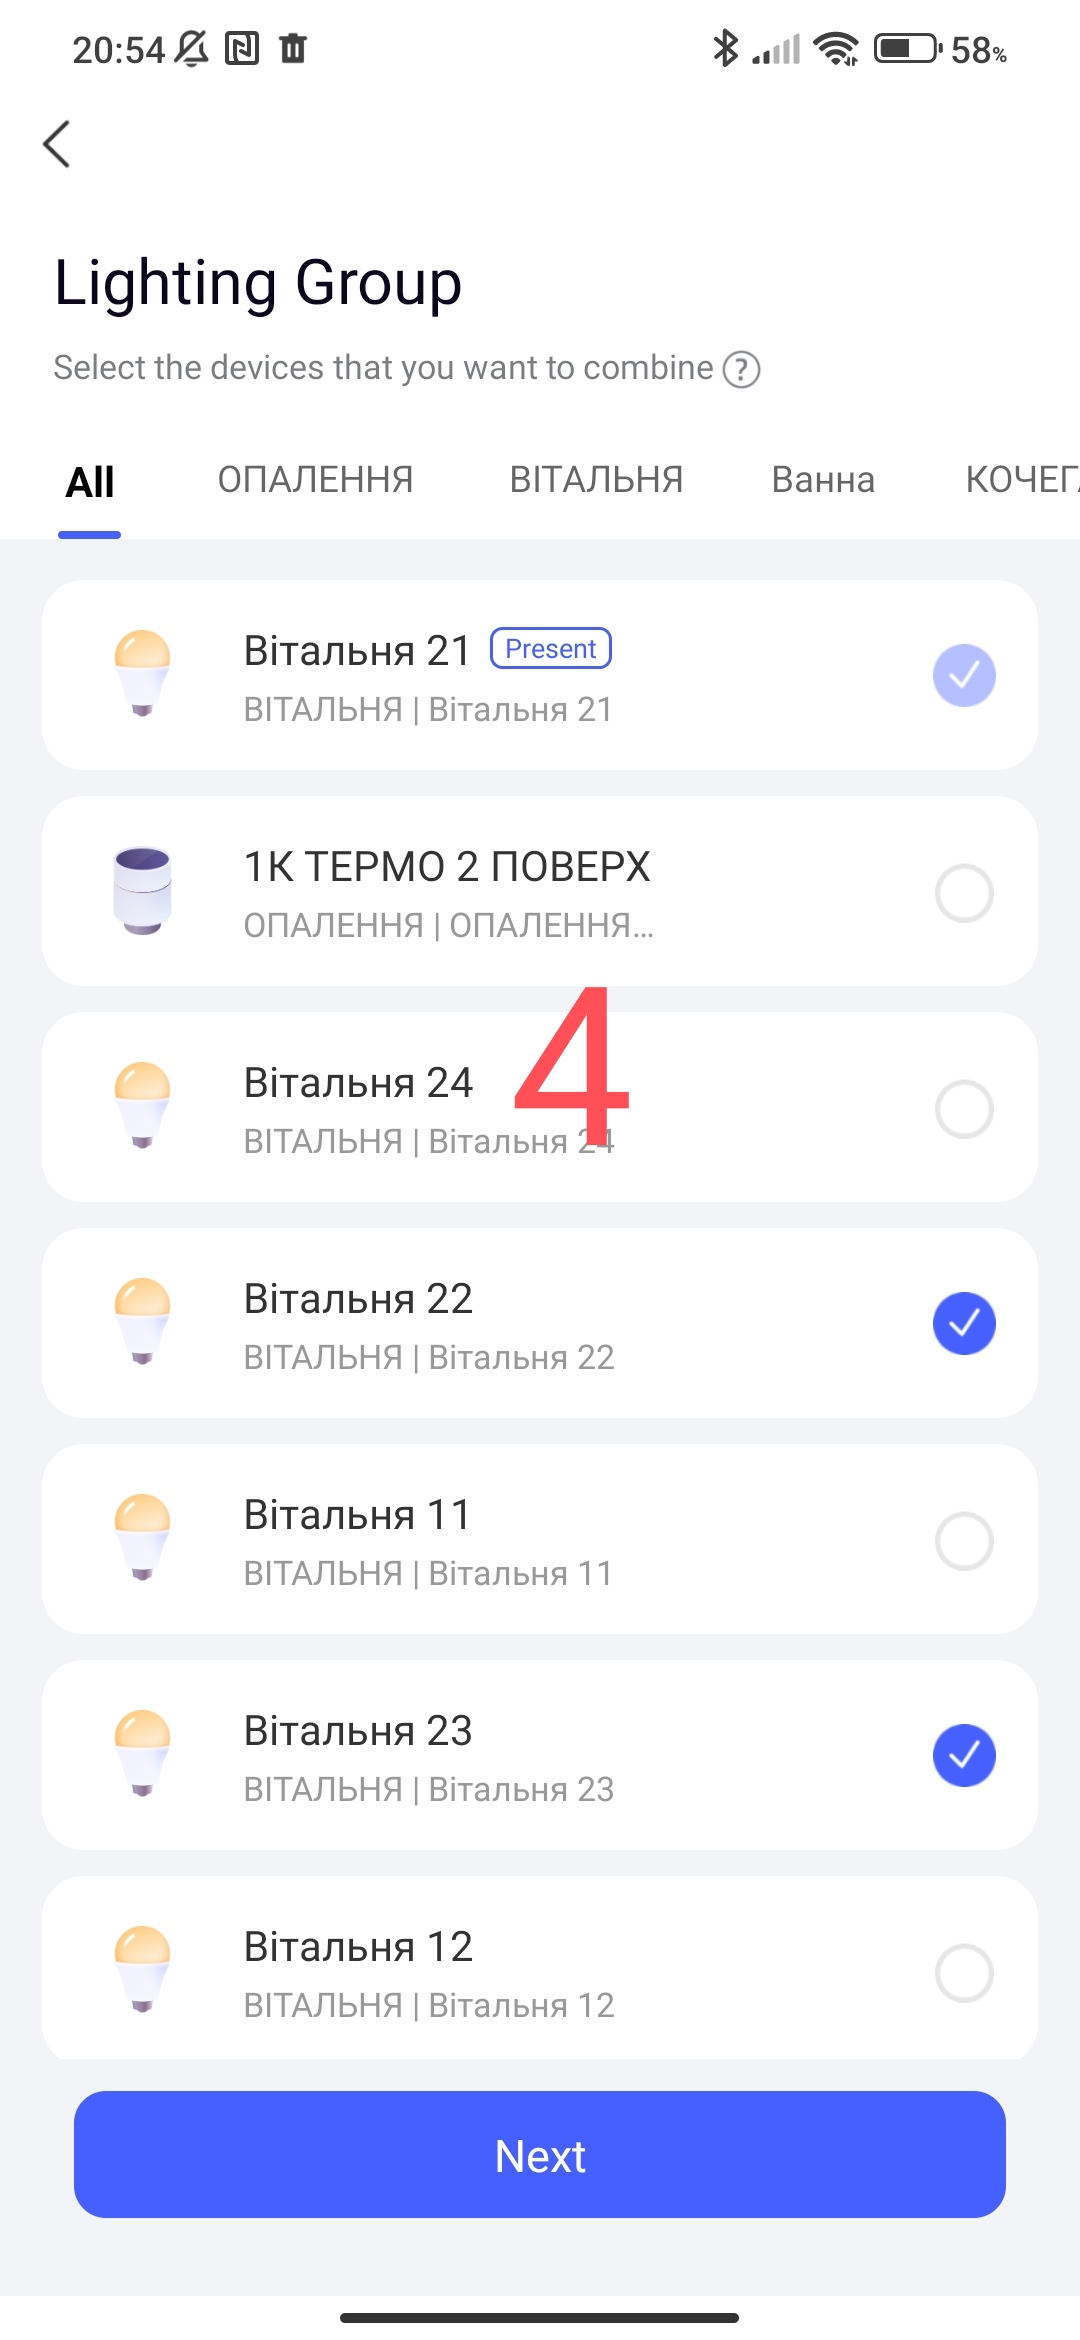
Next, in the menu, select the lamps that we want to group.
Fig3,4
Next, according to the prompts, we give a name and the entire set is associated with the location, etc.
Fig5,6,7,8
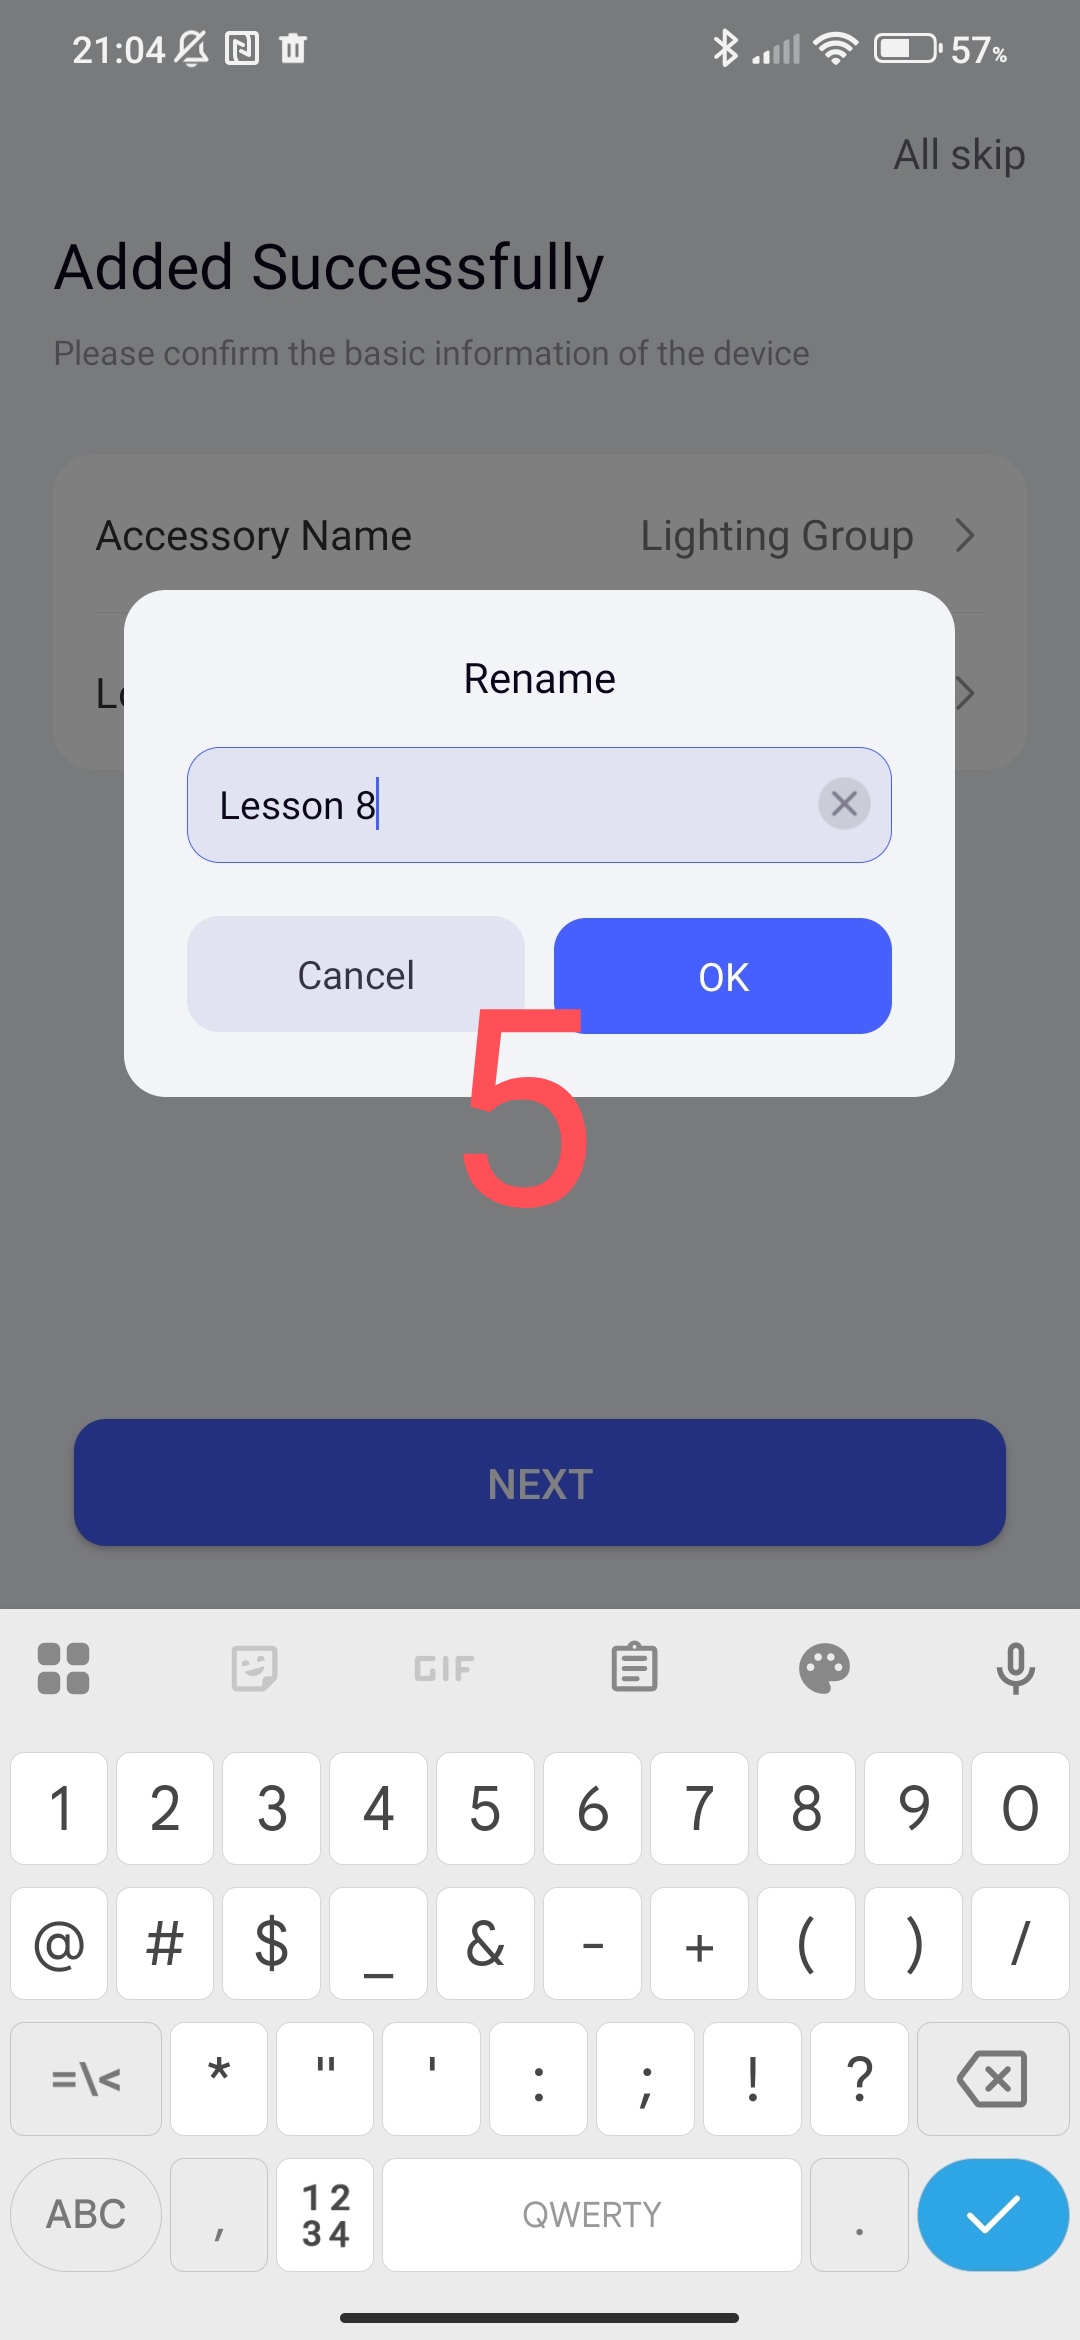

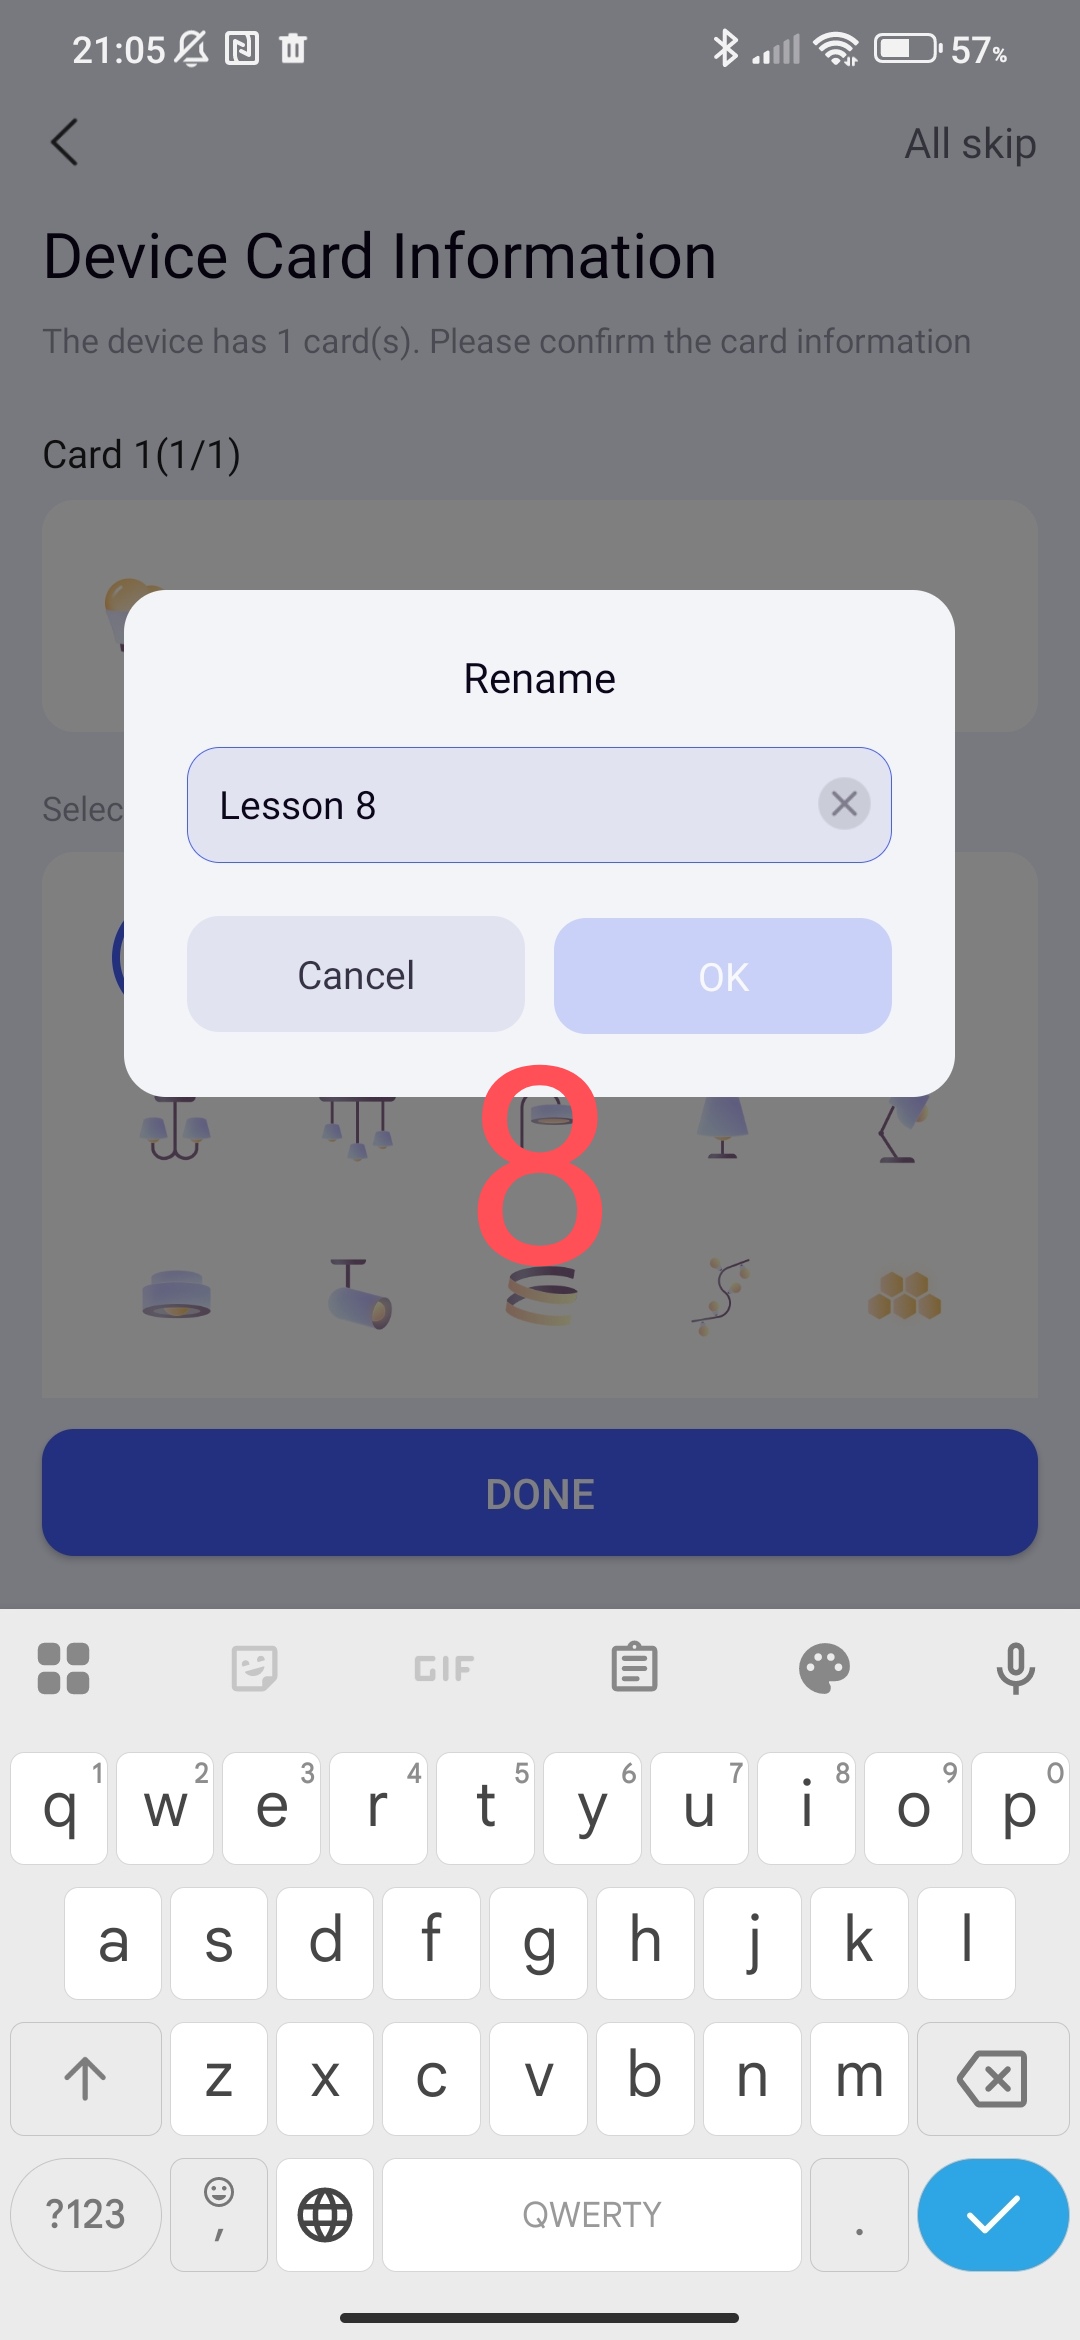
So we got a group of three lamps that is controlled by one button with the name “Lesson 8”.
Fig 9
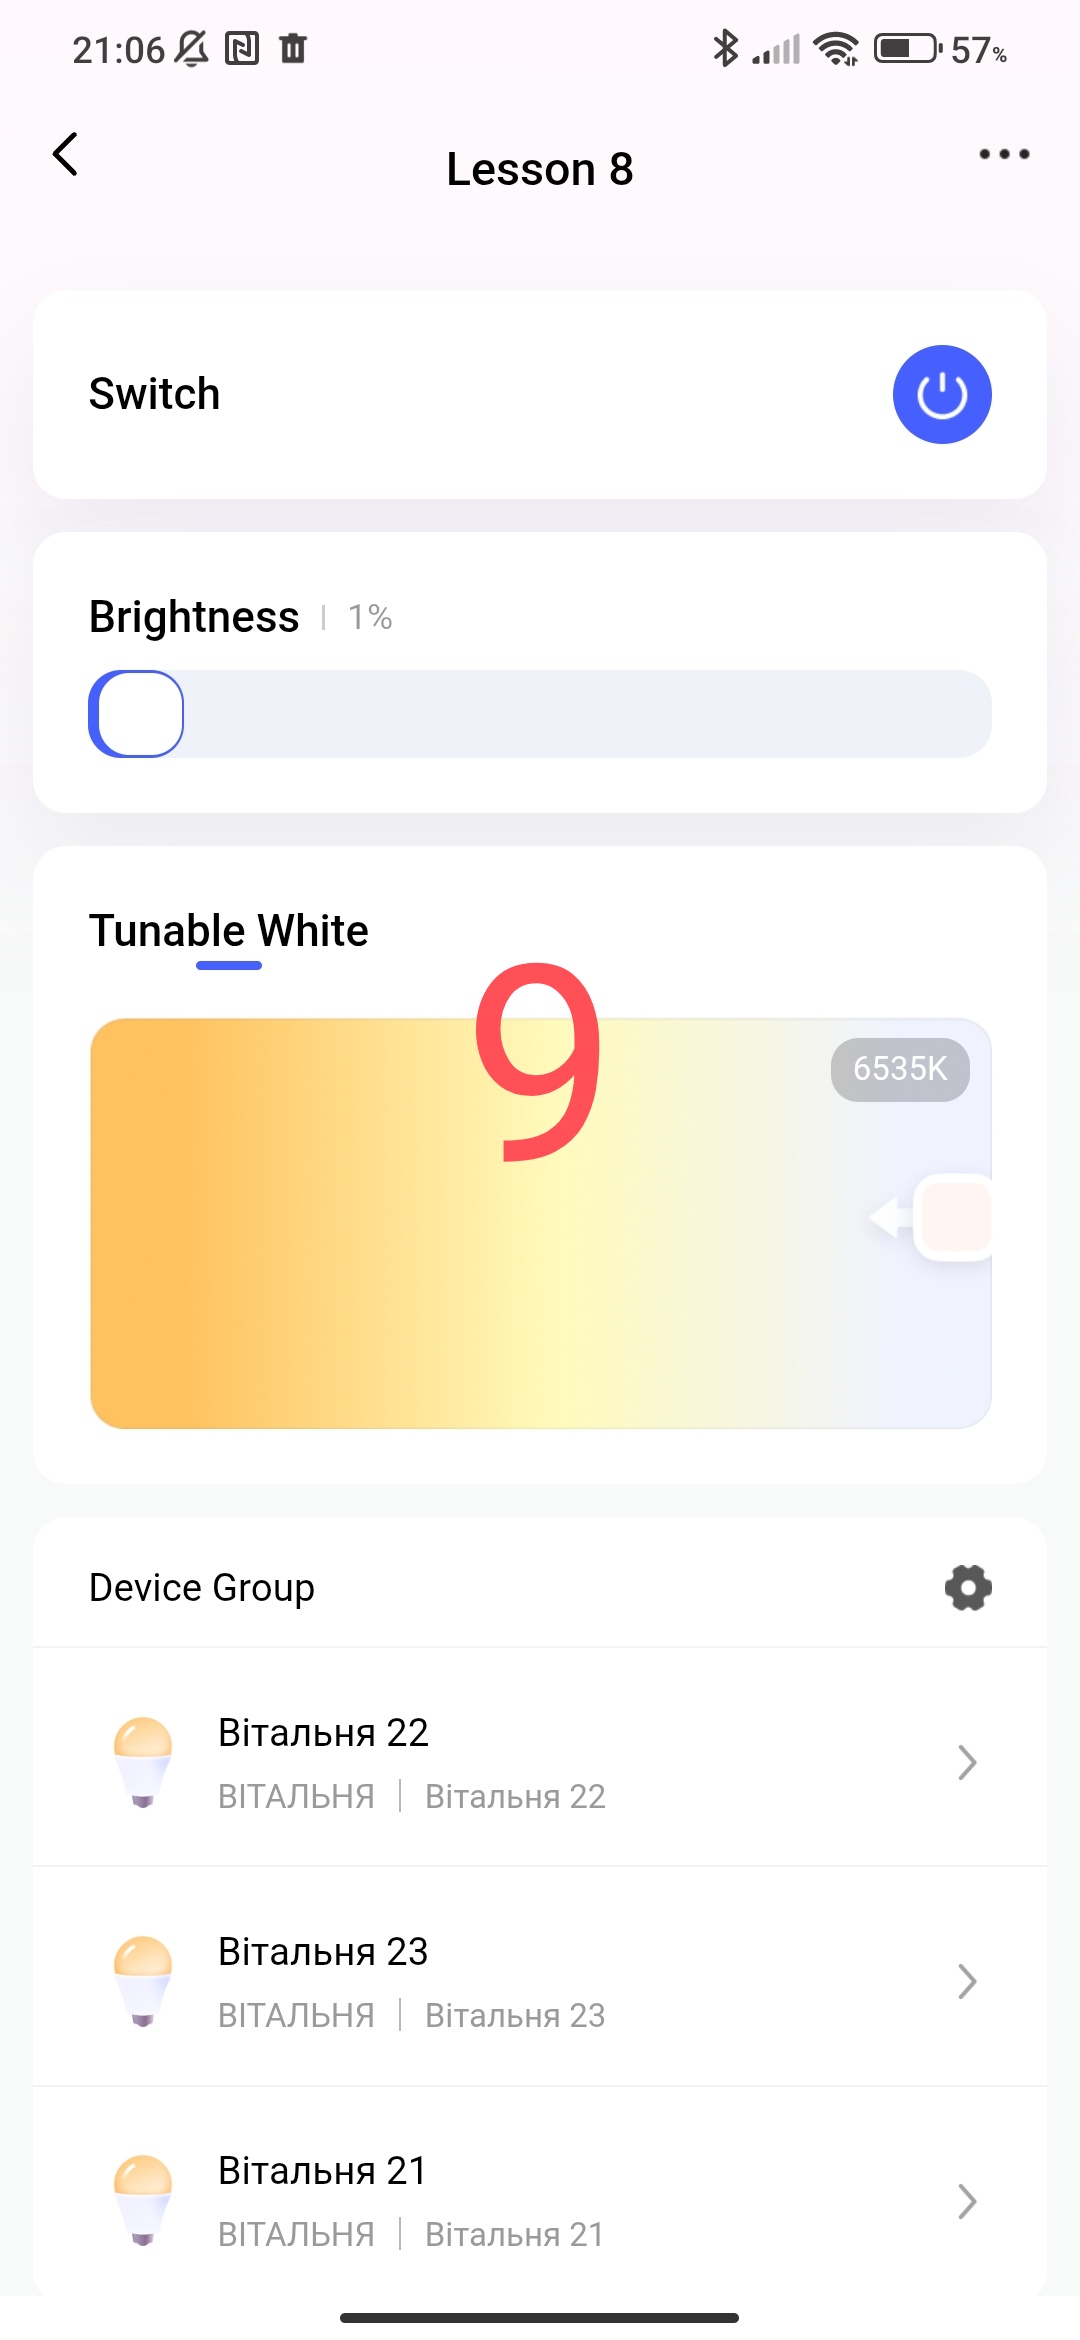
The resulting group control of lamps duplicates all the functions of the single lamp that we have in the house.
2_CREATING SCENES FOR GROUPS OF LAMP.
A feature (at the moment) in group lamps is the absence of the “On” and “Off” conditions in automations. Therefore, we will create separate scenes that will perform actions on switching the lamp.
I won’t repeat myself, in lesson 7 I showed how to create a scene for a regular lamp (Fig. 5,6,7,8 Automation 2.0, lesson 7. Controlling Aqara smart lamps using switches (wired and wireless)).
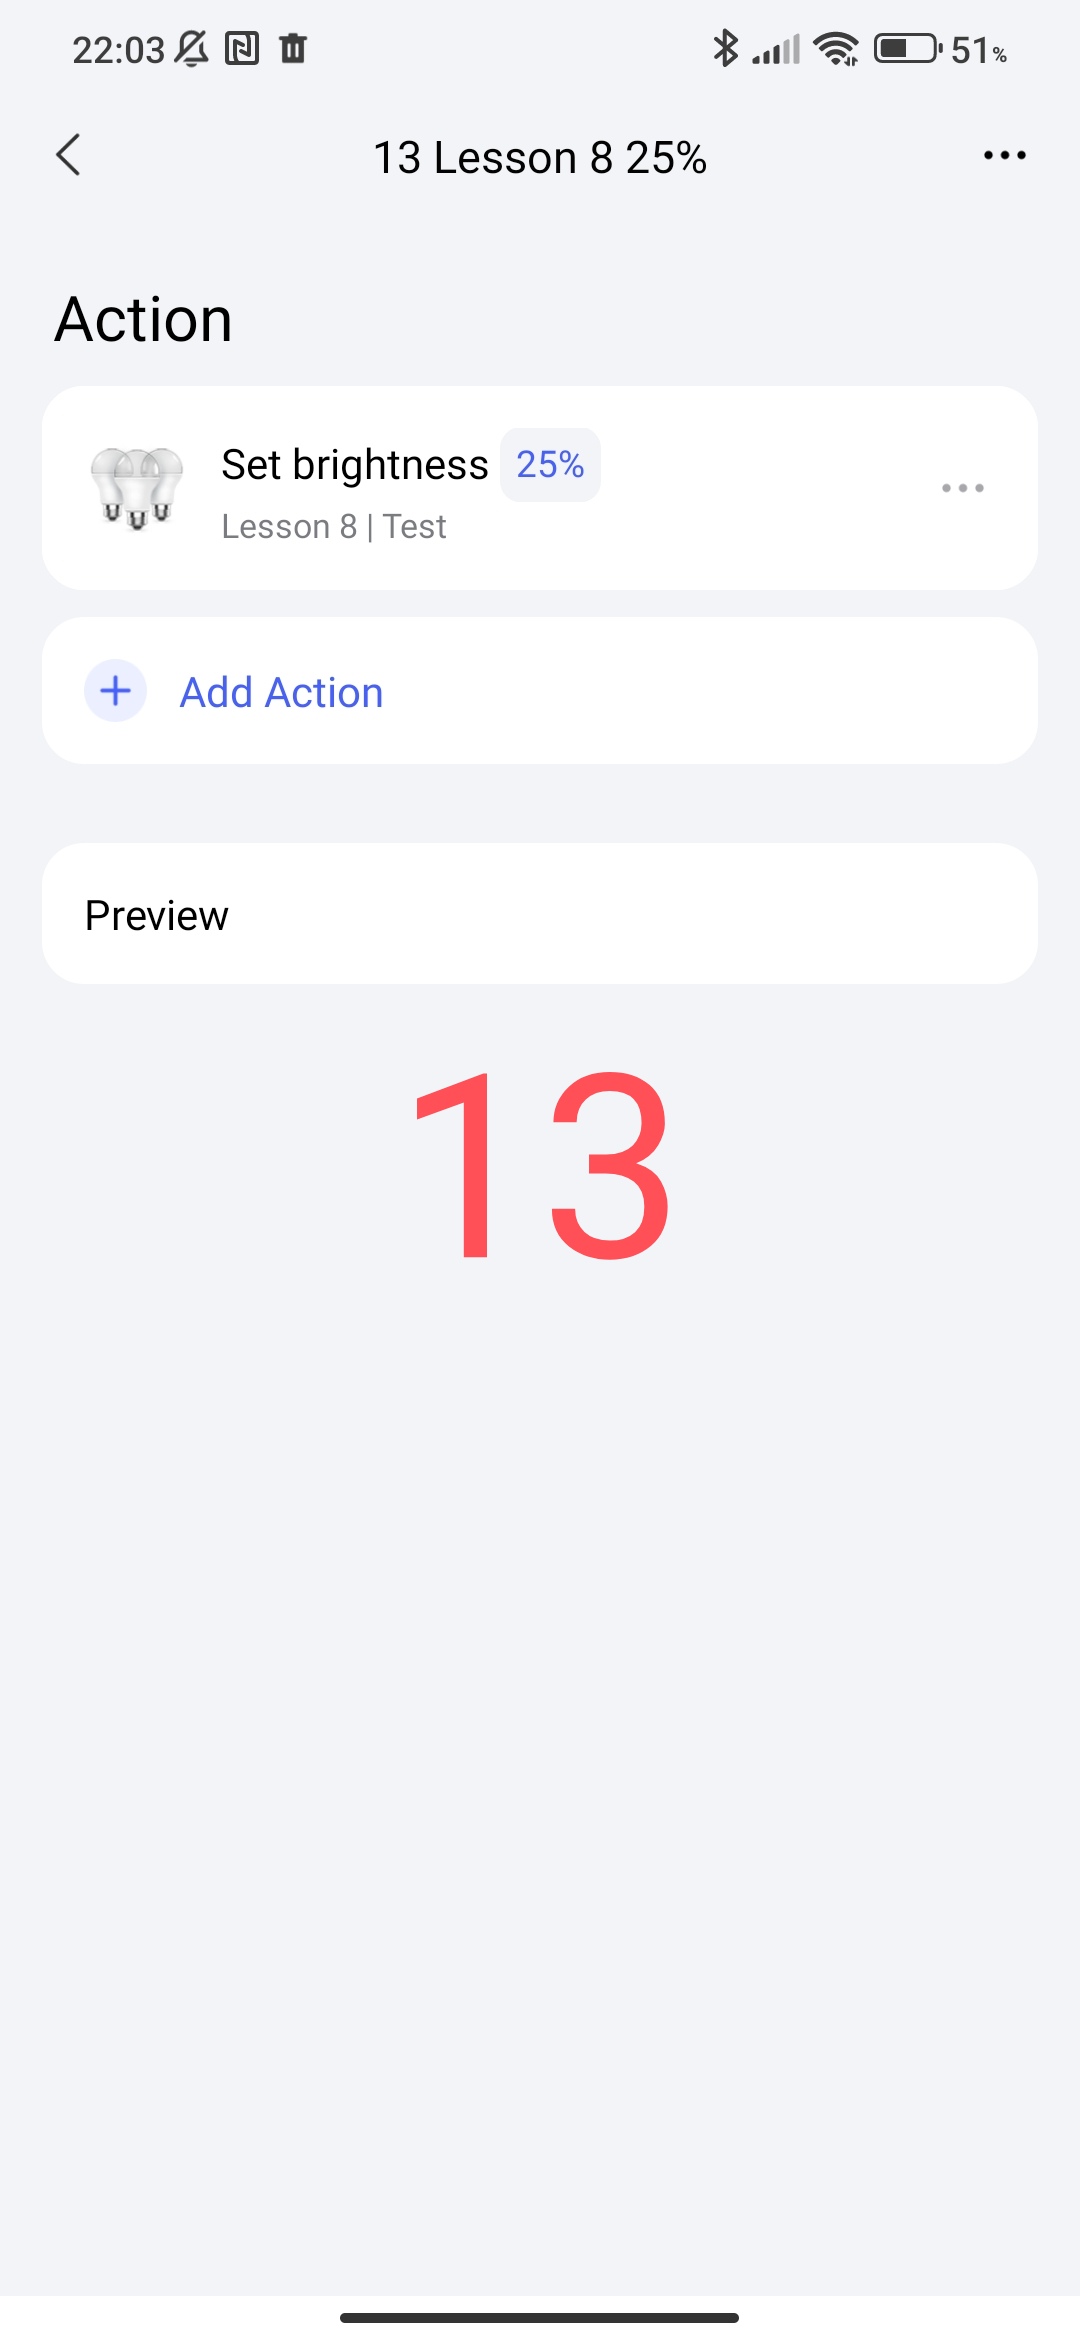
I made the scene “On-100%”, “On-75%”, “On-50%”, “On-25%”.
Fig.10,11,12,13


I also made the scene “Off” of the lamps
Fig.14

The scenes we created are the controls in our automations. You can choose other parameters that are available in the settings to your taste (brightness, temperature, color…).
3_CREATING AUTOMATIONS ON/OFF OF LAMPS.
To avoid repeating myself, I described creating automations for T2M (Lesson 7), the only difference is that in the current automations there will be no additional light (color ring).
There is a peculiarity in the current automation, we cannot insert “On” or “Off” of lamp groups into the IF condition, they simply are not there.
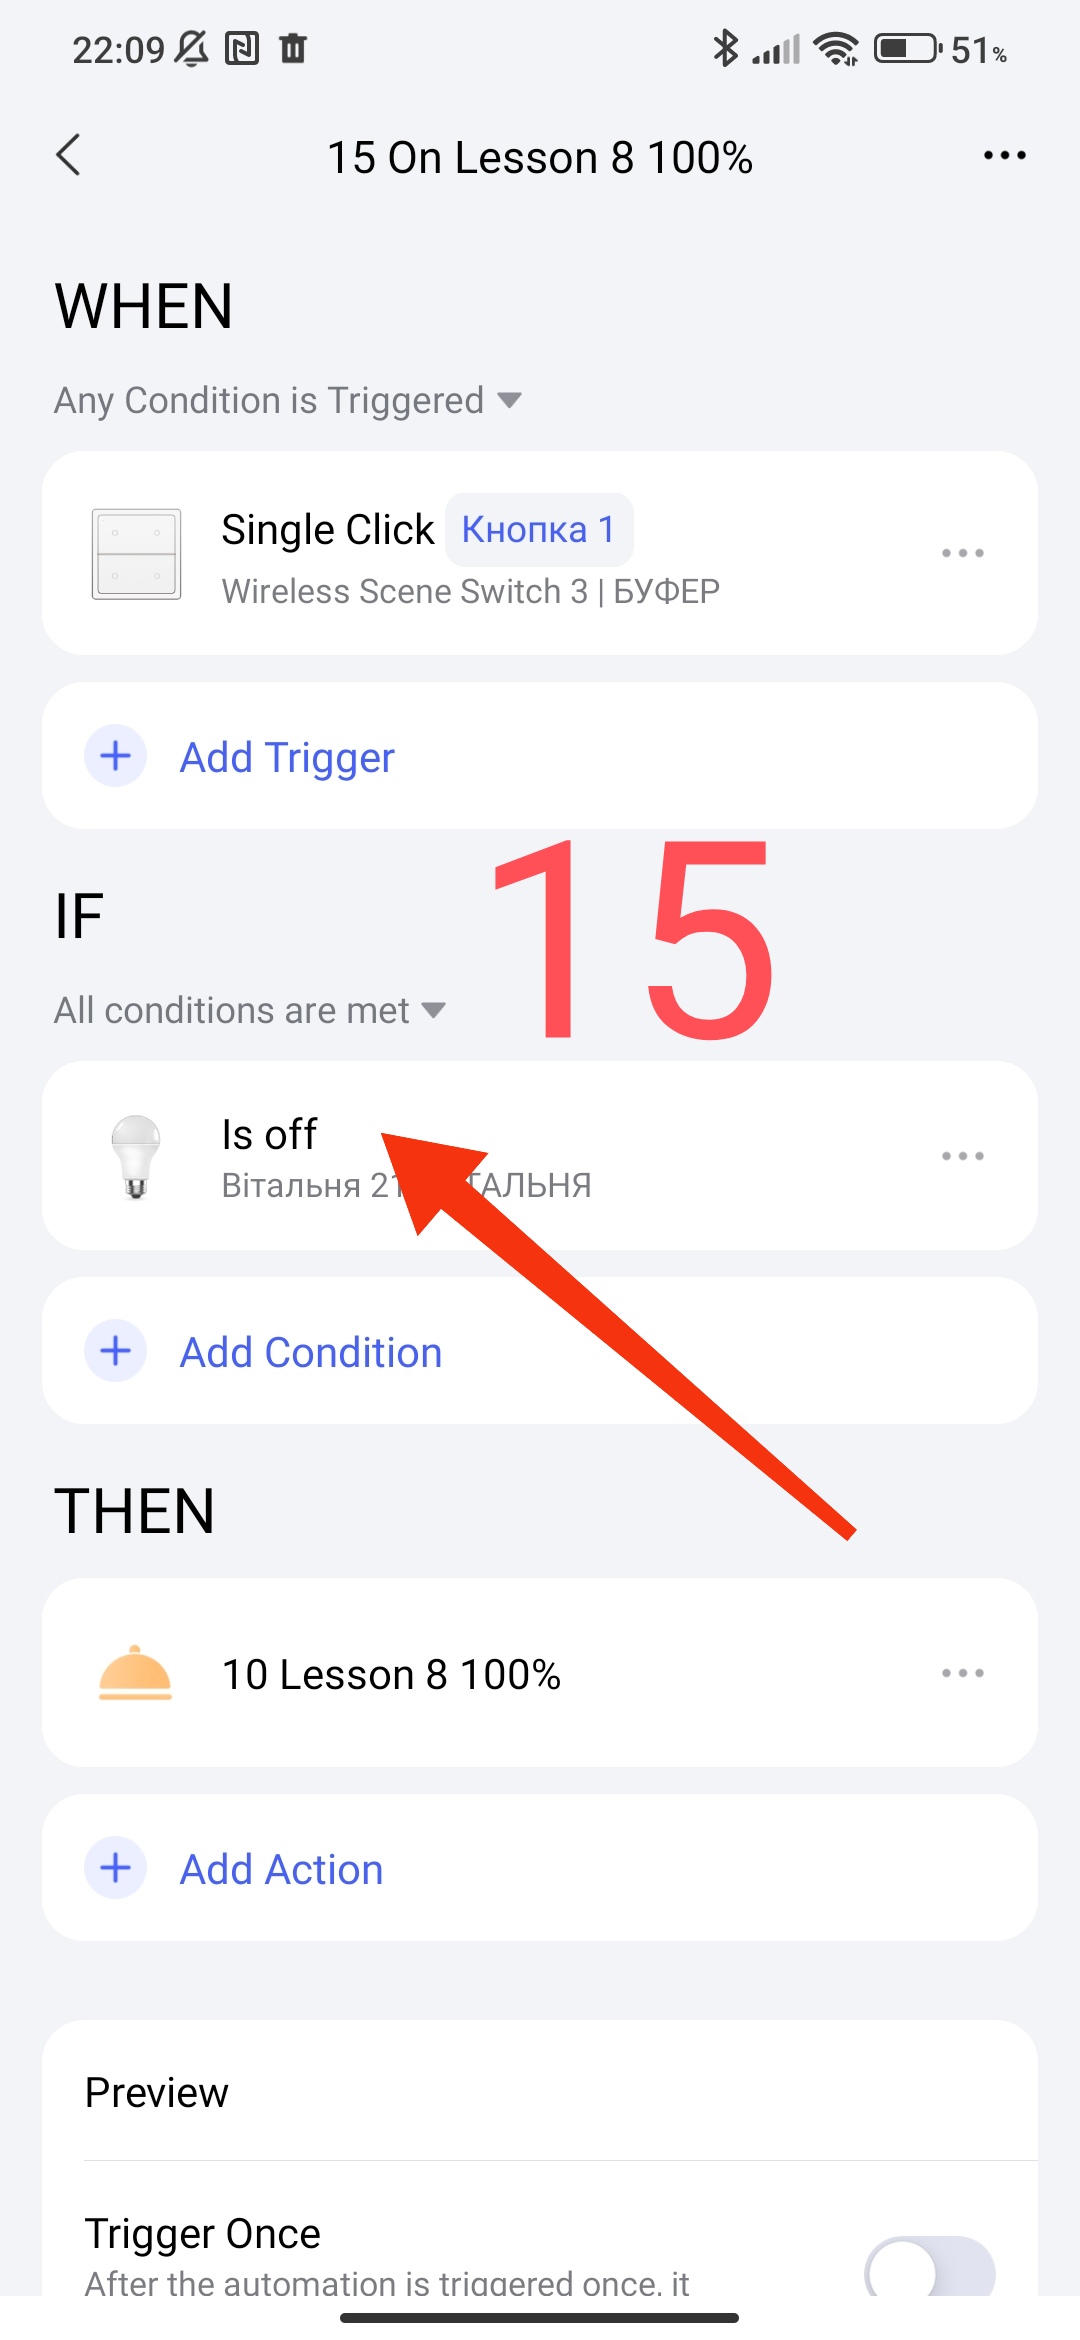
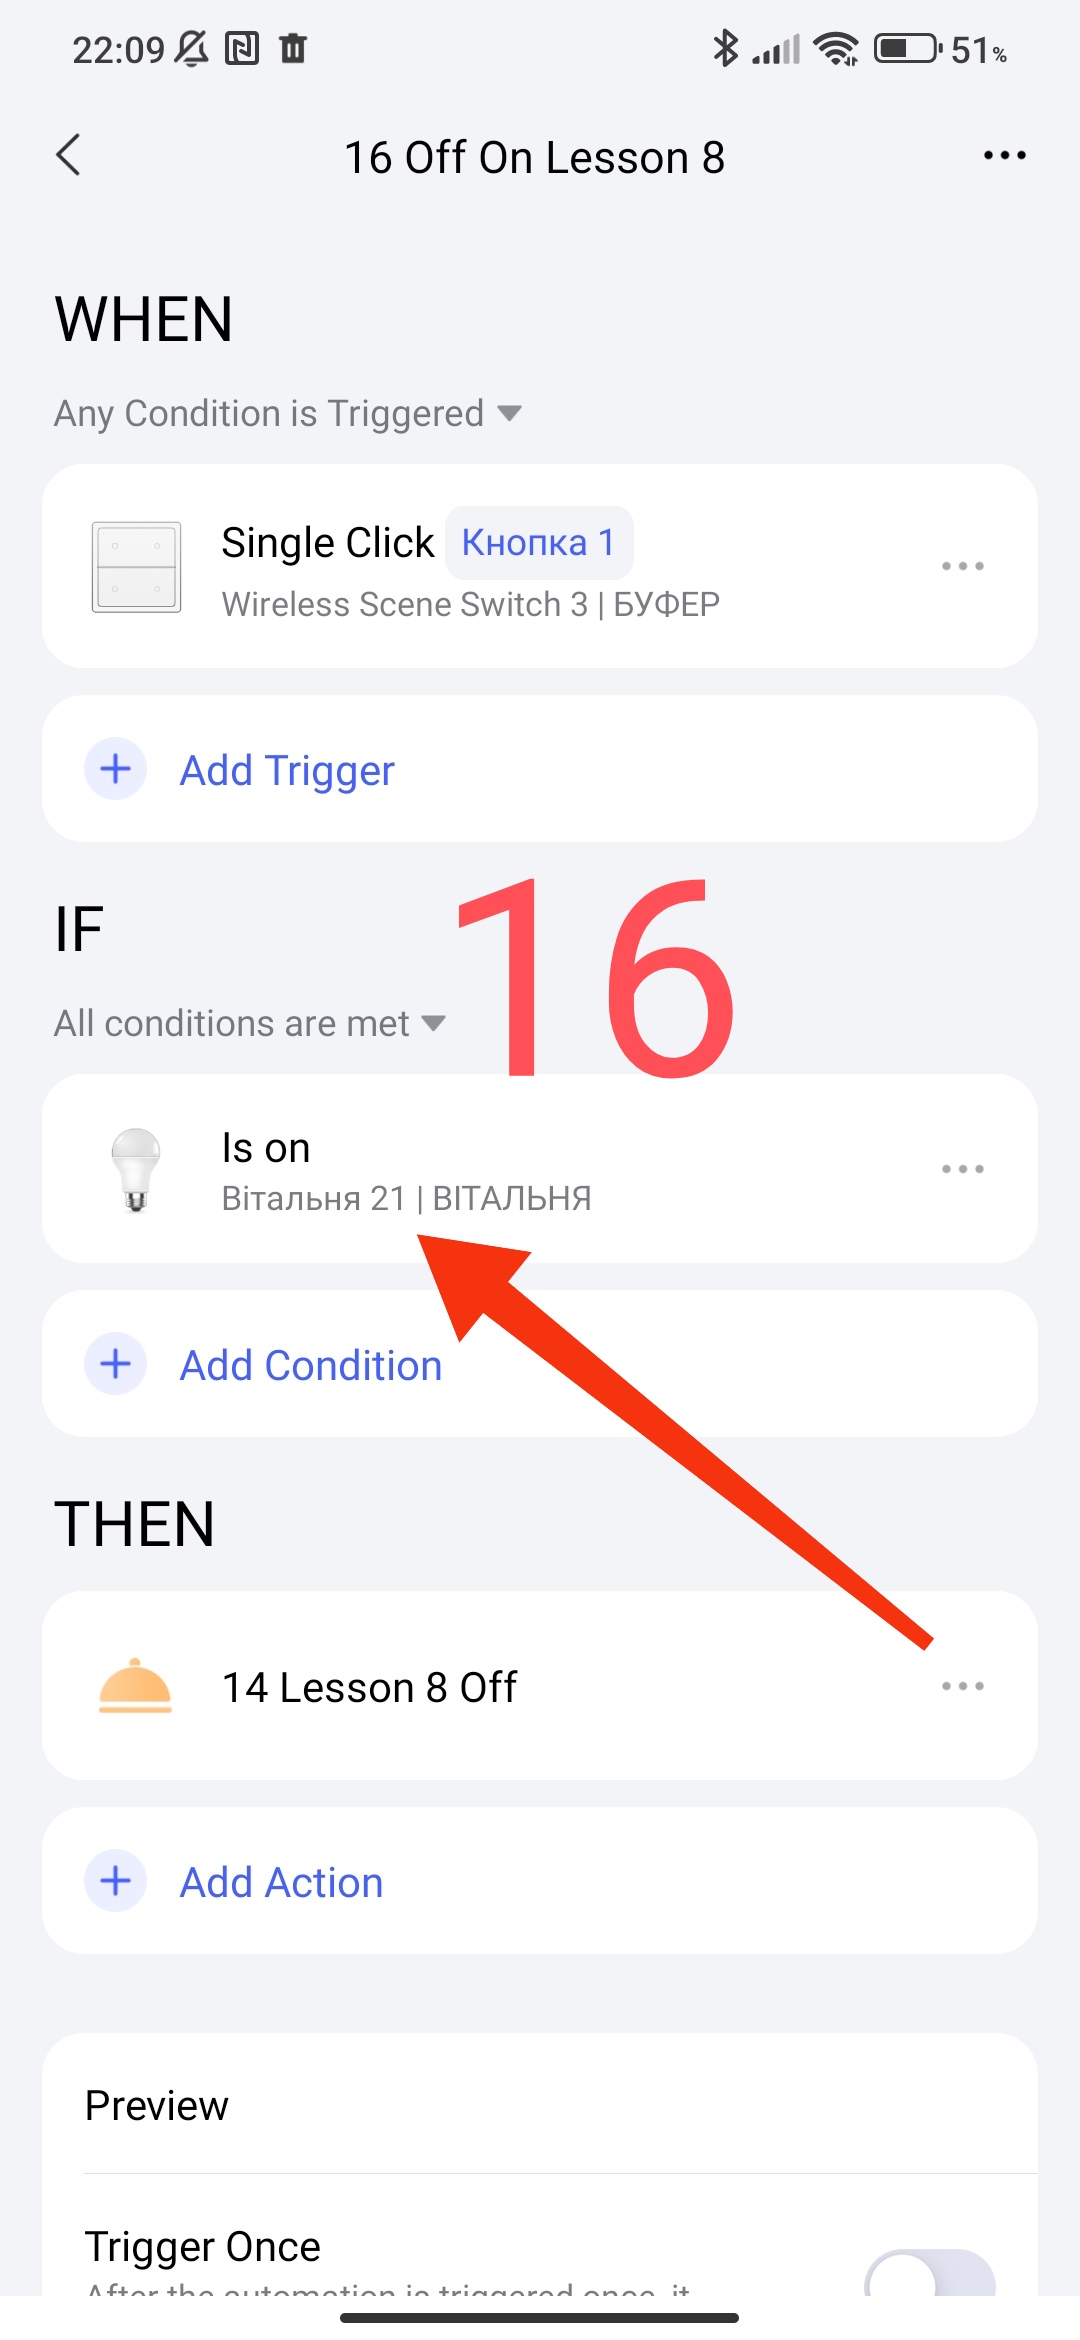
Therefore, instead of this condition, we will use the state of one lamp (2.1) from the “Lesson 8” lamp group as a trigger to control the state of the lamp group (On or Off).
We will get automation (I do not describe the creation process) “On” (100, 75, 50, 25)".
Fig15.
And this is automation “Off”
Fig16
Once again, all automations described in lesson 7 ( Automation 2.0, lesson 7. Controlling Aqara smart lamps using switches (wired and wireless) ) are suitable for using the groups that I described above. Also, lesson 7 is suitable when you have a smart switch + smart lamps (group) connected. The above procedure is from my working system of my house.
This concludes the current topic.
Thank you for reading and sharing the topic (you can also on other platforms with a link to our forum).
To be continued, we will consider workarounds for using sunset, sunrise for scenes.
See you soon.